Hello, I am a maker of a wide variety of genres. I have worked as a Architectural model maker, designer, tool maker and graphic designer.

To view my online Photo Portfolio of my Architectural model making please go here.

This blog is where I document my personal and commission projects with photos and write ups.

Please read my about me page for contact info and how to enquire about commissions or plan purchases.

Plans for sale : here
Showing posts with label cosplay. Show all posts

4 July 2017

Harley Quinn's Baseball Bat from Suicide Squad.


Recently my wife purchased a pair of the trainers worn by Harley Quinn (Margot Robbie) in Suicide Squad, They are pretty awesome. She jokingly mentioned that I would have to make her the baseball bat that she uses in the film. 
Not to take a challenge lightly I made the baseball bat :) 

 http://imagesmtv-a.akamaihd.net/uri/mgid:file:http:shared:mtv.com/news/wp-content/uploads/2016/01/tumblr_o18hgpw23p1qf5hjqo8_250-1453309654.gif?quality=.8&height=140&width=245

 I did a little googling and found a few images of the screen used bat. one such image had a full 360degree view of the bat.
 using this image and some others (im pretty sure they are replicas and souvenirs) they helped me work out what to put on the bat and the spacing for the main components.


https://c1.staticflickr.com/5/4194/34755583794_f1870f4f60_b.jpg
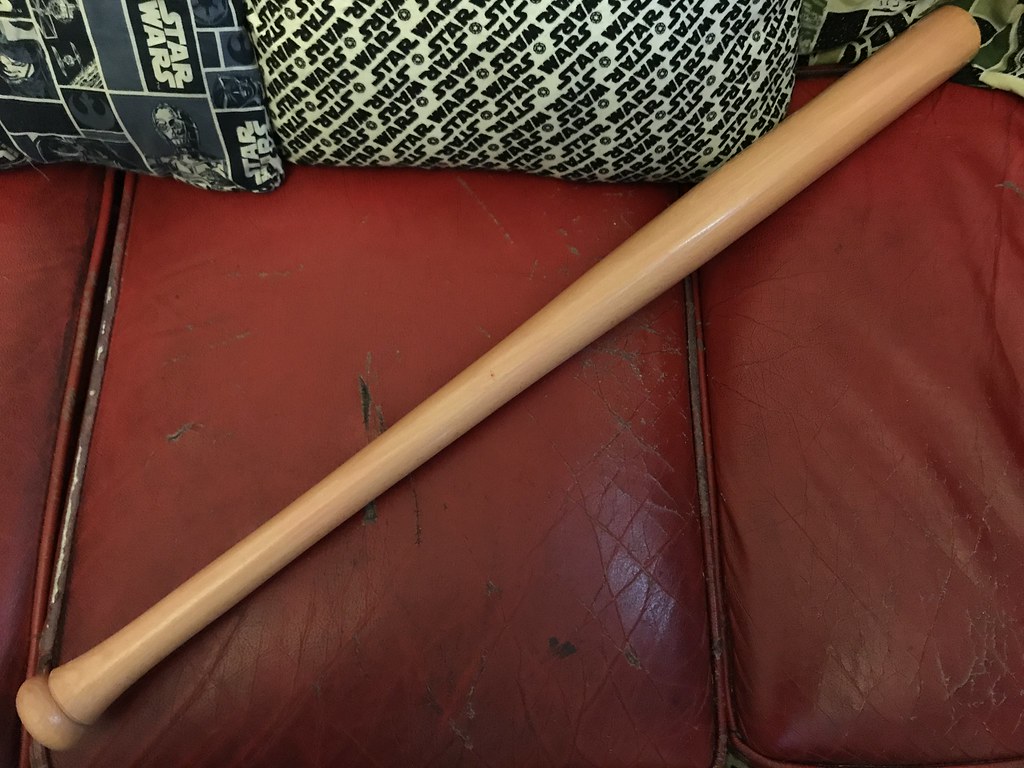
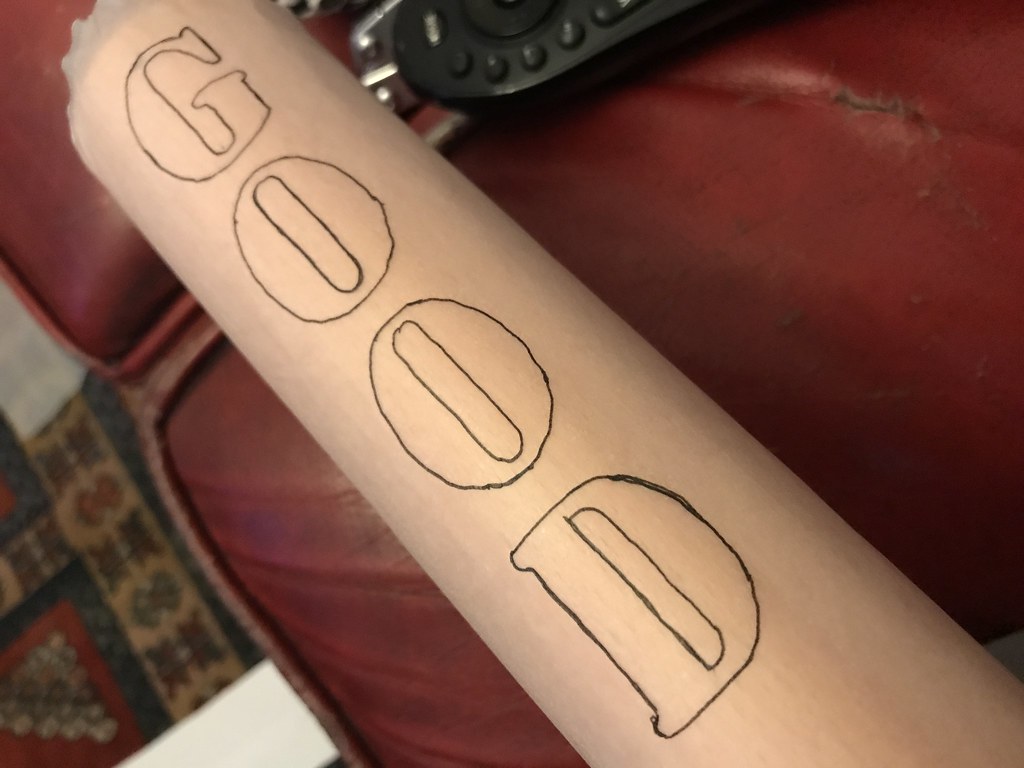
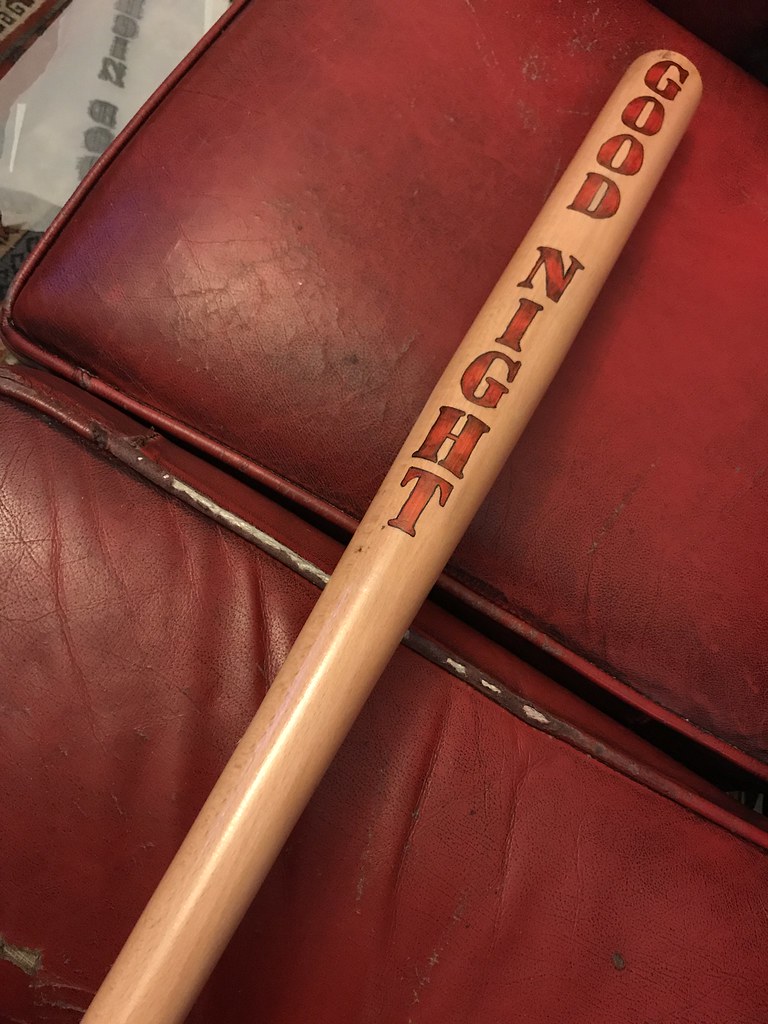
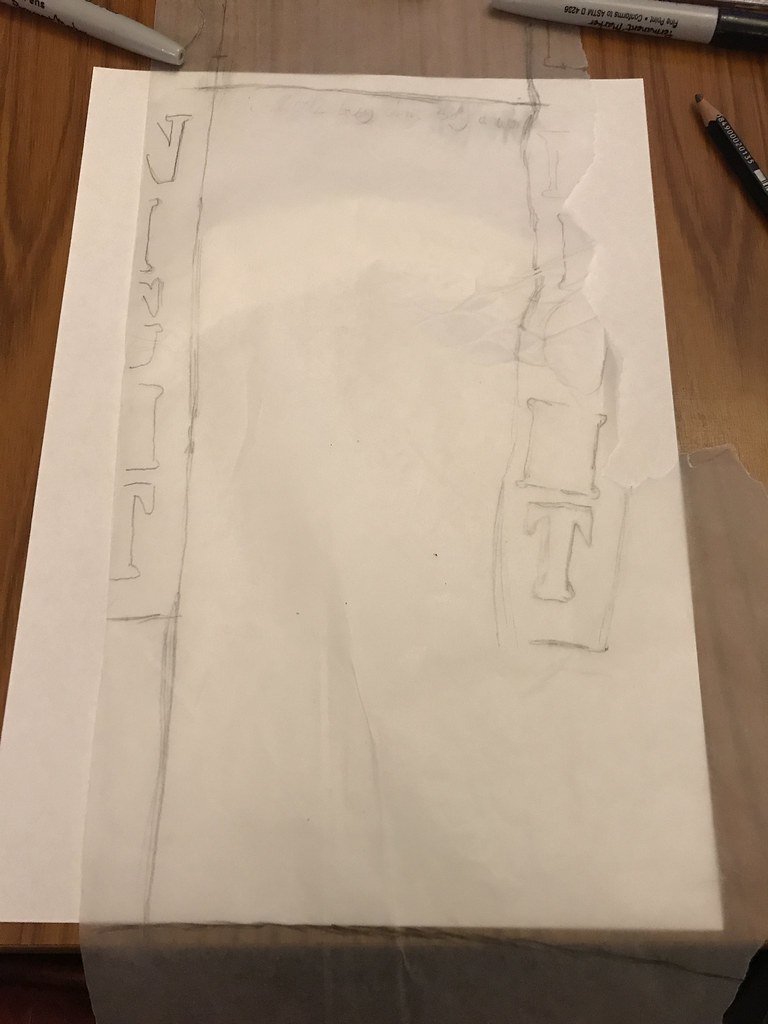
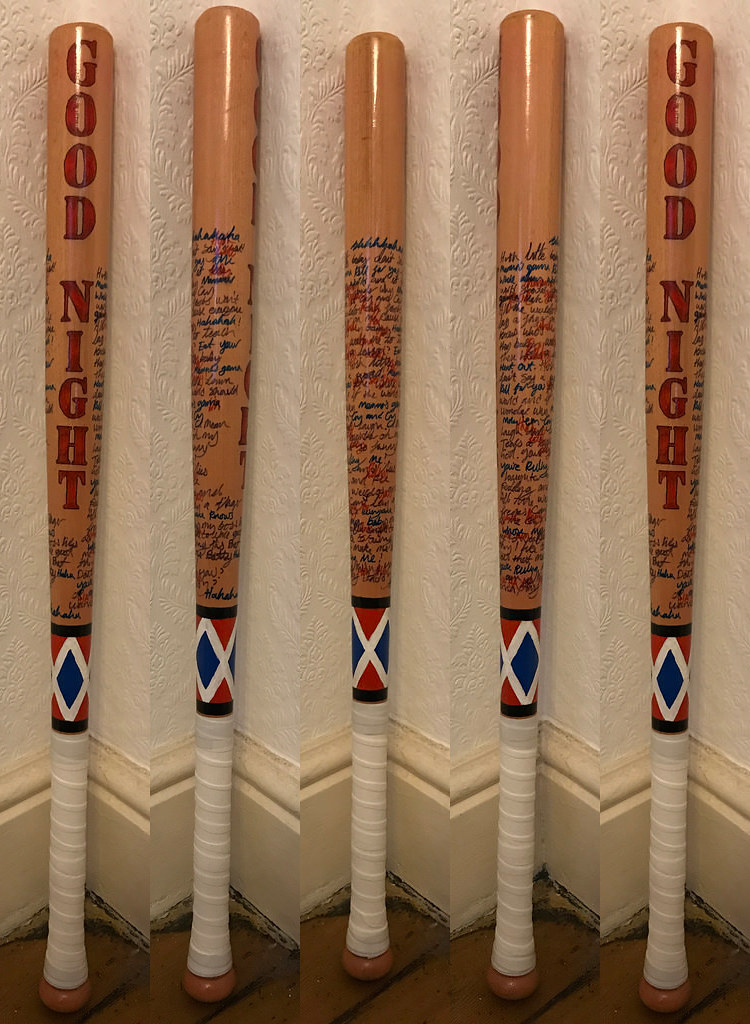
Once i got a suitable bat that didnt have any markings or branding I measured the length and scaled the images i had to the right size so i could work out the size and position of the 'GOOD NIGHT' text on the front of the bat. 

https://c1.staticflickr.com/5/4175/35558194056_7c78990a99_b.jpghttps://c1.staticflickr.com/5/4262/35558223806_20ab37bc0a_b.jpghttps://c1.staticflickr.com/5/4025/34755617104_e397bee226_b.jpg
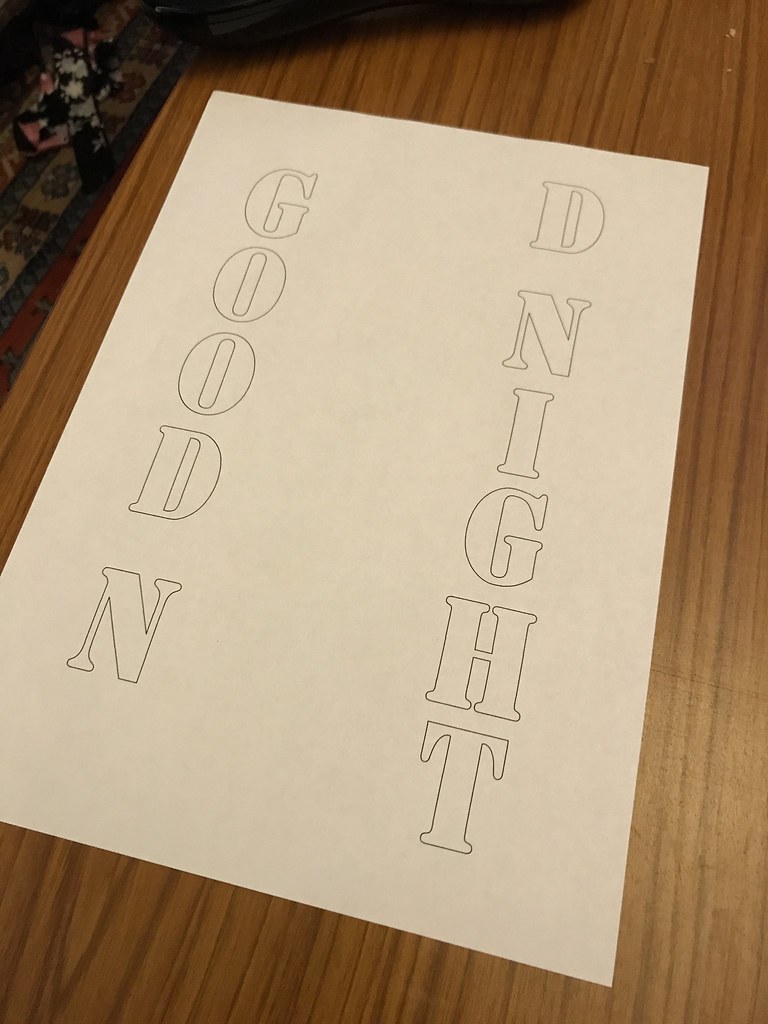
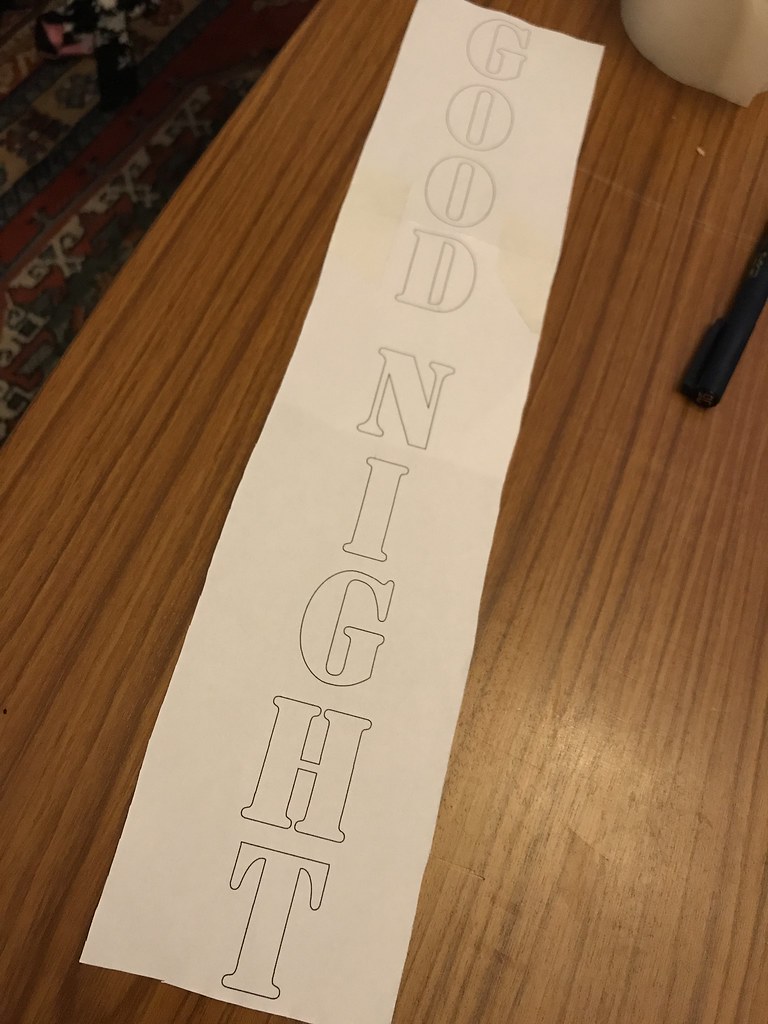
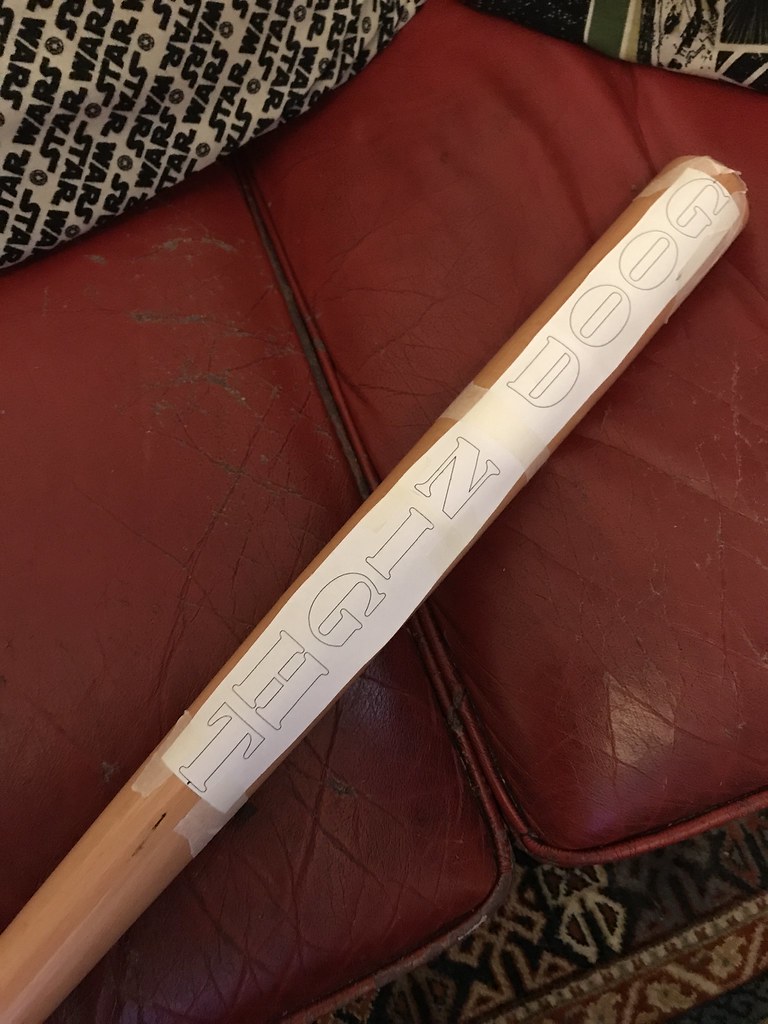
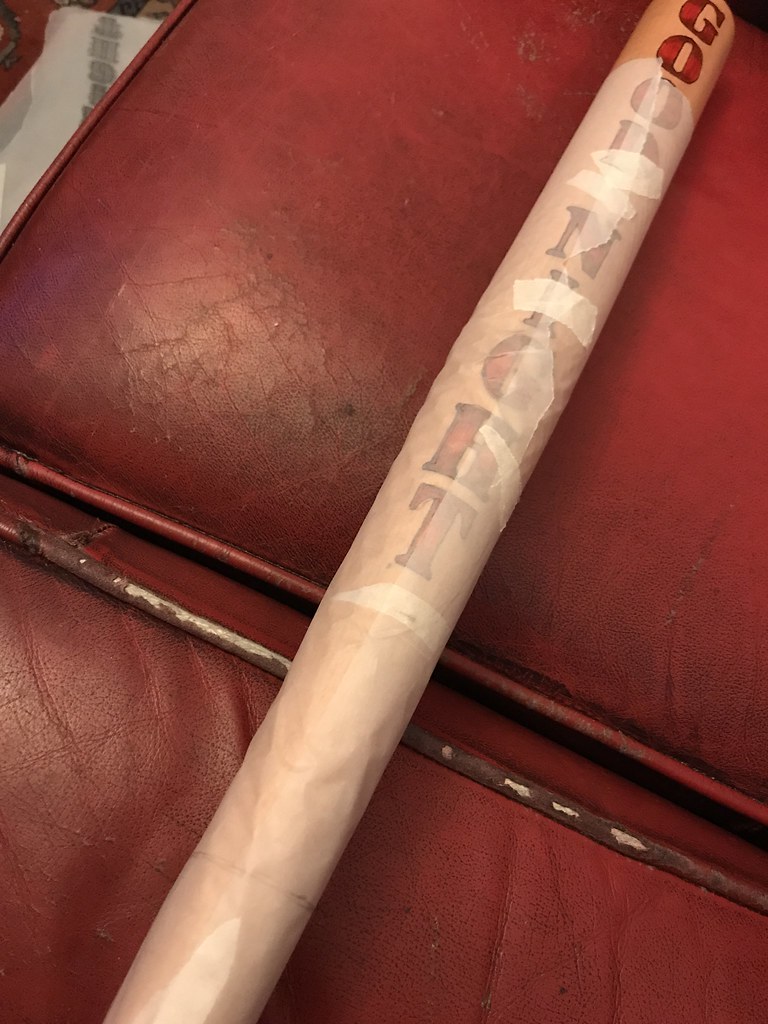
 I traced out the lettering of 'GOOD NIGHT' and printed them out to the right size to match the bat. cut it up and taped it in position on the bat. this will be my guide for marking the words out on the bat.

https://c1.staticflickr.com/5/4279/34755616954_1883fe8eef_b.jpghttps://c1.staticflickr.com/5/4243/35596803775_5f50e53469_b.jpg
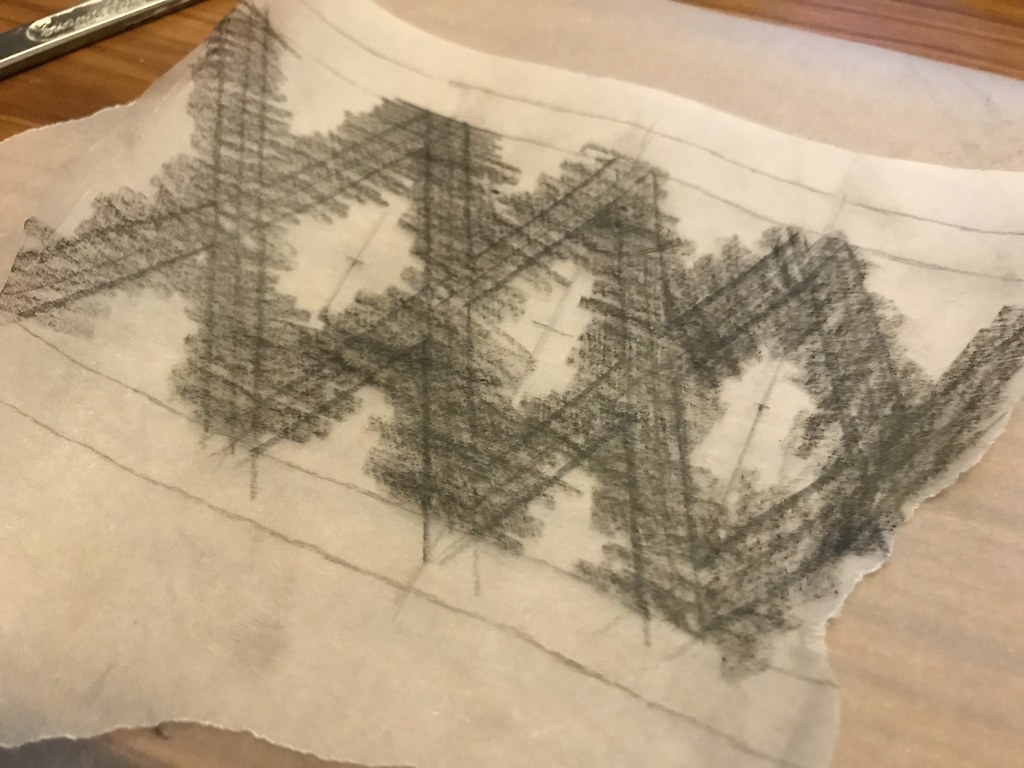
Once the template was taped in place i wrapped some tracing paper round the bat and traced the words on the paper while it was all in place on the bat. 

https://c1.staticflickr.com/5/4196/35428514612_7f61c602a7_b.jpghttps://c1.staticflickr.com/5/4038/34755604794_2cddb6670f_b.jpg
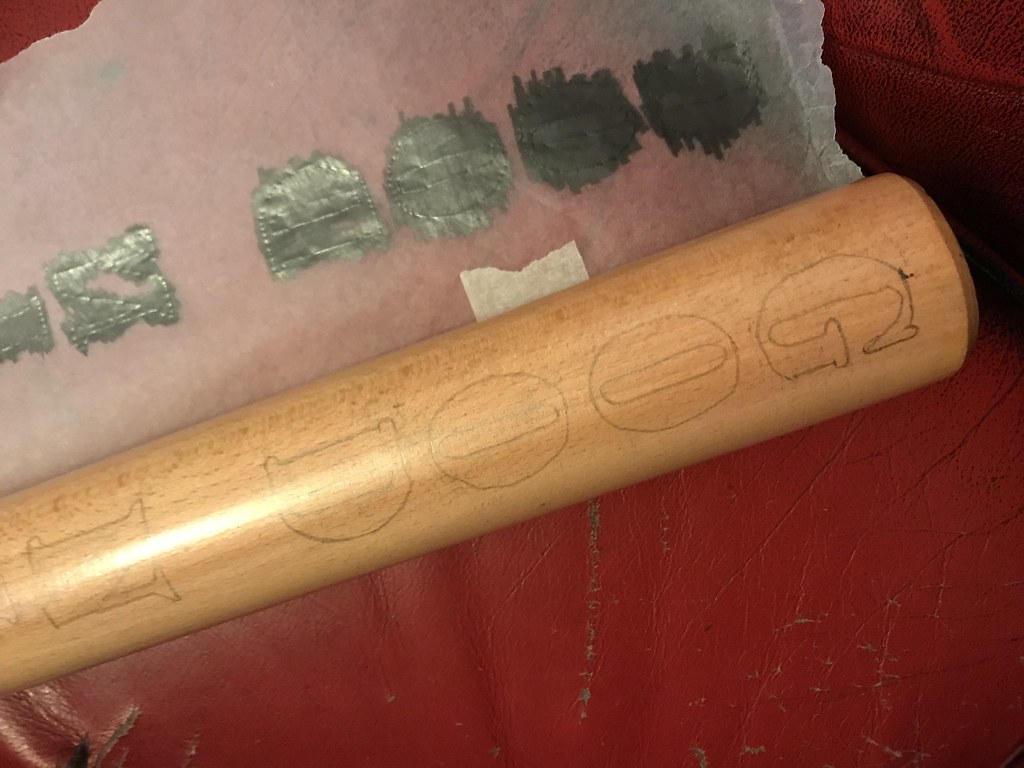
 leaving one side of the tracing paper taped onto the bat so it would be returned into place, i used a soft 7B pencil to colour the back of the letters. 
When the tracing paper is wrapped back round the bat and traced over the lettering again, which transferred the soft pencil onto the bat.  (its like a home made sheet of carbon paper)


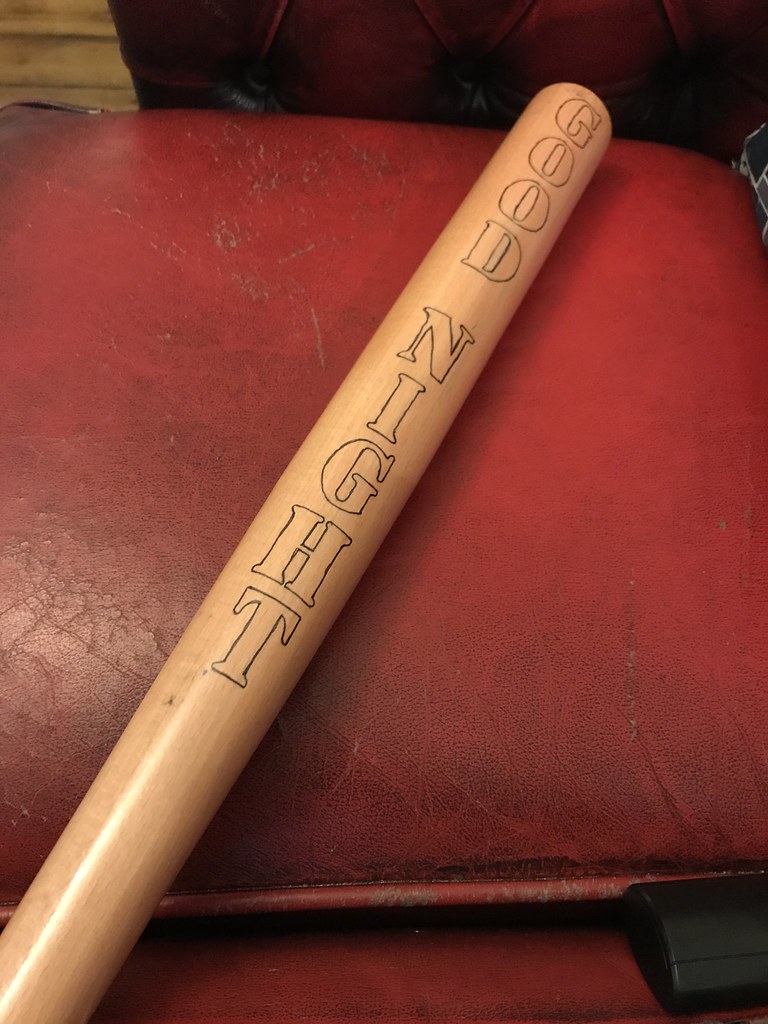
I then went over the faint pencil lines with a thin permanent pen.  


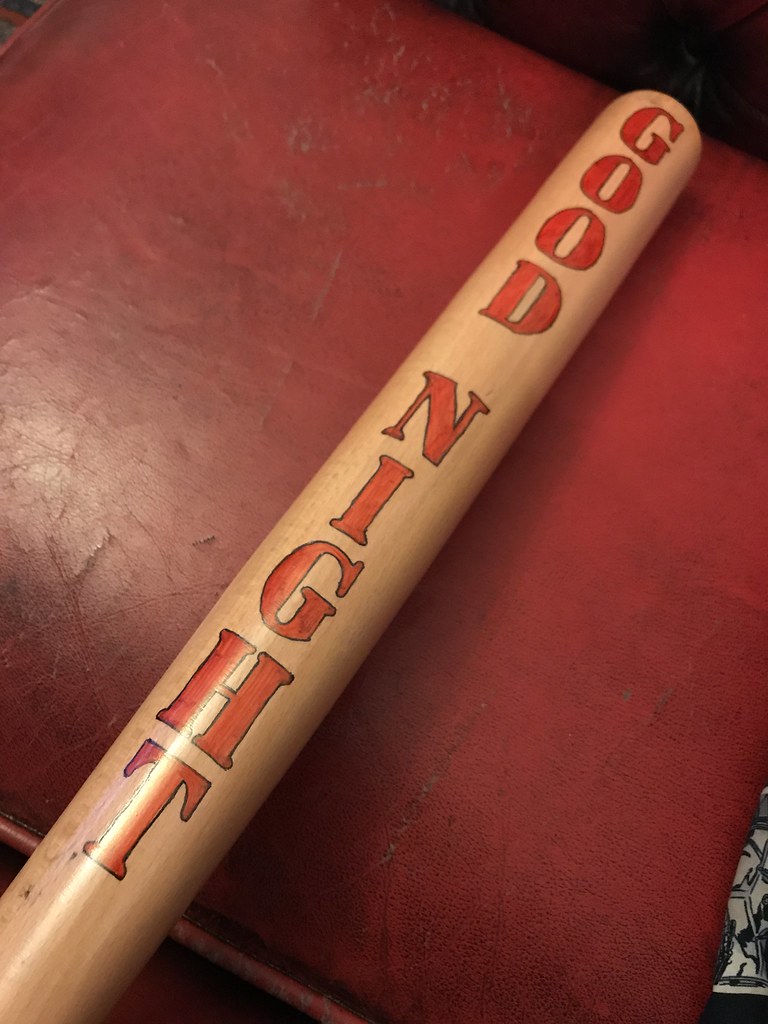
I then used a red permanent marker to fill the letters in red. (Im using red markers as it lets the grain of the bat show through and I feel its more like something Harley would do.)


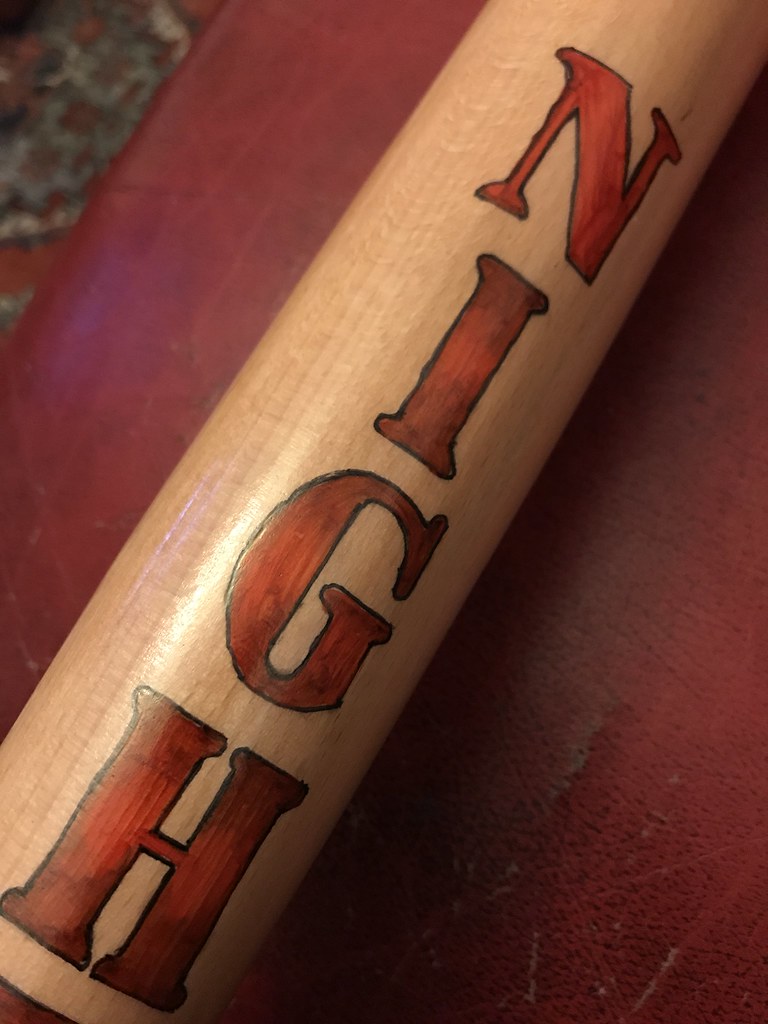
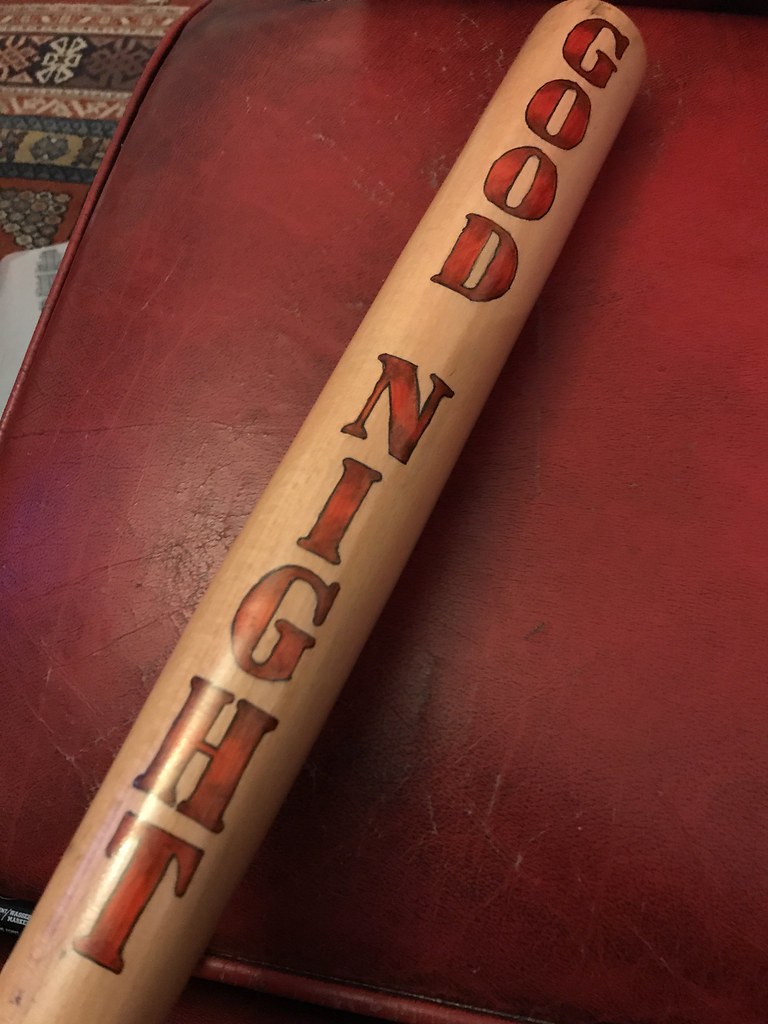
 Using a non-permanent fibre tip pen and a cotton bud i coloured the edges in and blended the black into the letters to give them the airbrushed fade to black look seen in the source images. 


I wrapped some more tracing paper round the bat again, this time the join is over the letters on the front. 
The aim of this is to get a template for where the writing is going to be on the back of the bat. 
I traced round the sides of the letters this was so i could see where they were when i unrolled the paper. This was to allow me to get the spacing correct on the bat.

 
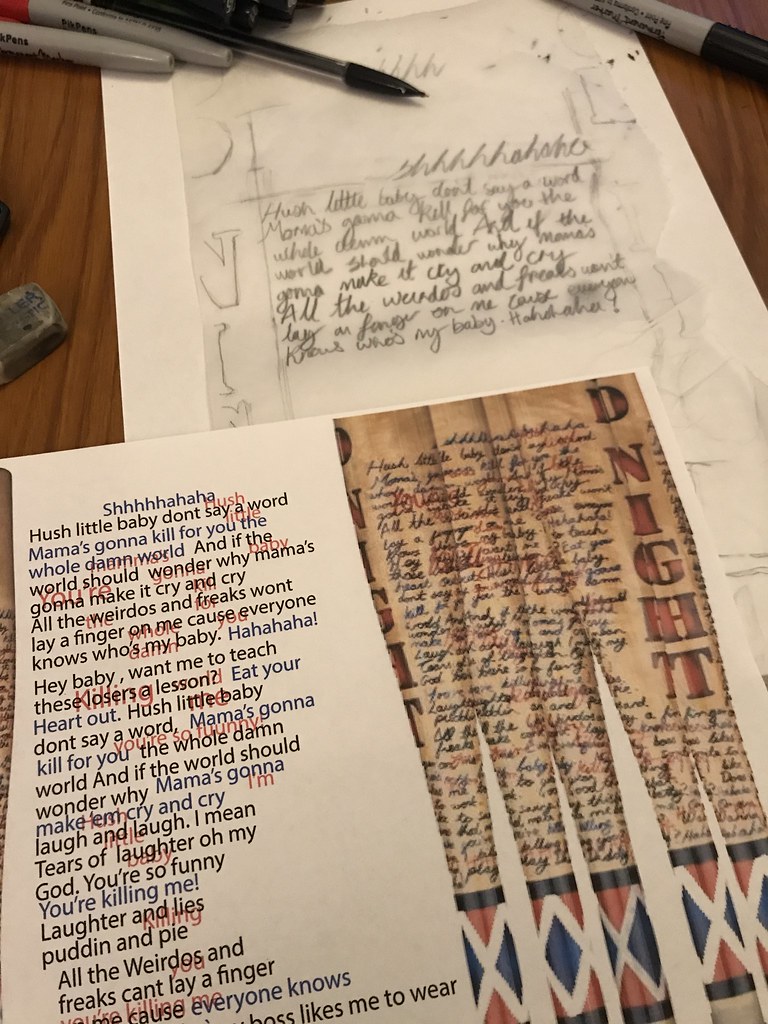
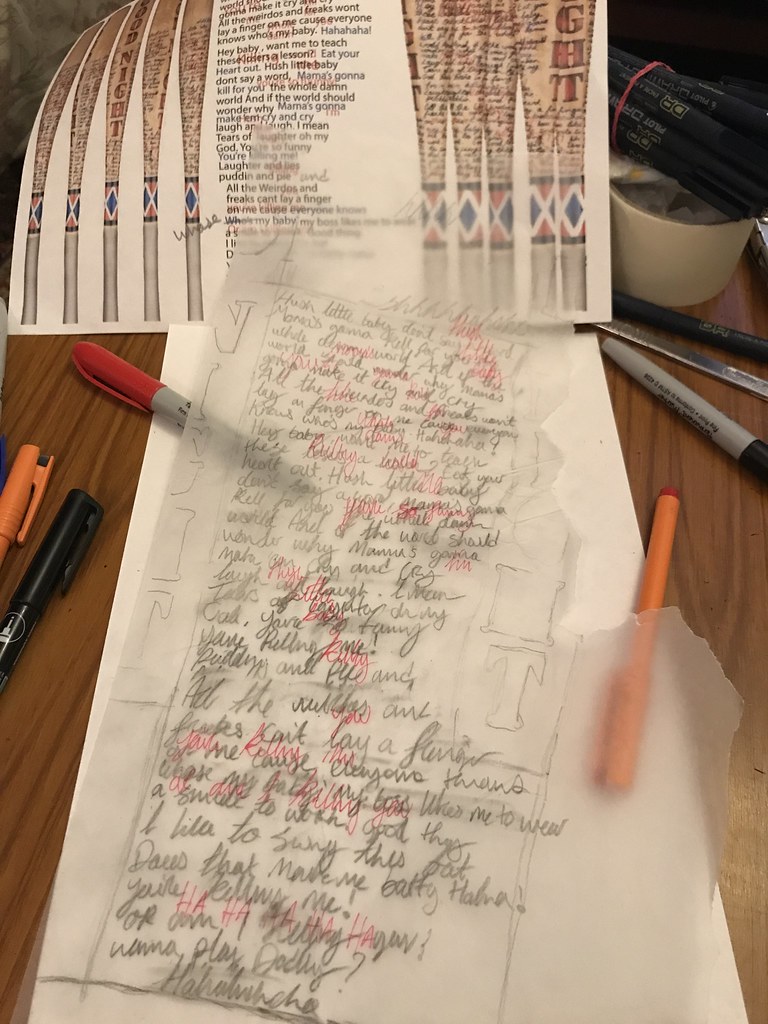
Using the template i wrote out the whole quote once just to get used to writing it and to try and get the spacing correct. 
I then did it with the pens i will finally do the bat with. this matters as the pens are thicker than the pencil i used first.

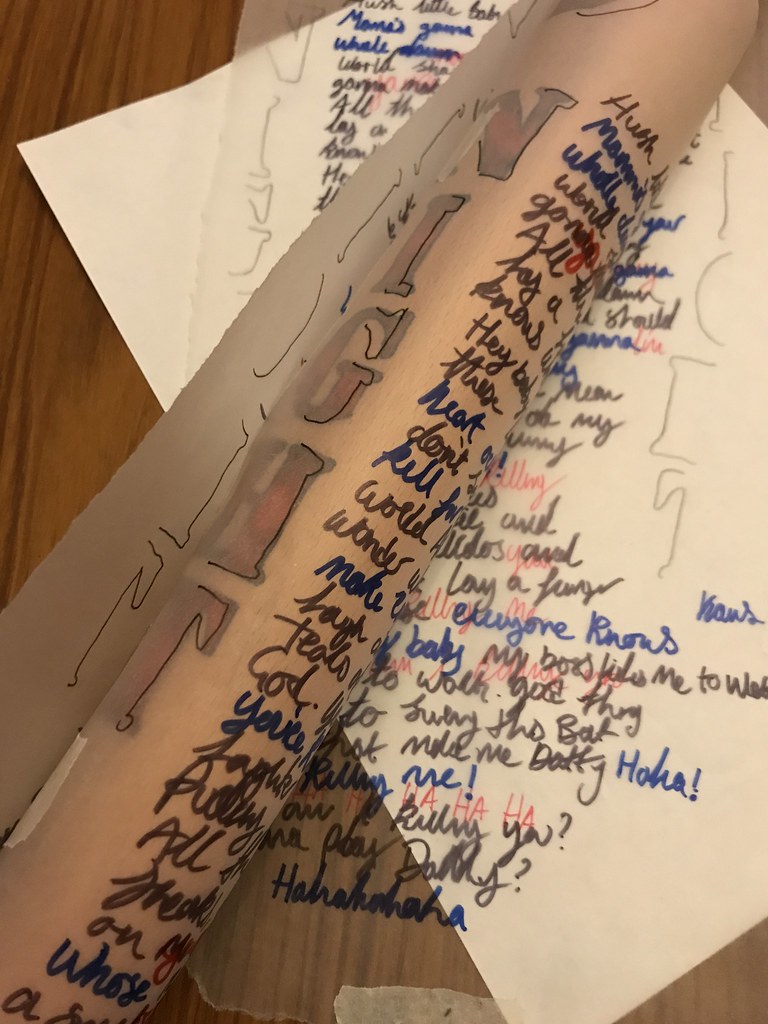
I wrote the words out a few times in the pen just so i knew i could do it when it came to putting it on the bat. 
I wrapped the tracing paper back onto the bat (using the outlines of the letters to align the paper correctly.) this was to make sure the spacing of my writing was correct and that it all lined up.

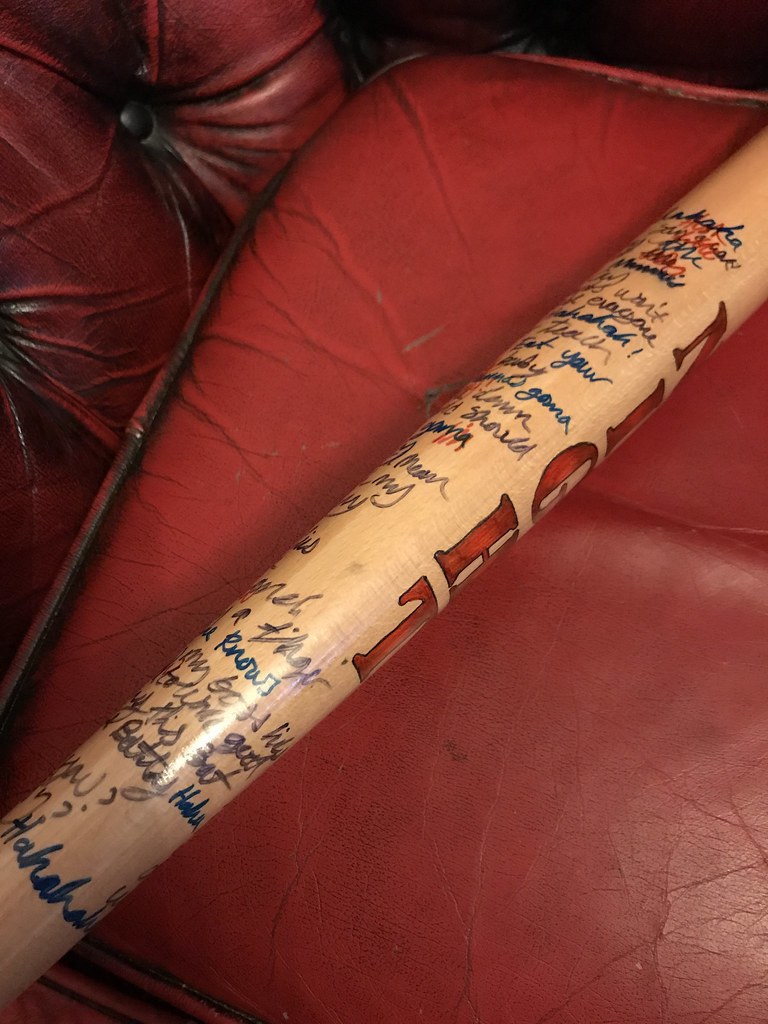
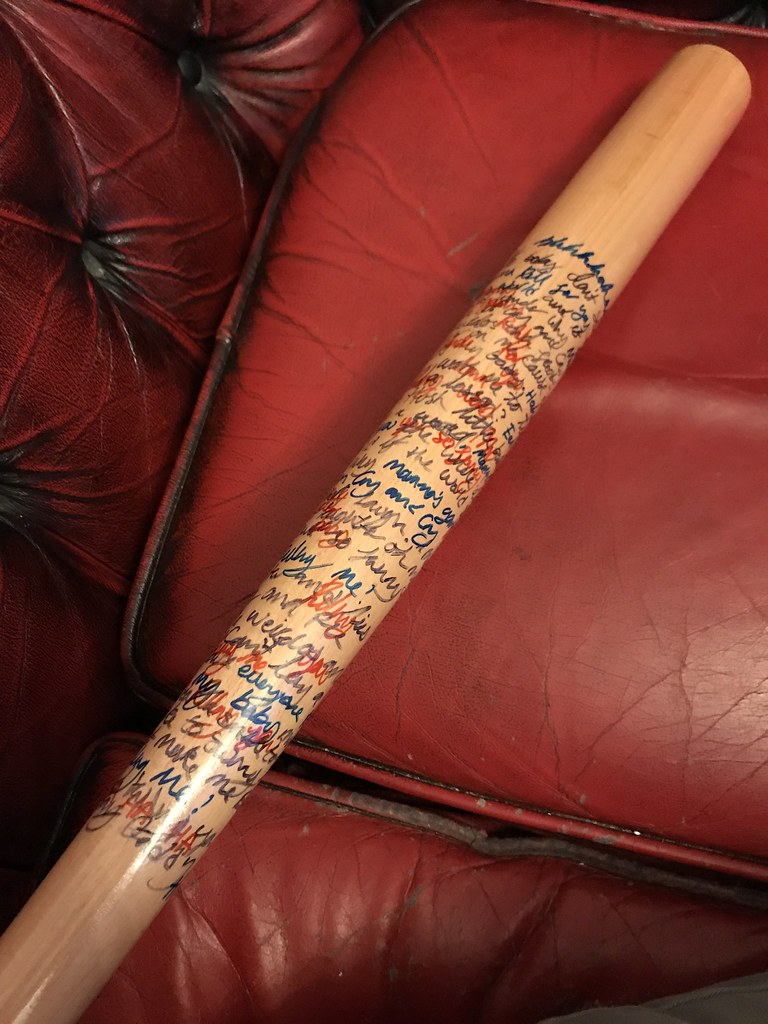
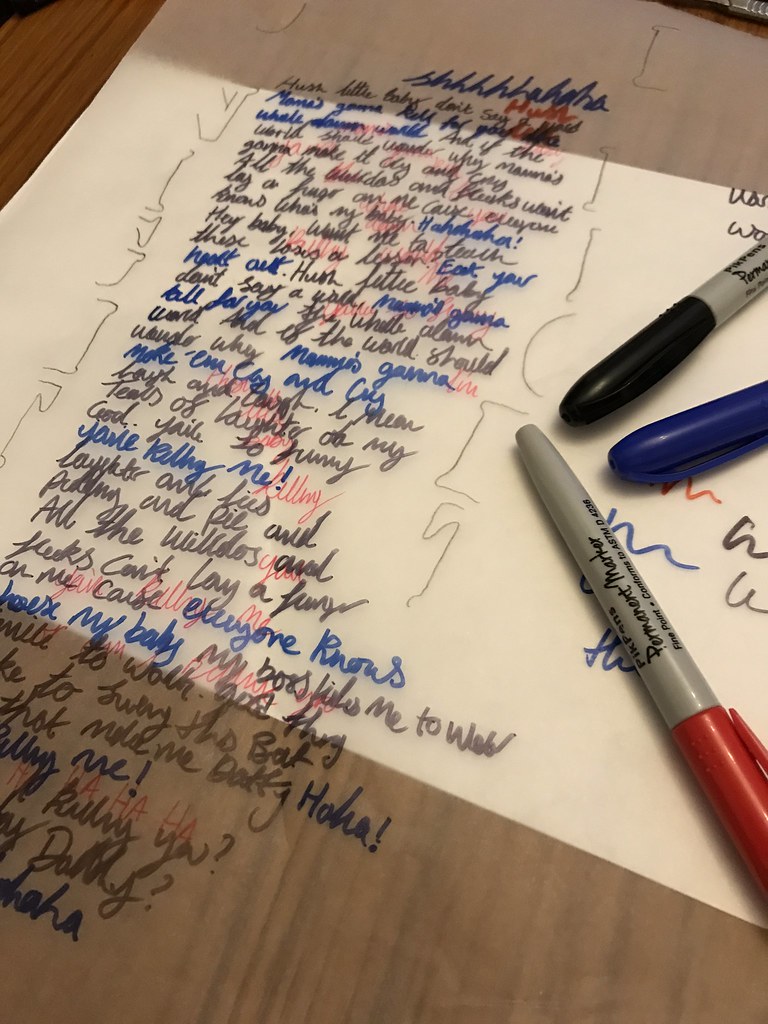
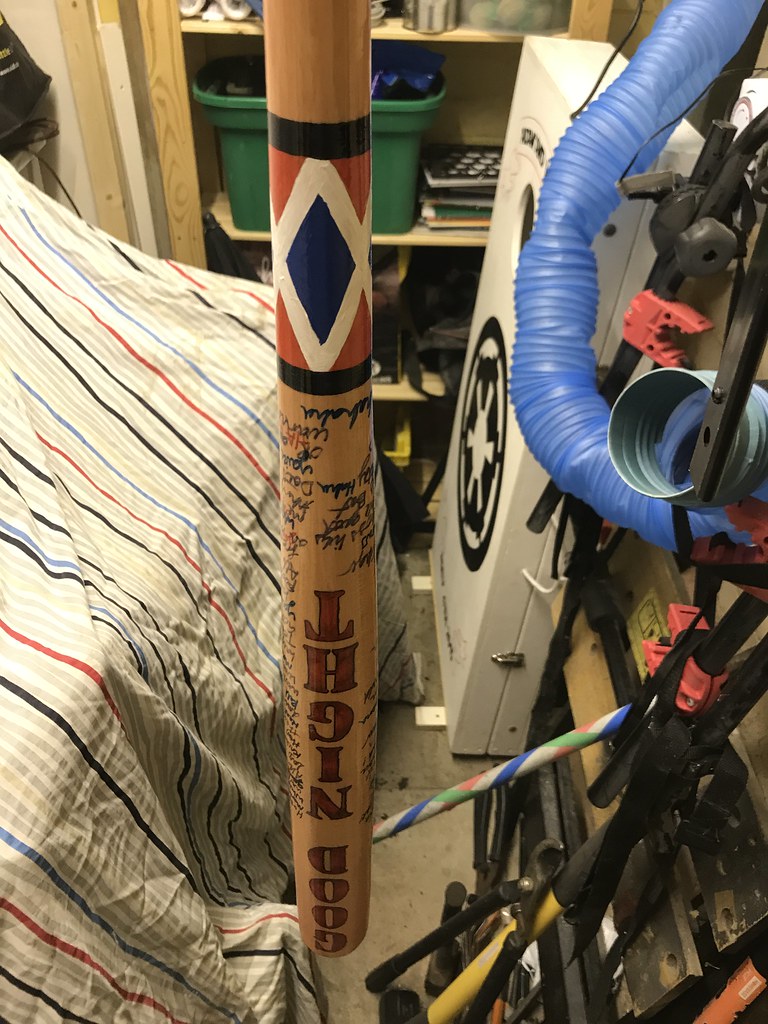
Once i felt confident that i could write the quote on the bat correctly I went about slowly writing the quote onto the bat.  
I started with the black and blue lettering, switching between them as i went along. 
The red lettering in the background of the quote was written last to make sure it was in the correct place.


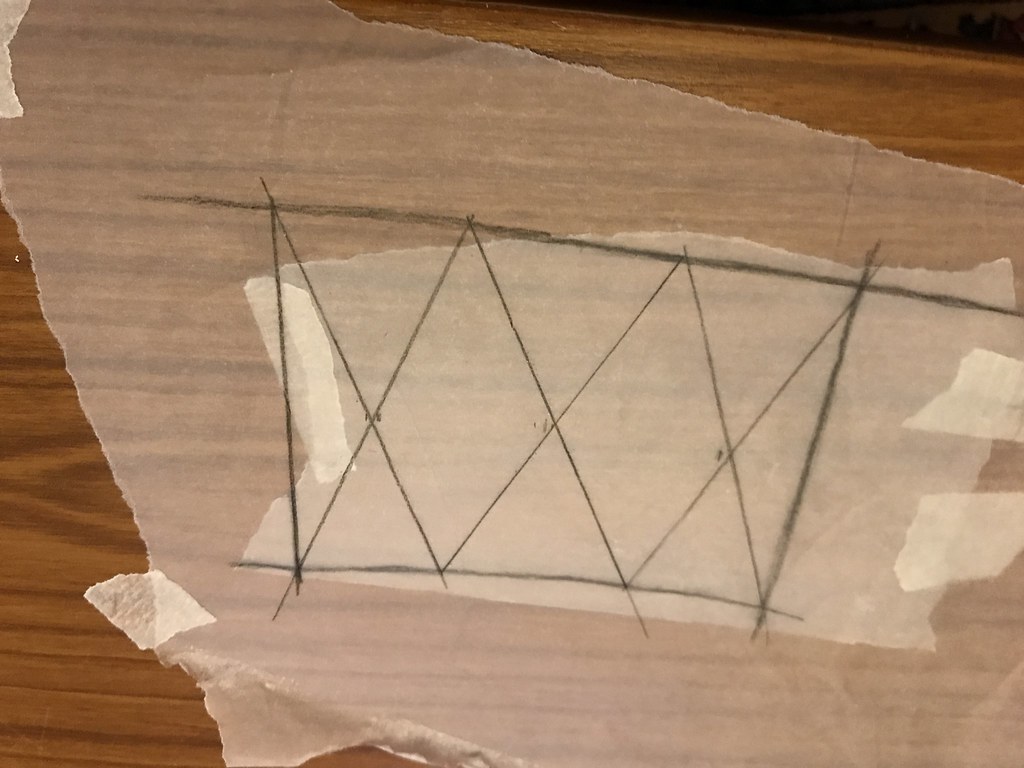
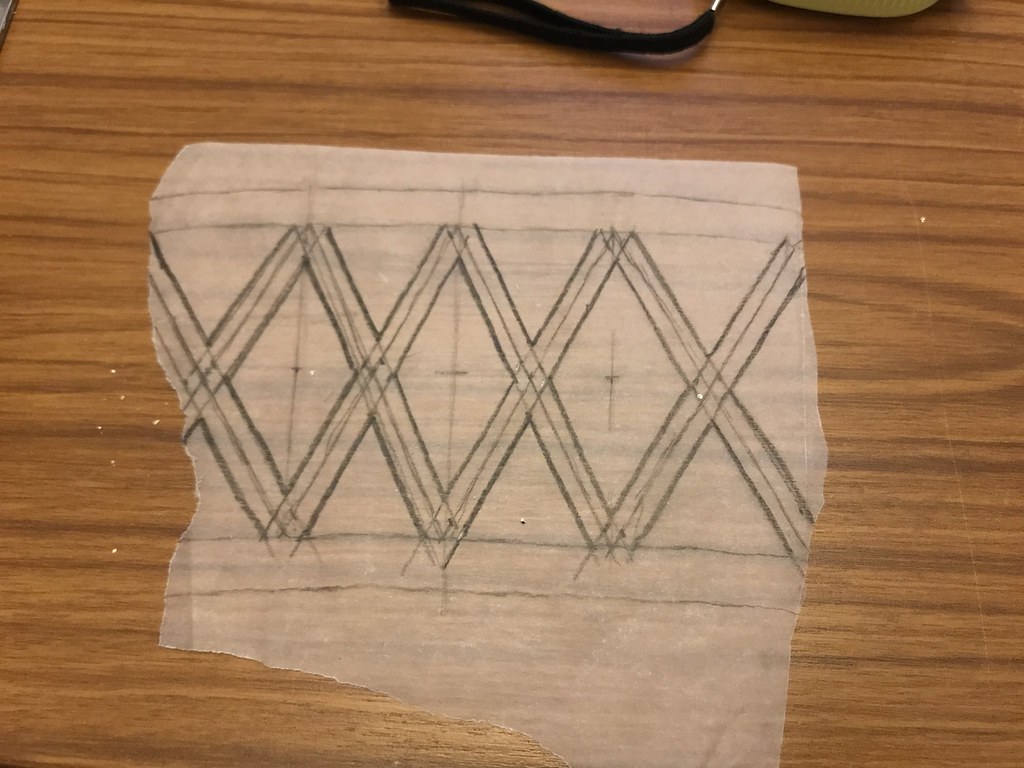
 Using the tracing paper I wrapped the handle of the bat and marked out where the diamonds would be. I used the scaled image to get the dimensions correct. 
I took the paper off and marked out how the diamonds will look. thickening up the lines so they matched the screen used prop. 
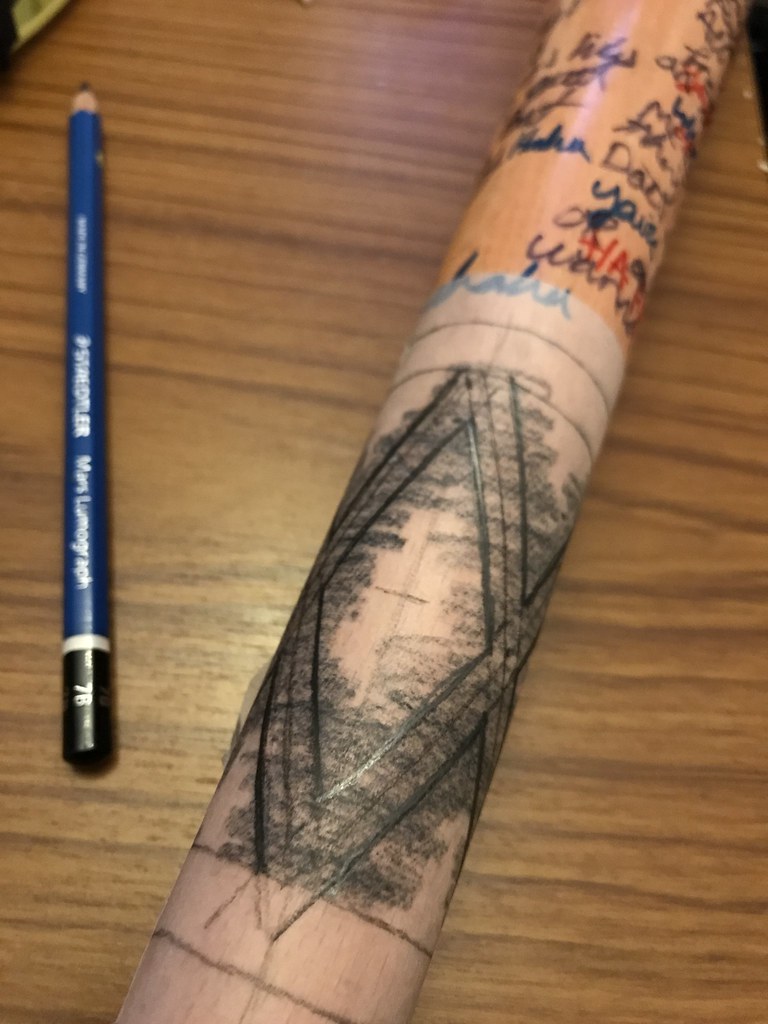
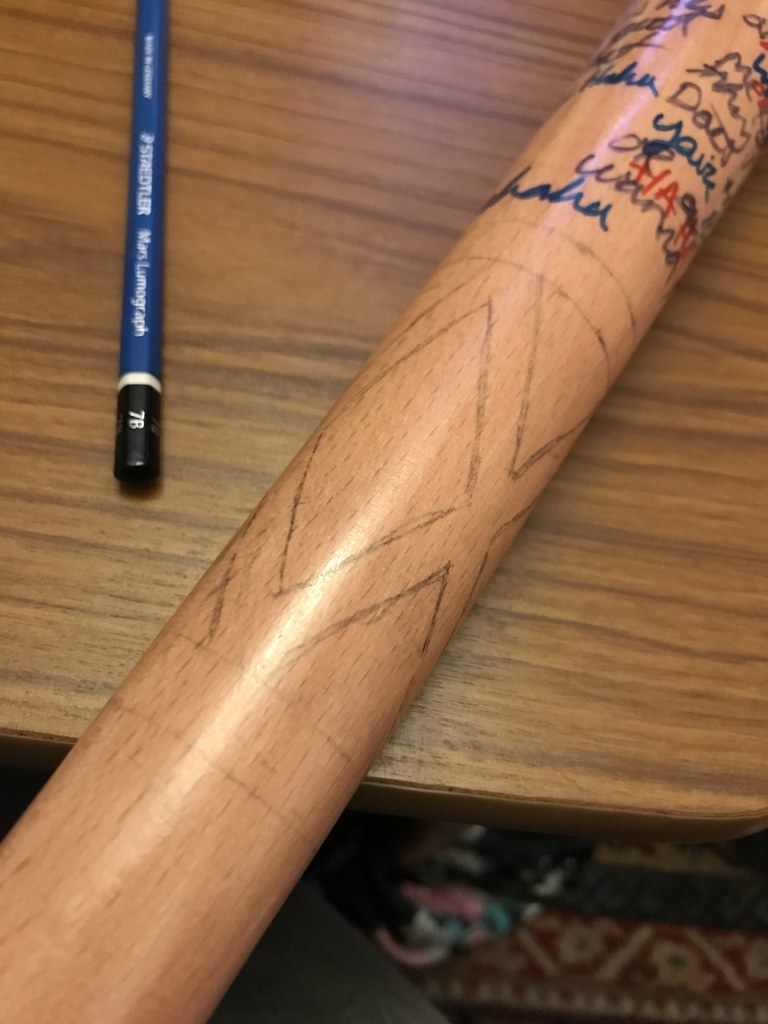
Then using the colouring the back of the paper technique again I placed the design onto the handle of the bat. 


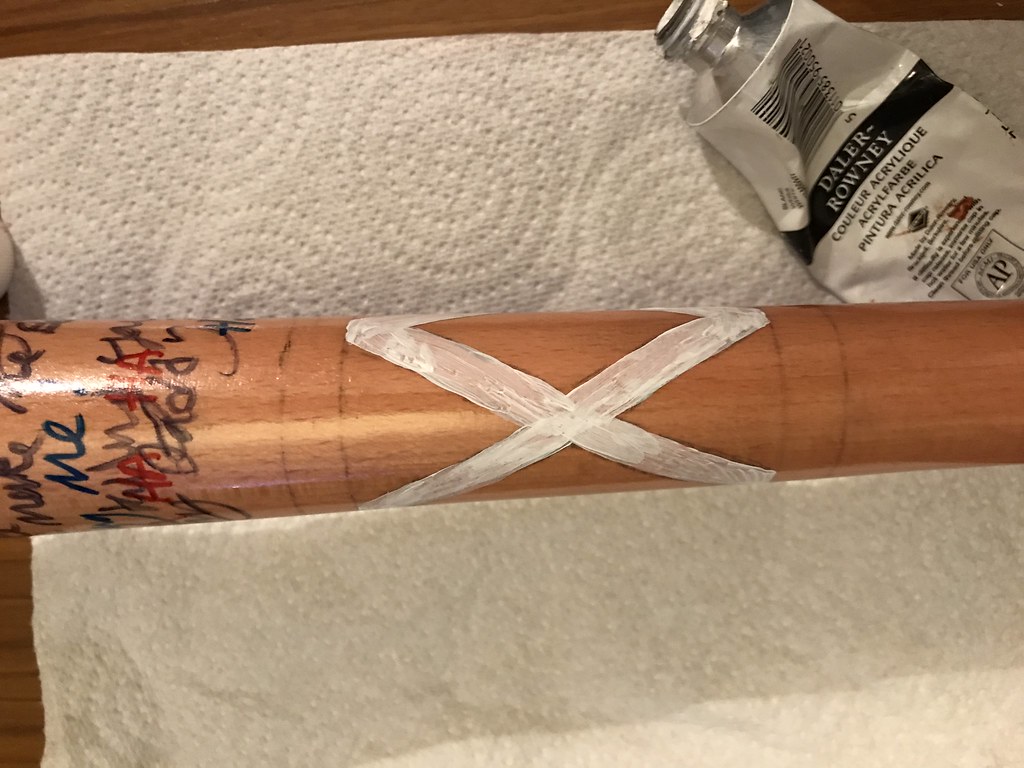
I then used some acrylic paint to fill in the lines. I started with white as other colours will go over it better if i make a mistake :)


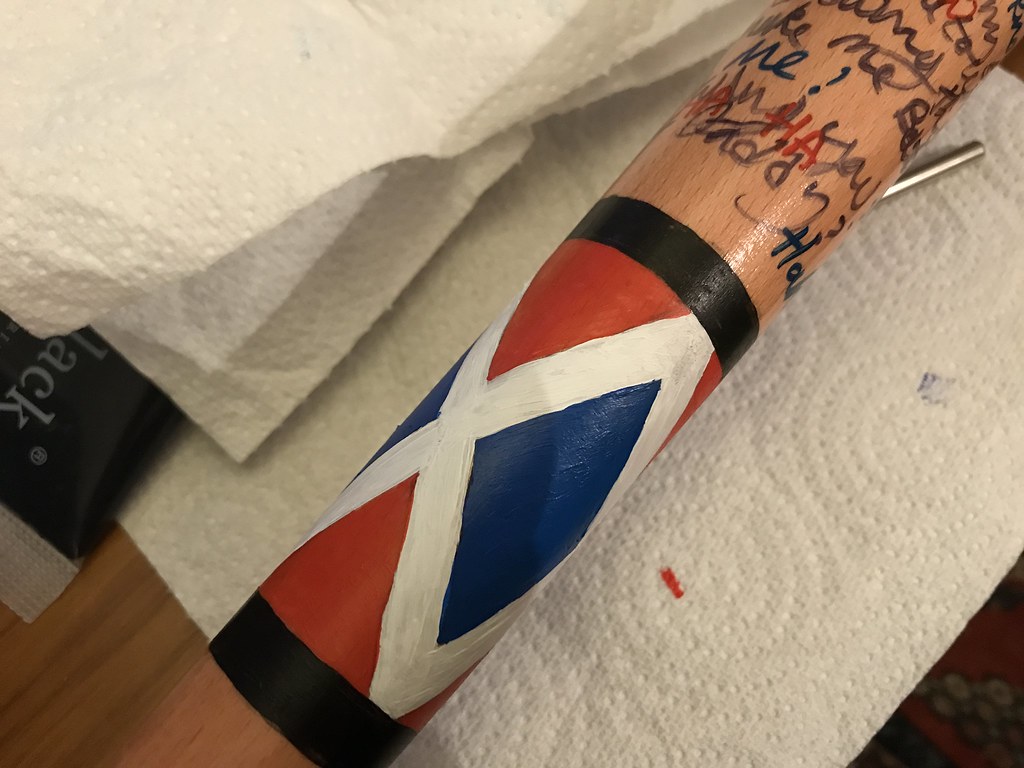
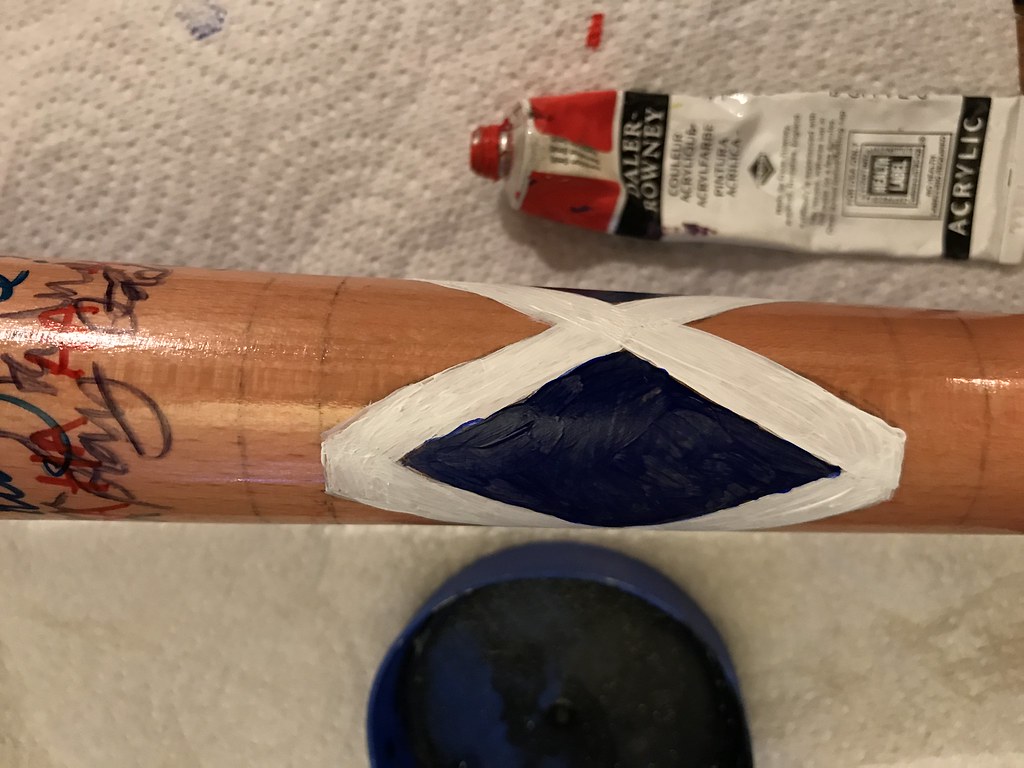
The blue i originally used was a tad too dark once I painted the other colours so I used a lighter blue and I think it works a lot better. 


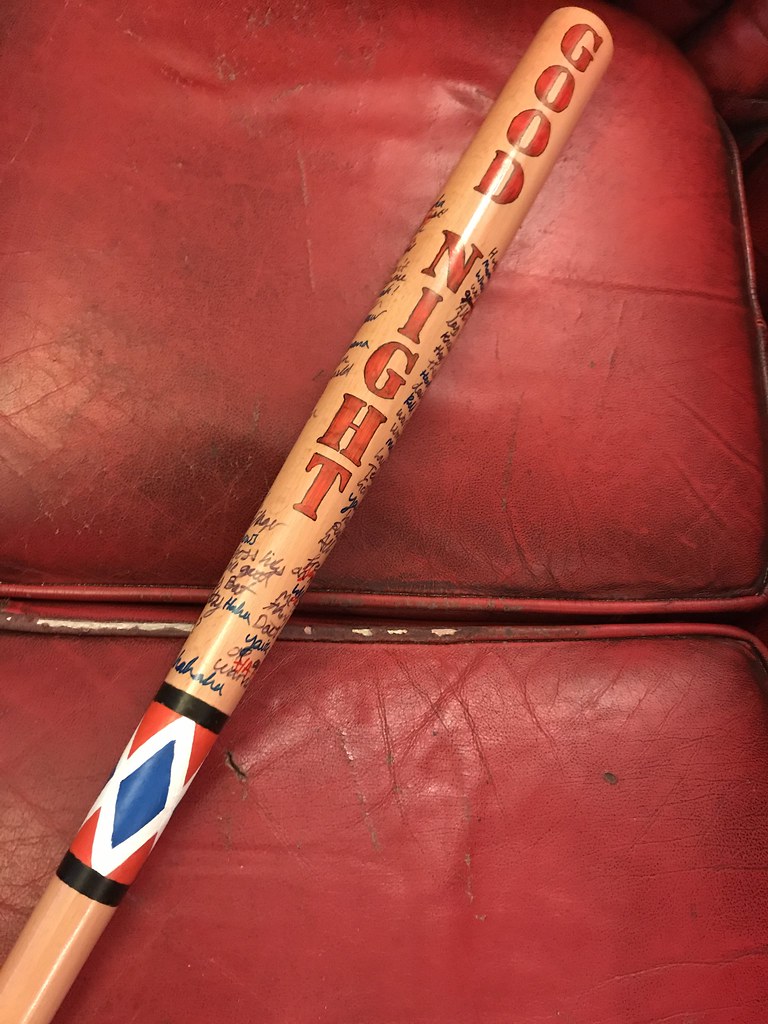
Once the paint had dried it was time to seal the bat. 

I took the bat out to the shed and gave it a couple of coats of clear gloss lacquer. This is to protect the paint job on the handle, and also it will make sure the pen wont run or smudge, even though it was done in permanent marker it still might get smudged but with the gloss clear coat over it it will stay fresh.


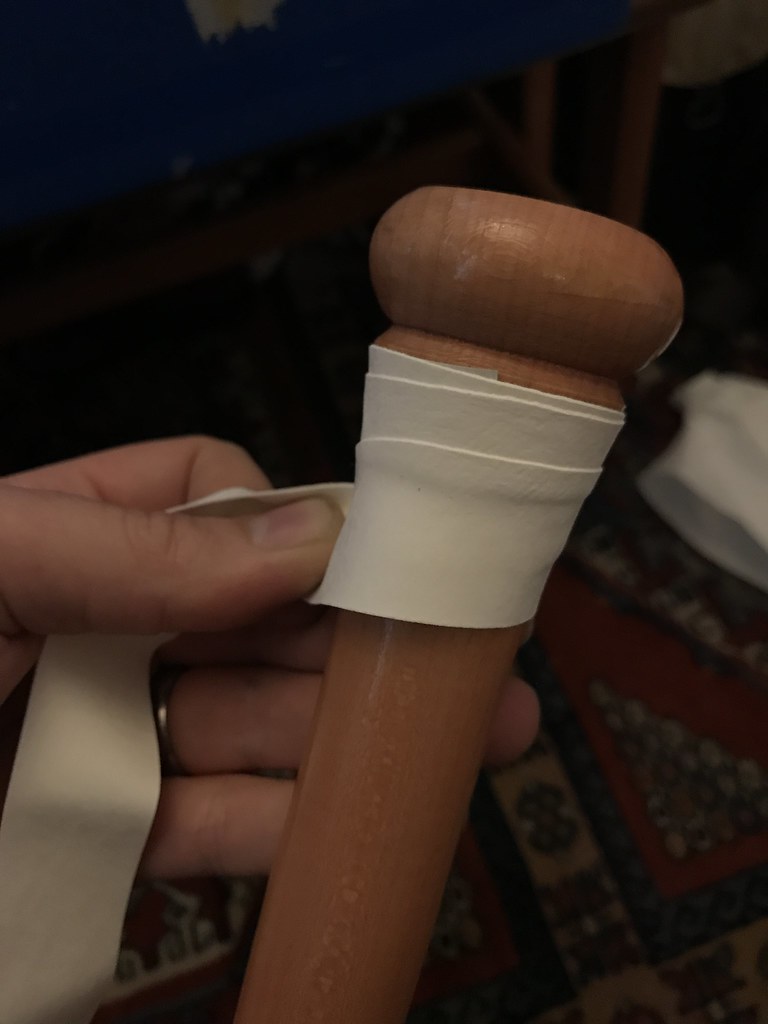
To put the grip on the bat i purchased some white rubber tennis racquet grip. The one I got was white and i thought (incorrectly) that it was blank. I had to wrap it funny in the middle to cover the dunlop logo as i didnt want it to be visible if the grip got dirty etc. 

I started wrapping at the base of the grip and then worked my way to close to the black lines on the bottom of the diamonds. The grip came with some black logo tape to secure the grip but i didnt like it so i used some white electrical PVC tape. it will age differently to other grip but i think it looks good. To match the top of the grip i wrapped some tape round the bottom as well.

 
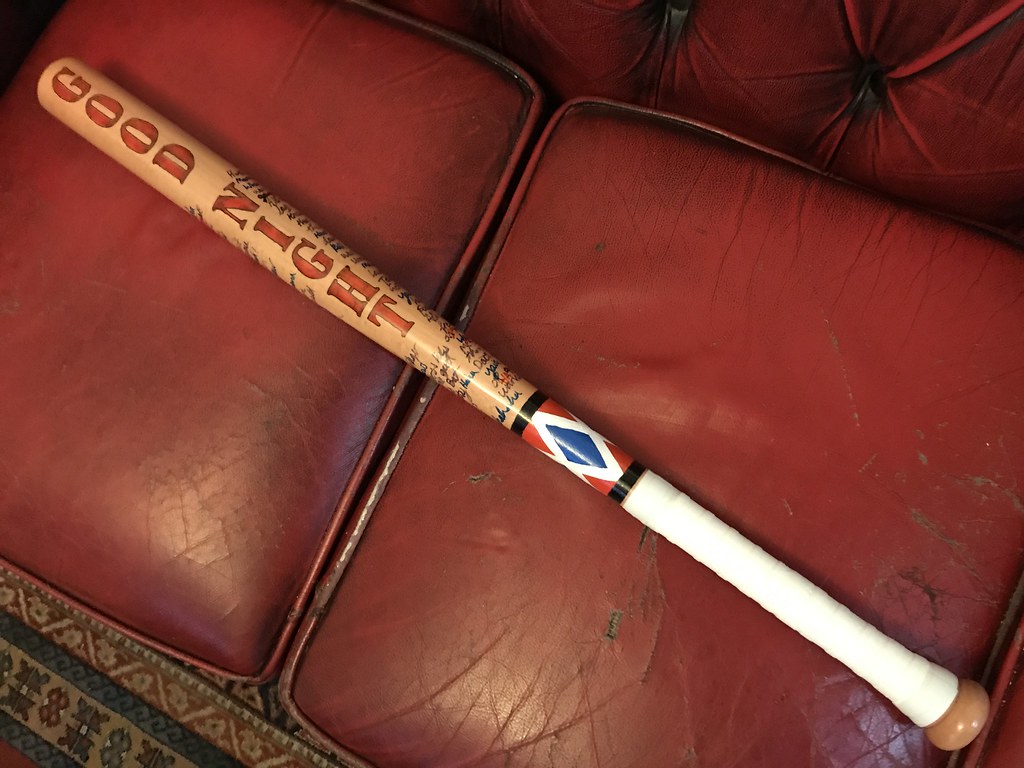
Finished bat is all shiny and ready to get some folk for Mr J.
 
 https://c1.staticflickr.com/5/4257/35722119235_937314eb2d_b.jpg


 Thank you for taking a look at my post about how i made Harley Quinn's bat from Suicide Squad. 
If you have any questions please feel free to ask and i will try my best to answer them. 

If you like Harley Quinn I have another post about how I made her Mallet. see HERE


29 February 2016

How To Make A MULTIPASS From Fifth Element.


I was browsing one of my favorite places for inspiration and research for props www.propstore.com.
they were selling a multipass and they had posted some really good close up photos of the multi-pass used in the film Fifth Element. 
So i decided i wanted to use those photos to make some Multipasses for my self and my wife. 

I screen grabbed the photos from the www.propstore.com


Using these pictures makes it very easy to replicate the prop myself.


Drawing up the plans. 

Using the photos from the prop store and Adobe illustrator i traced around them to make some plans for a laser cutter.

To get the scale and size correct i used some screen grabs from the movie.


Cutting Parts and Assembling

Using the plans i made i cut out all the parts on the laser cutter.

The white backed parts are 1mm thick perspex and the green backed is 2mm thick . 


Assembling the Multipass. 

I glued all the front parts together and left the rear half of the frame as i need to insert some of the fine detail in-between the front and back later on and don't fancy masking it off when it comes to painting.


Little details discovered.

When i was looking through the Prop store photos i saw a code on one of the parts, so i searched on my favorite internet search engine and discovered its a little diode readout think so i ordered some and that also helped with the scaling of the whole multipass.


Under coating all the parts. 

Keeping all the parts face up i gave them a coat of undercoat paint. 

Once the face up coat had dried i turned all the parts over and undercoated the rear side.


Art work.

While the paint was drying  i worked on the artwork for the multipass

Using photoshop and the screen grabs from the propstore i made the front and back for the cards. the fronts will all be different due to the difference in the people on the cards.  
I made one for leeloo from the movie and one for me and one for my wife.

i printed them on thick paper and cut them to fit the multipass frame, both front and back. 


Adding the details. 


i got some translucent acrylic rods for the fine details and cut them to size.


i cut the red rod to the same length as the hole for the diode and i cut the green/yellow rod to the length of the gap between the button on the chain hole. These parts will need further work before being attached to the final prop.


Final paint and final details.


I gave all the parts a coat of dark metallic paint. 

The green/yellow rod had to have a notch taken off the end to trim it down to the thickness of the middle layer of plastic (2mm) so the rear face frame can fit correctly. 


 The small red rod had one side of it sanded to a flat surface so it would be easier to glue it to the main prop.
The diode is just inserted into the hole cut for it.


To make the Yellow button i got some 25.4mm domes and sanded them down to fit inside the hole in the multipass.


I made many more than i needed as i scratched some and its always good to have some redundancy when making things.

Once i had filed the domes down i printed some yellow off and cut it into circles and glued them to the rear of the filed domes.
These will then be put in the hole for the yellow button (or whatever it is in the film) 

I glued the yellow button in so it would not move as i am using the back panel as the activation for the lights.

All three of the mulitpasses without the diode or the art work.


I used spray adhesive to mount the artwork. 
Front                                                            Back.

here are the passes with all the parts in place.


Connecting the diode.

I bent all the wires on the diodes towards the yellow button, this allows for the back to fit and the battery to be connected.

There was very limited space in the back for the battery and a switch so i just bent the wires that i soldiered onto the top LED of the diode (that was more than enough to light it up) the bottome wire was bent so it would always be in contact with the battery, the second wire was bend and taped so it doesnt actually make contact with the coin battery.
This is so when the rear of the battery compartment is only glued along one edge it acts as the switch for the battery to light up the diode. 

This is only the top LED of the diode lit up so it is more than enough to light the whole thing up. :)


once you have done all of the above you will have a cool looking MULTIPASS.


The final touch will be adding a Ball Bearing Chain through the chain Hole, then you will have an awesome looking prop from the movie :)

Thank you for looking and if you have any questions please ask and i will do my best to answer them.