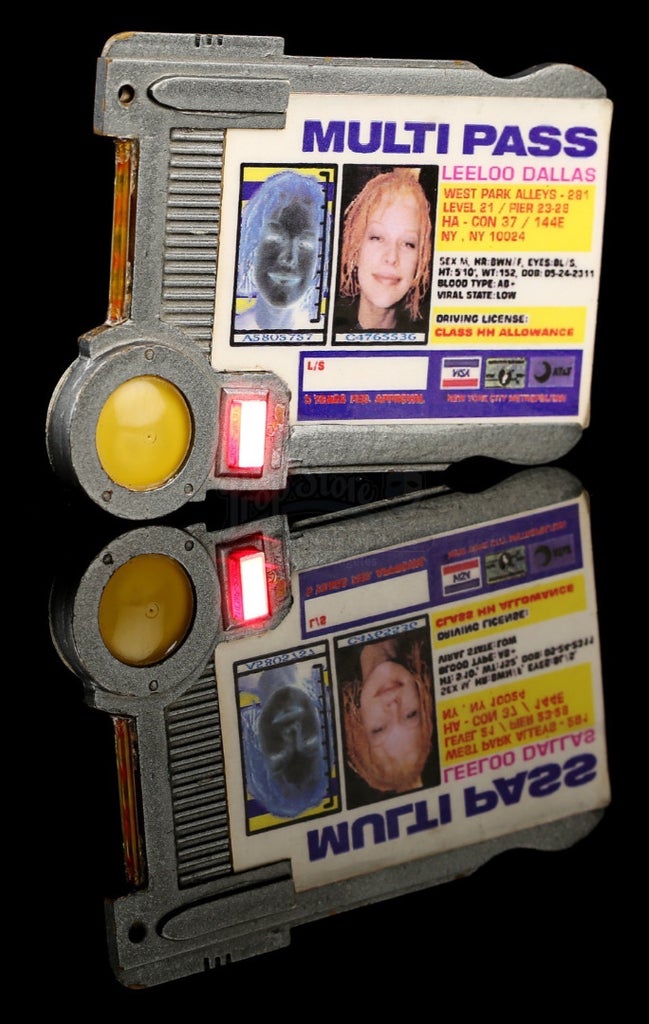
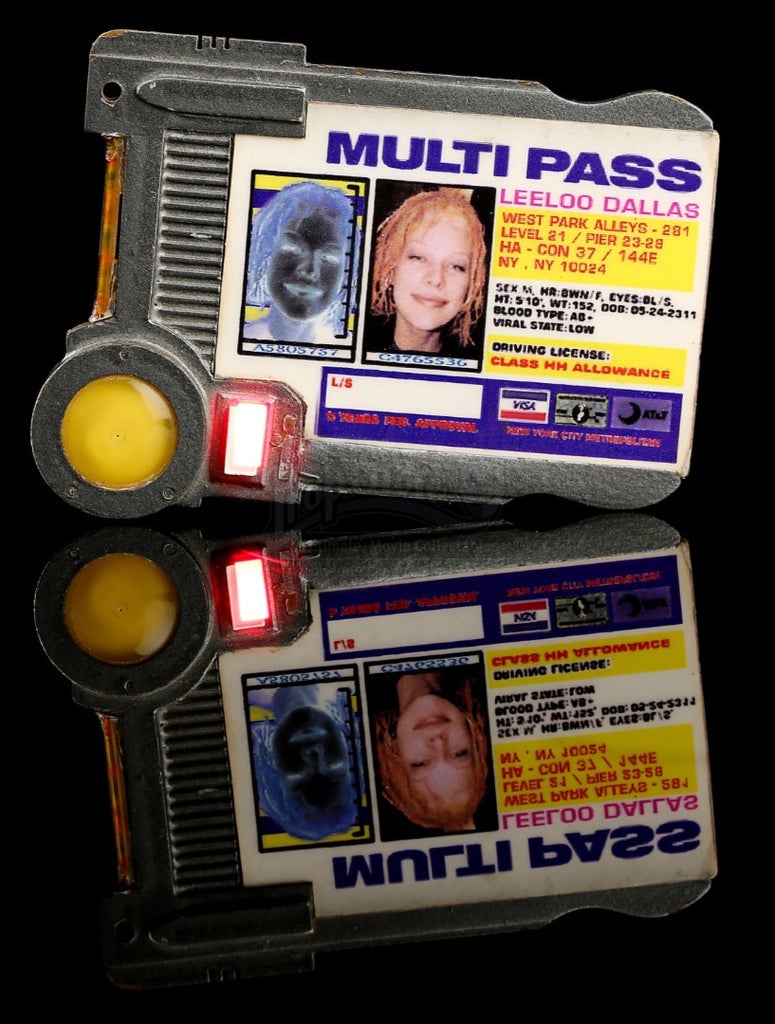
I was browsing one of my favorite places for inspiration and research for props www.propstore.com.
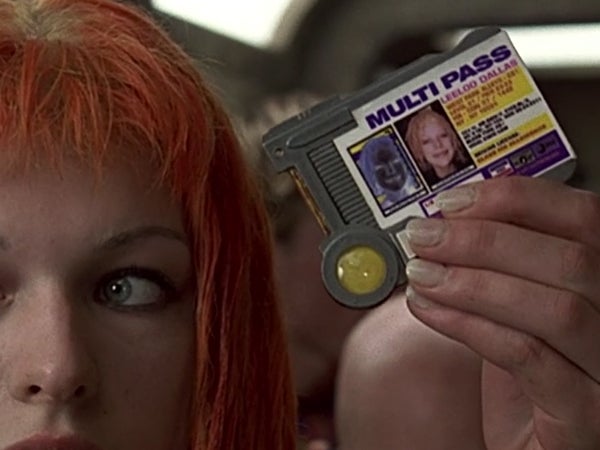
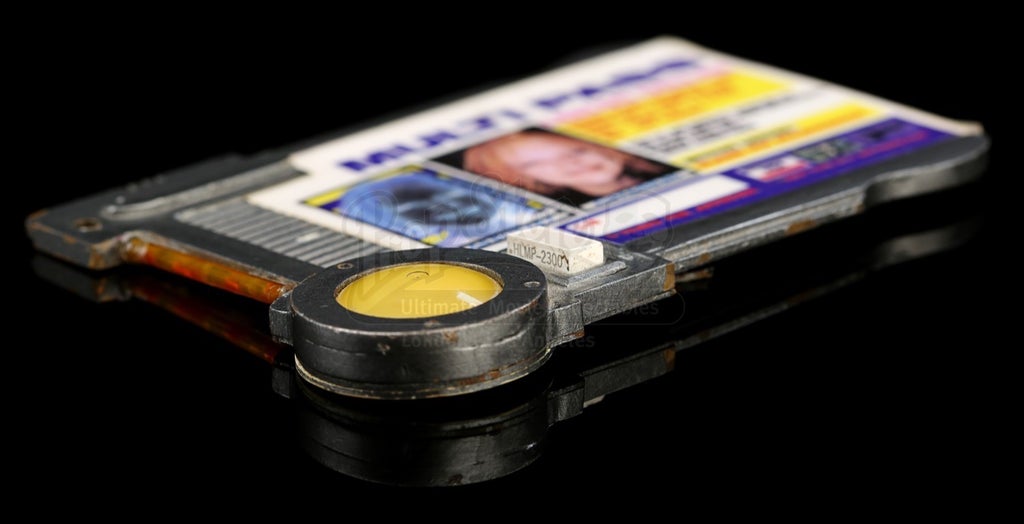
they were selling a multipass and they had posted some really good close up photos of the multi-pass used in the film Fifth Element.
So i decided i wanted to use those photos to make some Multipasses for my self and my wife.
I screen grabbed the photos from the www.propstore.com
Using these pictures makes it very easy to replicate the prop myself.
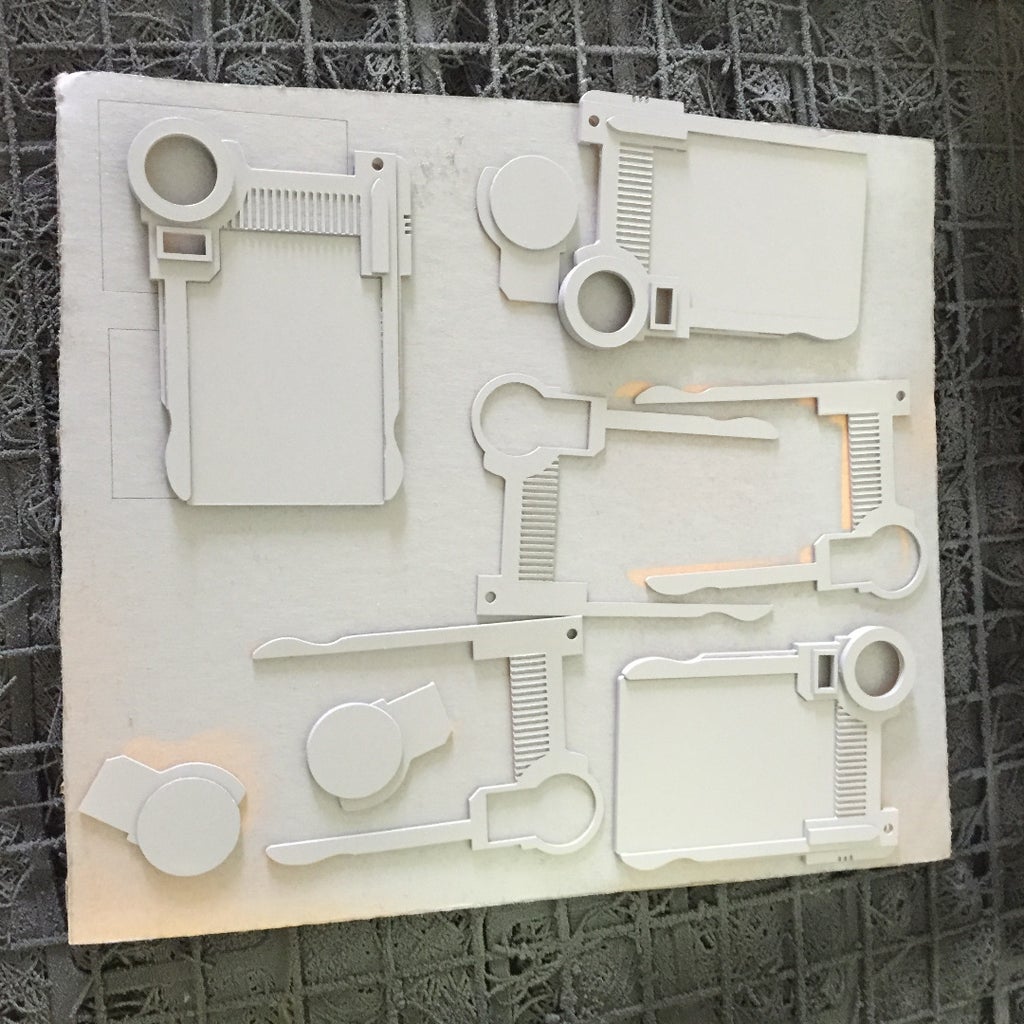
Drawing up the plans.
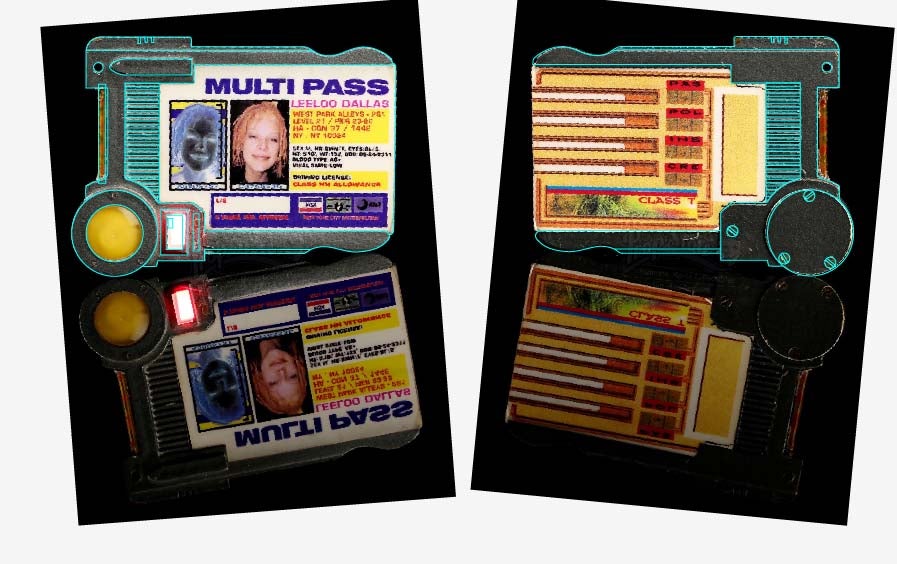
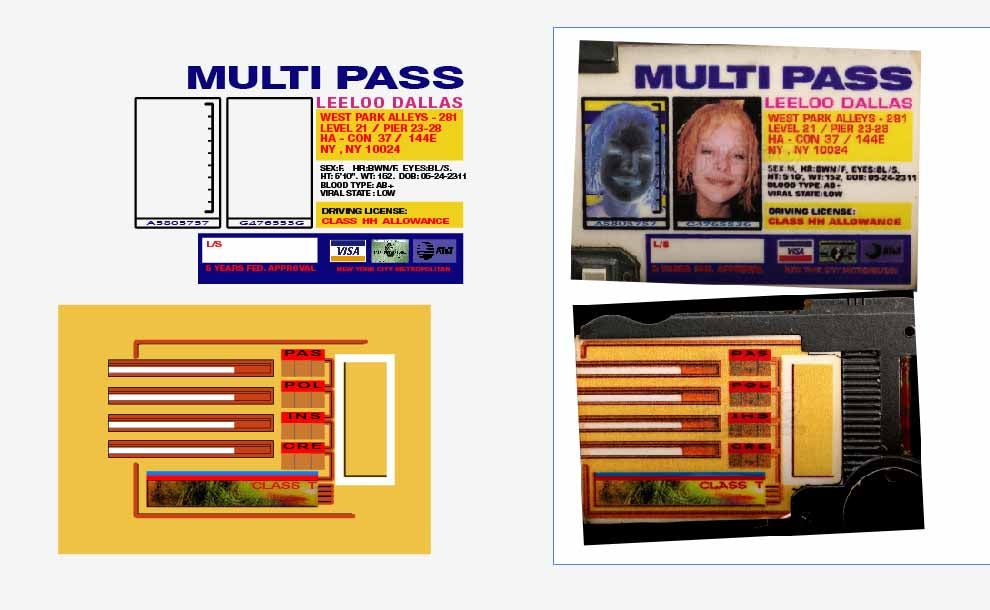
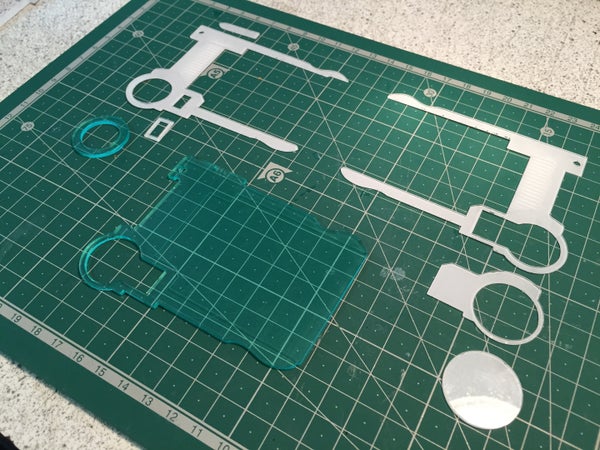
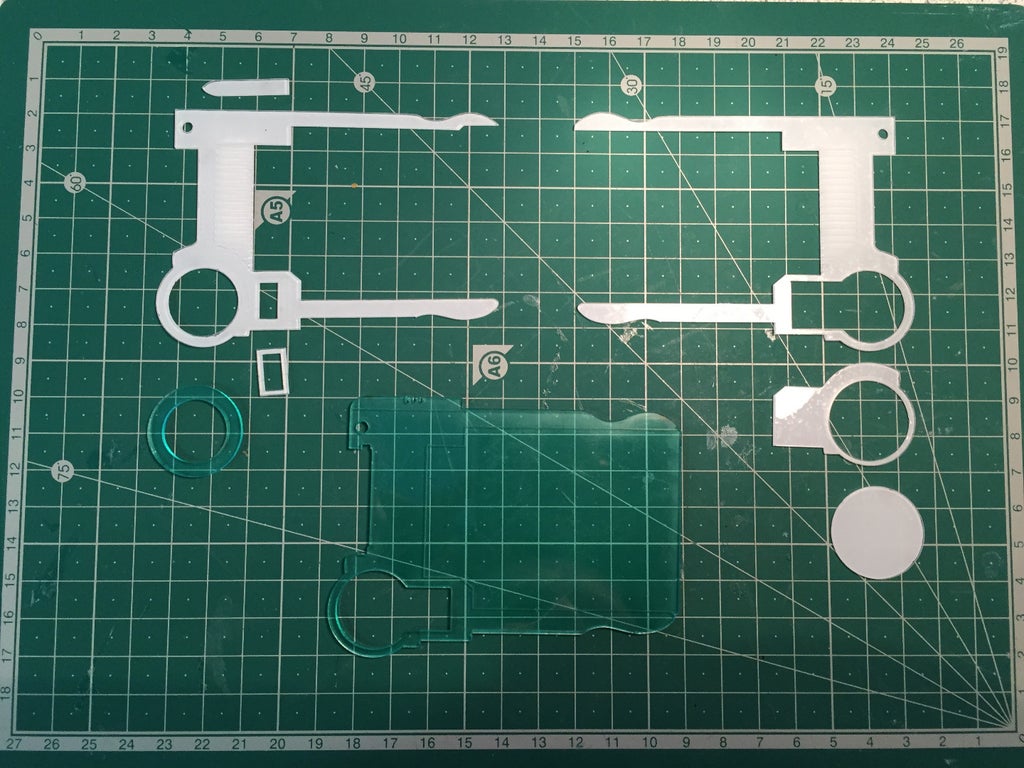
Using the photos from the prop store and Adobe illustrator I traced around them to make some plans for a laser cutter.
To get the scale and size correct i used some screen grabs from the movie.
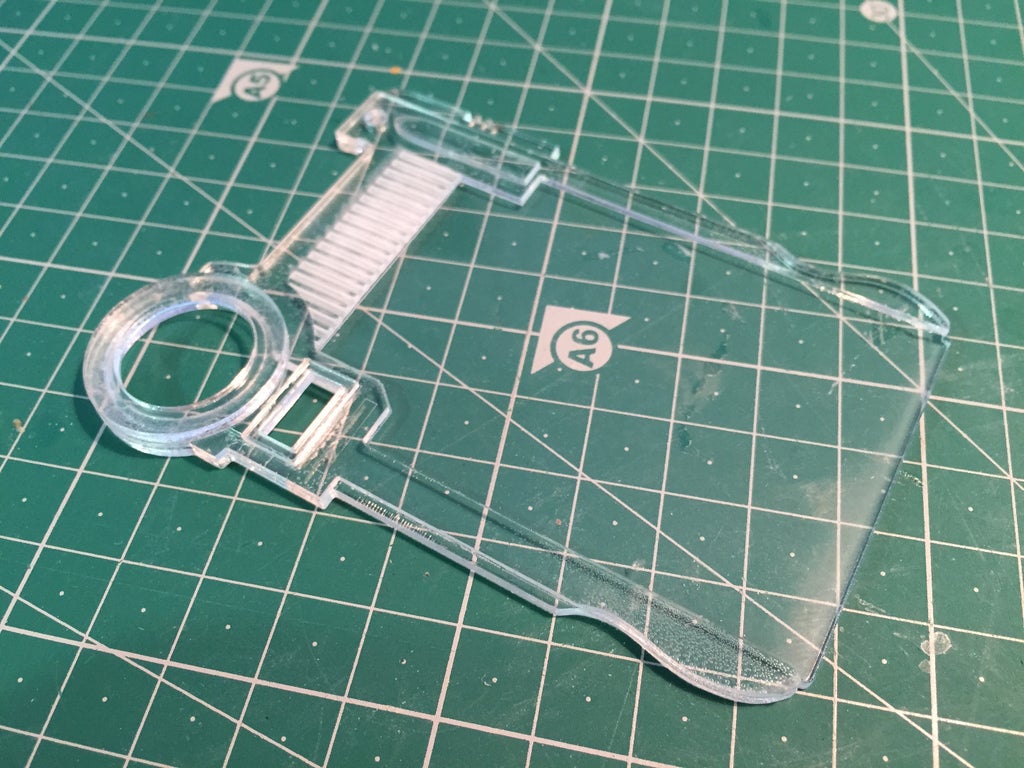
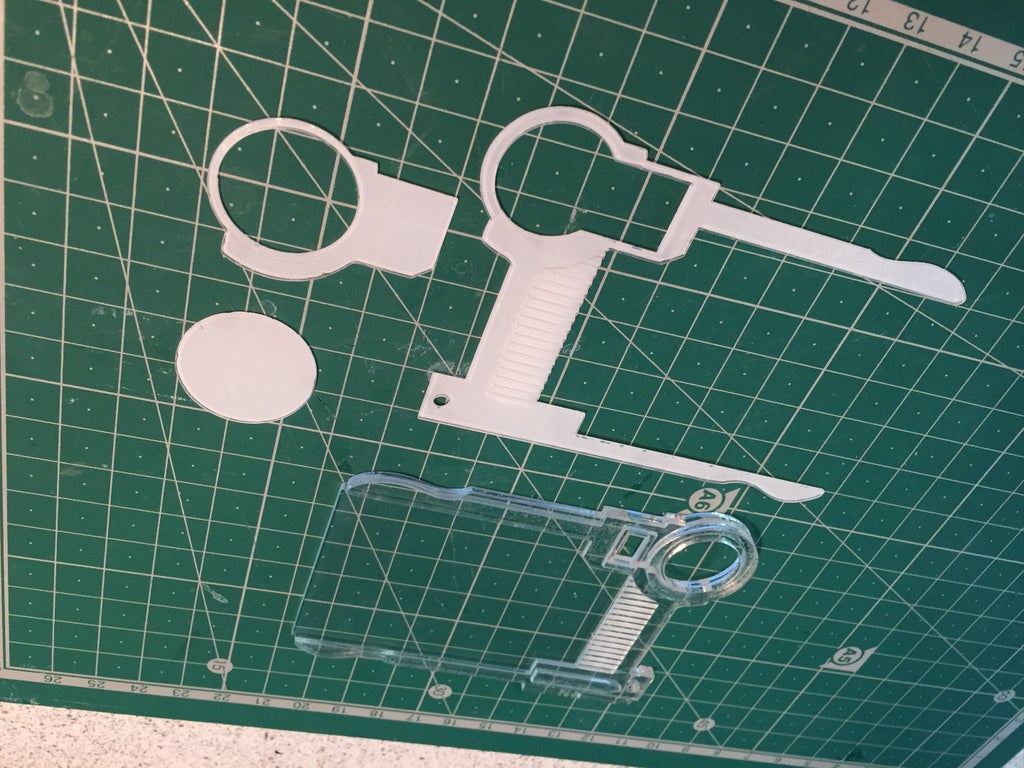
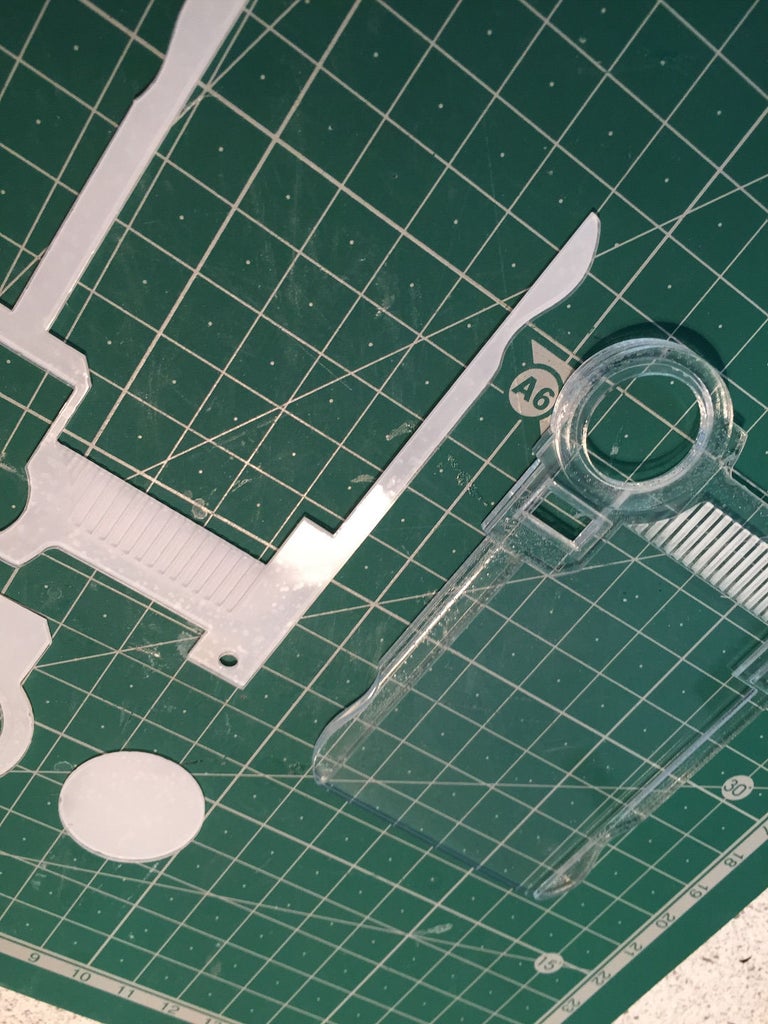
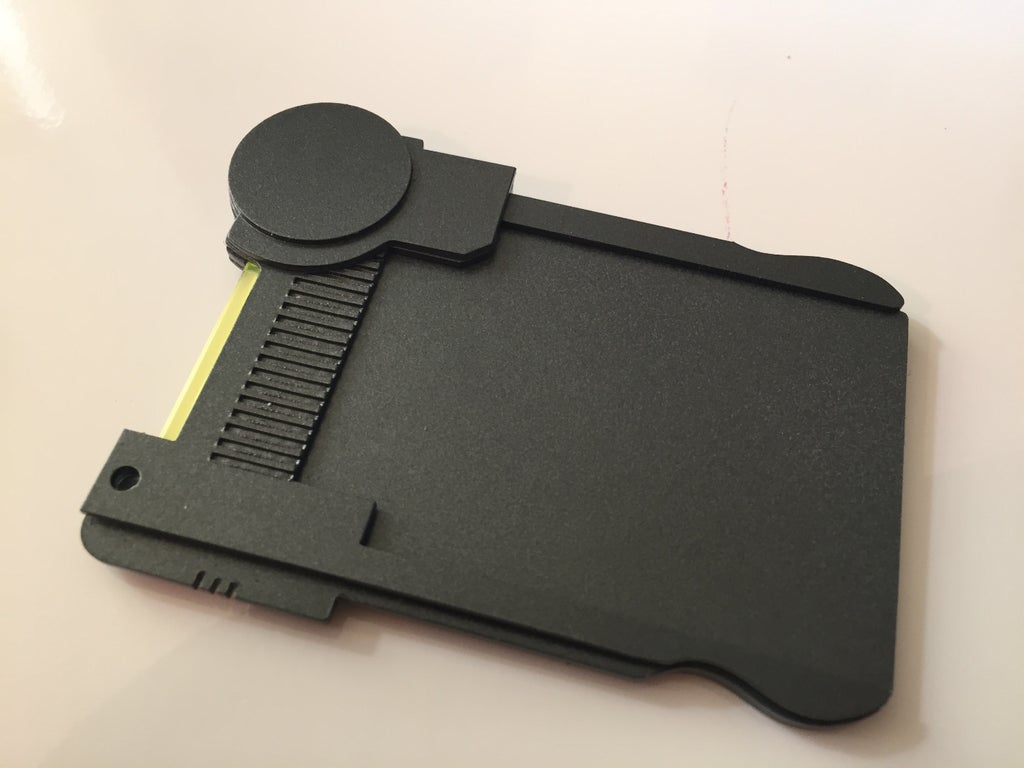
Cutting Parts and Assembling
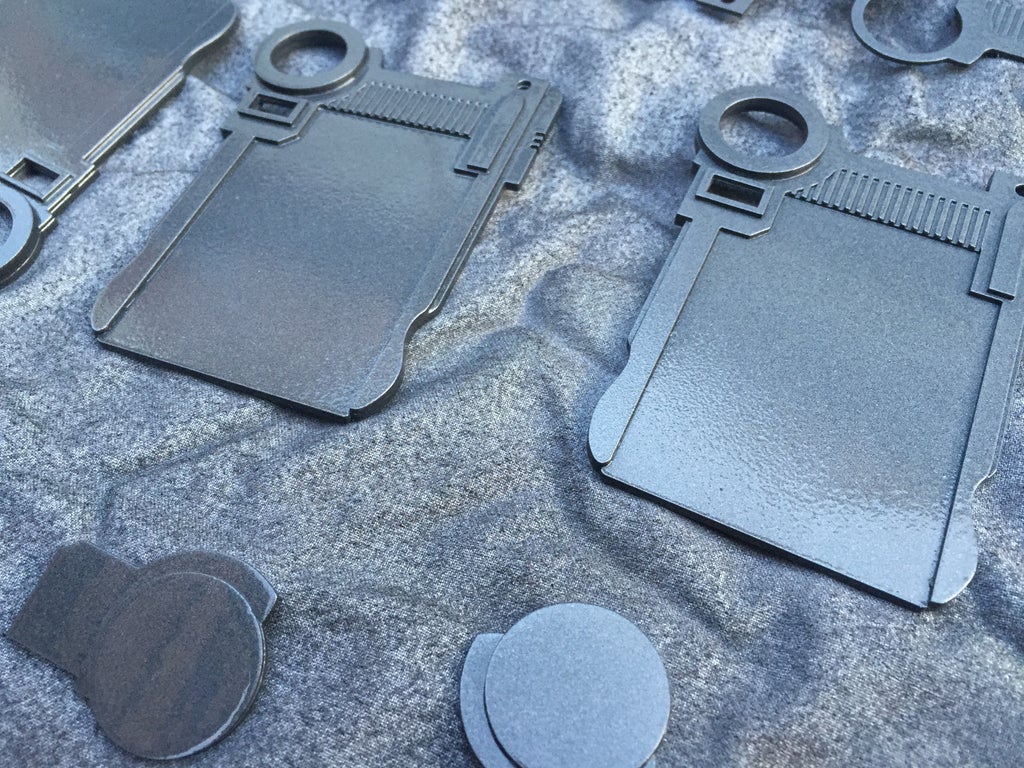
Using the plans i made i cut out all the parts on the laser cutter.
The white backed parts are 1mm thick perspex and the green backed is 2mm thick.
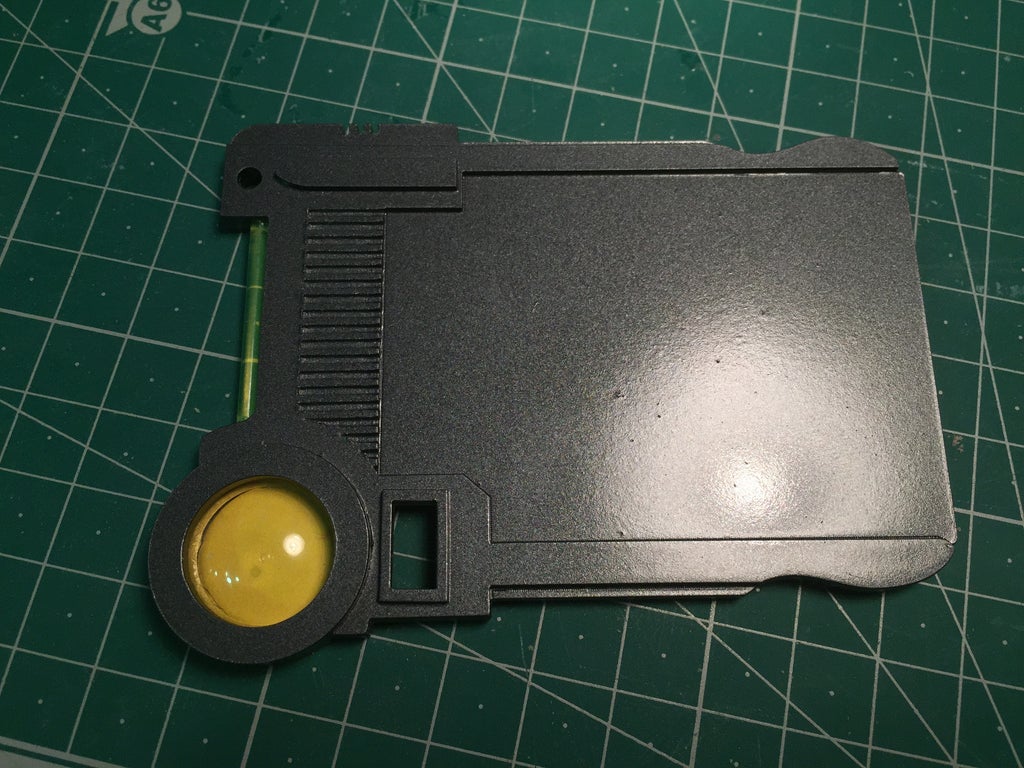
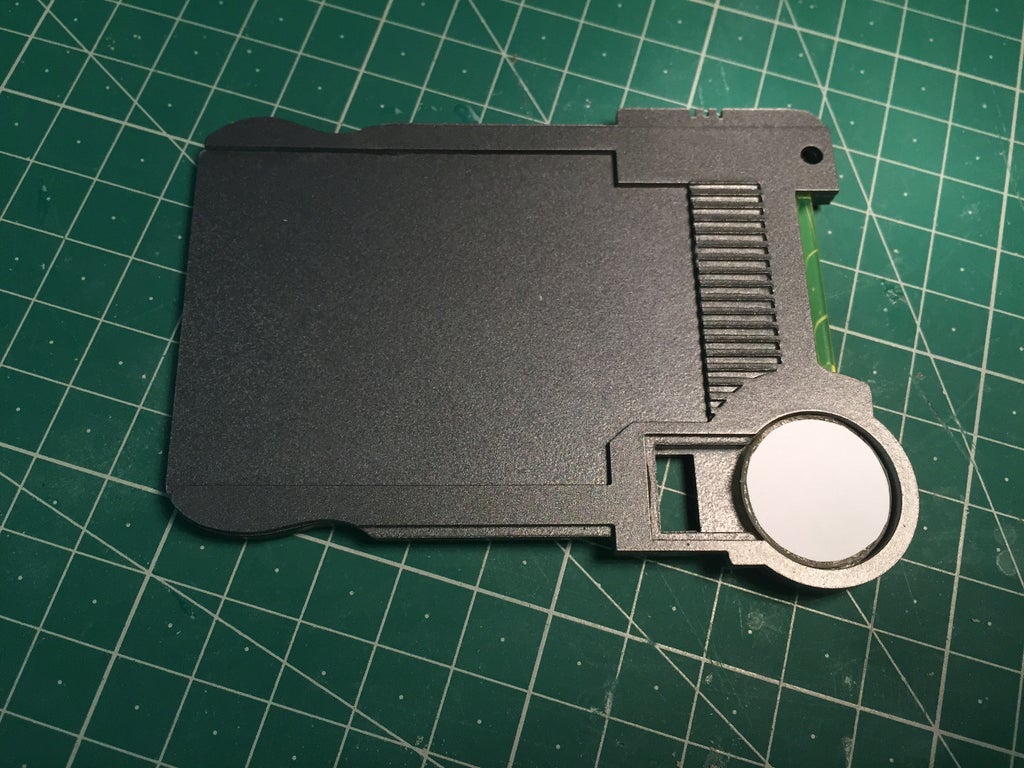
Assembling the Multipass.
I glued all the front parts together and left the rear half of the frame as i need to insert some of the fine detail in-between the front and back later on and don't fancy masking it off when it comes to painting.
Little details discovered.
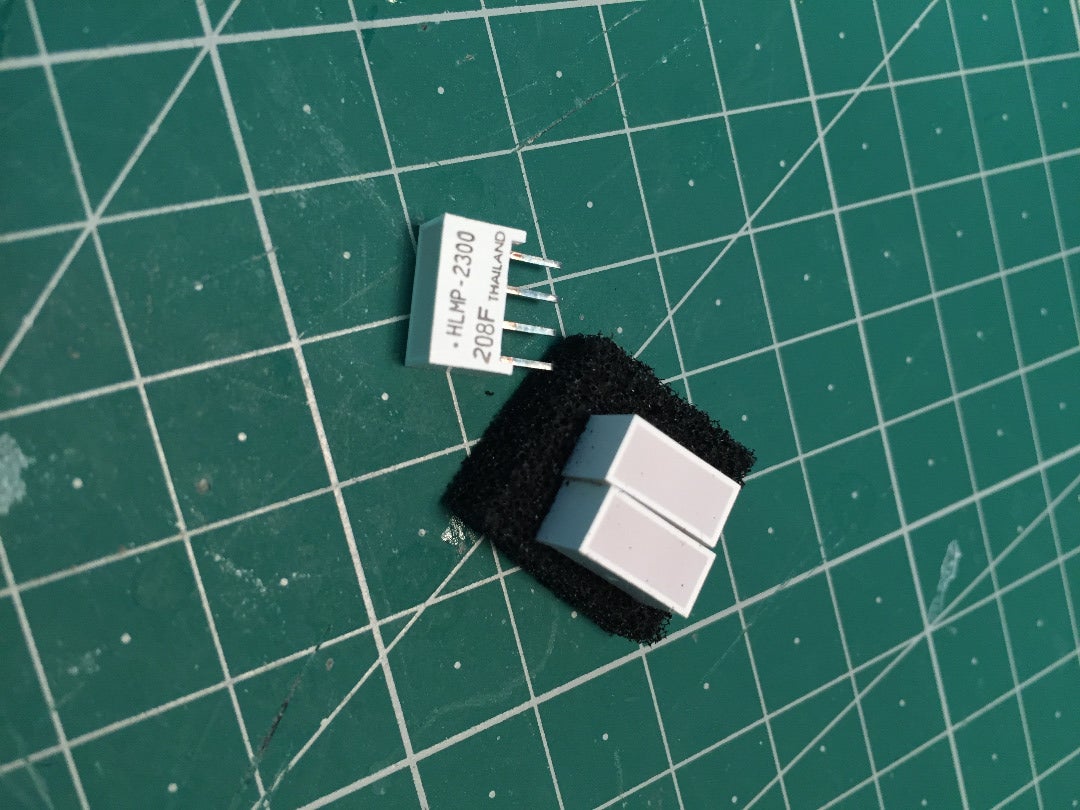
When i was looking through the Prop store photos i saw a code on one of the parts, so i searched on my favorite internet search engine and discovered its a little diode readout I think, so i ordered some and that also helped with the scaling of the whole multipass.
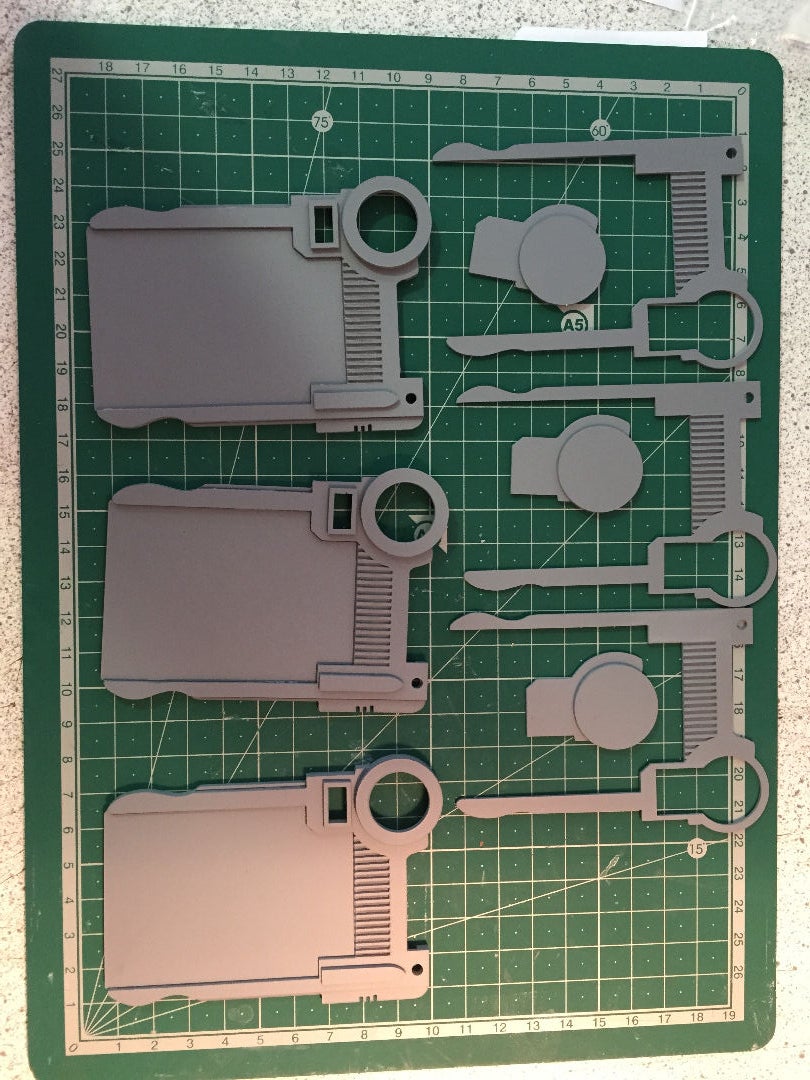
Undercoating all the parts.
Keeping all the parts face up i gave them a coat of undercoat paint.
Once the face up coat had dried i turned all the parts over and undercoated the rear side.
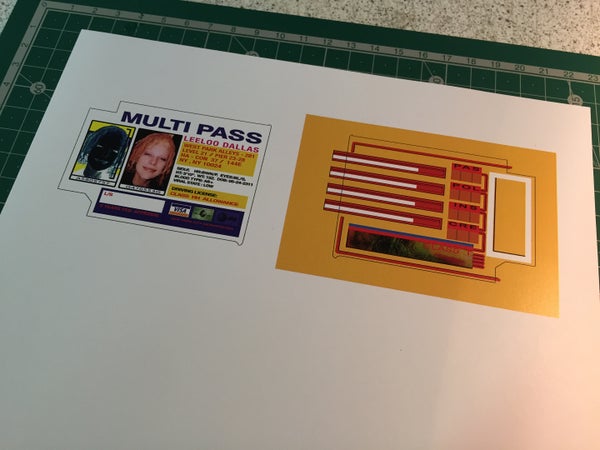
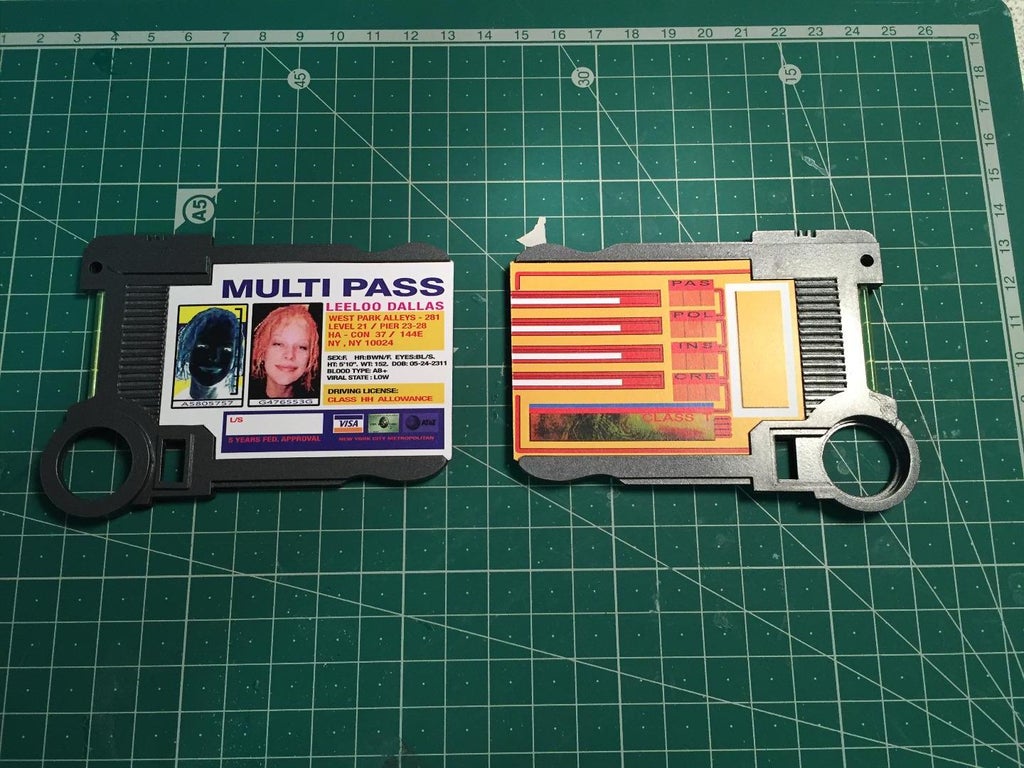
Art work.
While the paint was drying i worked on the artwork for the multipass
Using photoshop and the screen grabs from the propstore i made the front and back for the cards. the fronts will all be different due to the difference in the people on the cards.
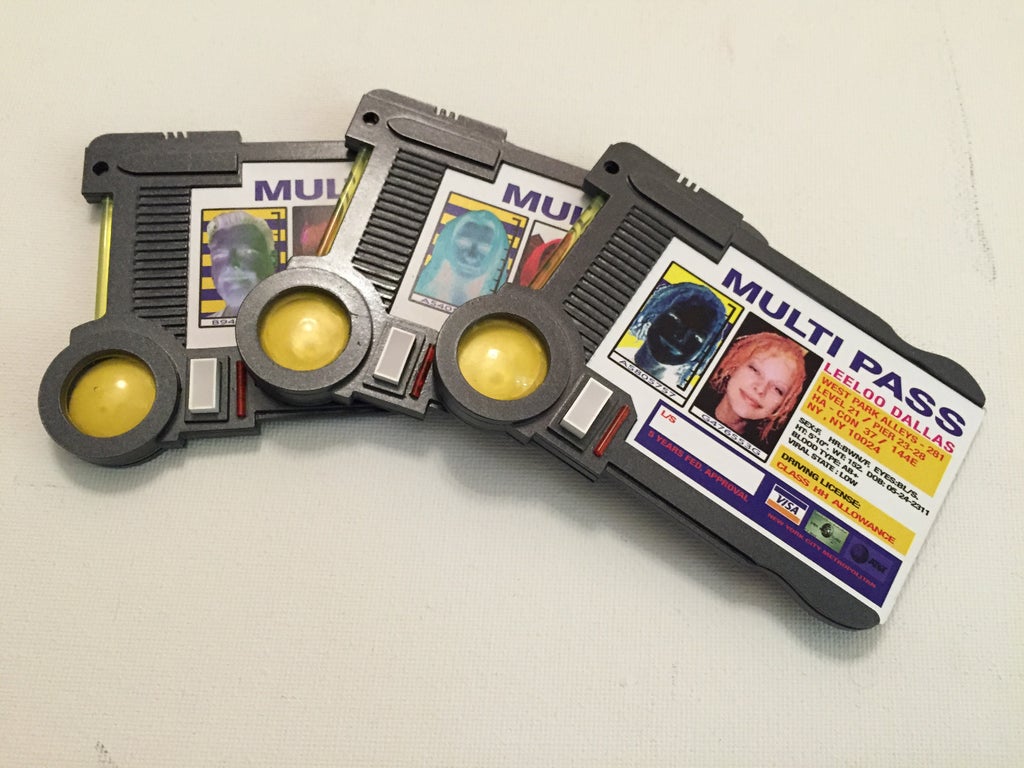
I made one for leeloo from the movie and one for me and one for my wife.
i printed them on thick paper and cut them to fit the multipass frame, both front and back.
Adding the details.
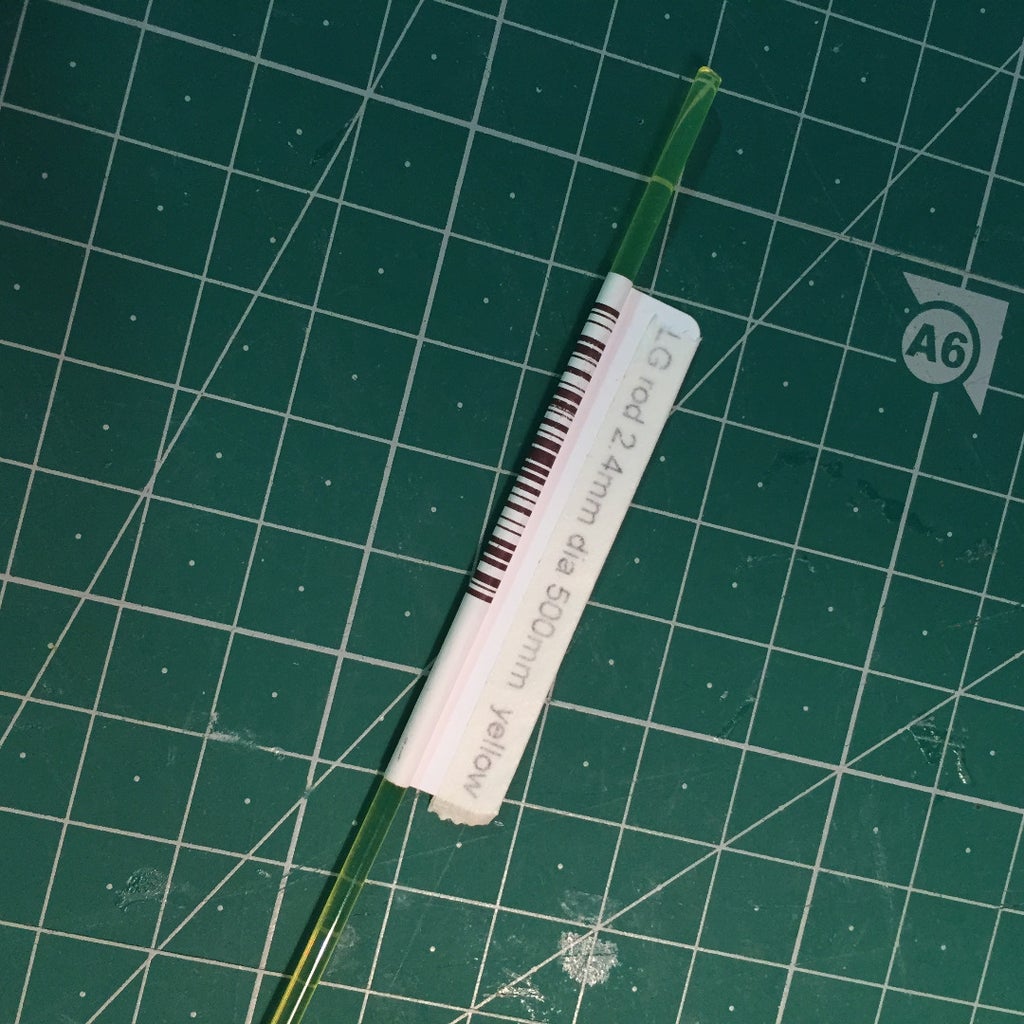
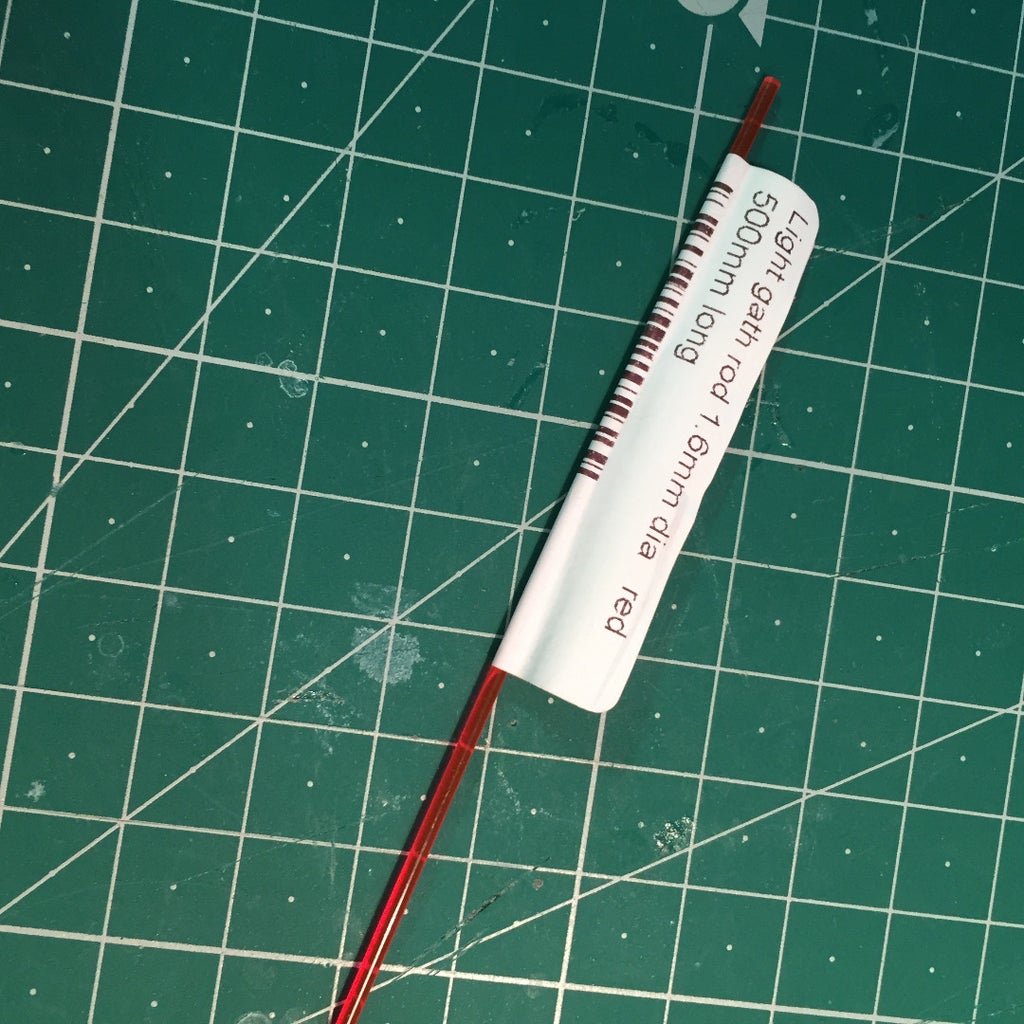
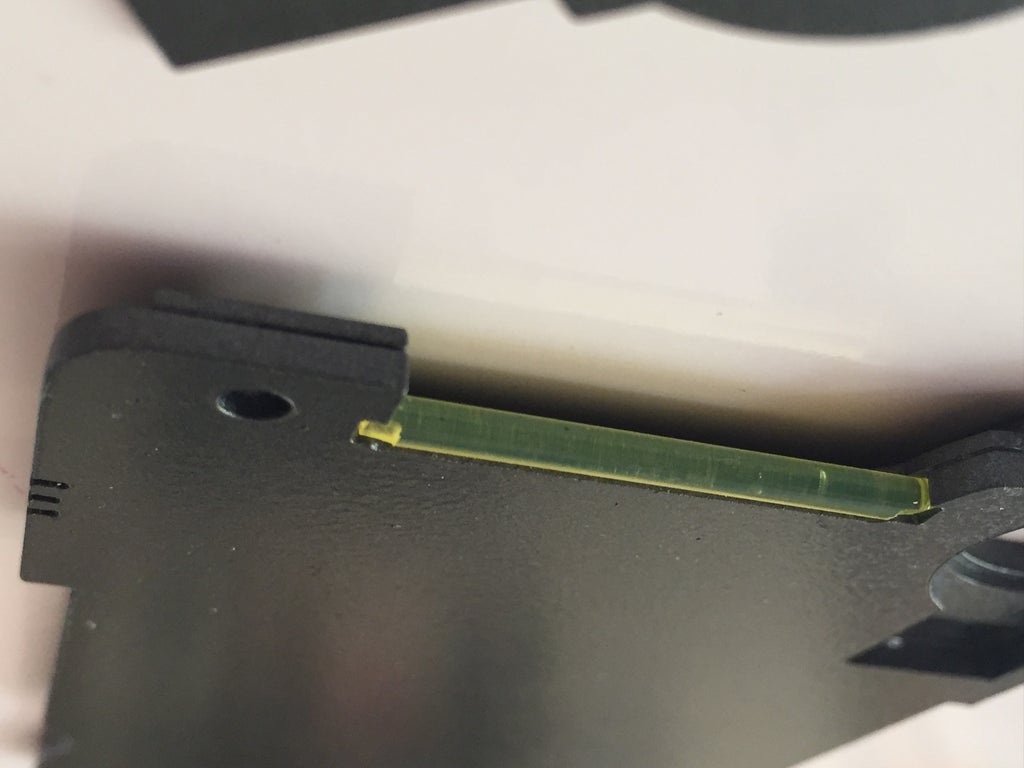
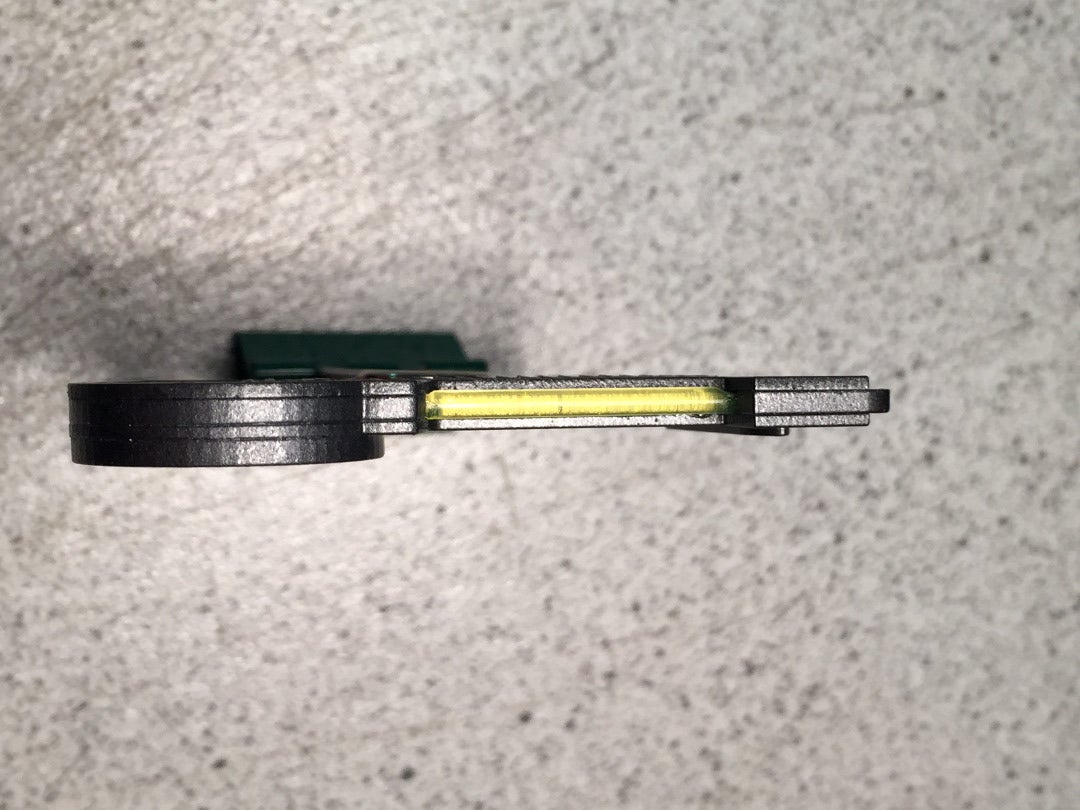
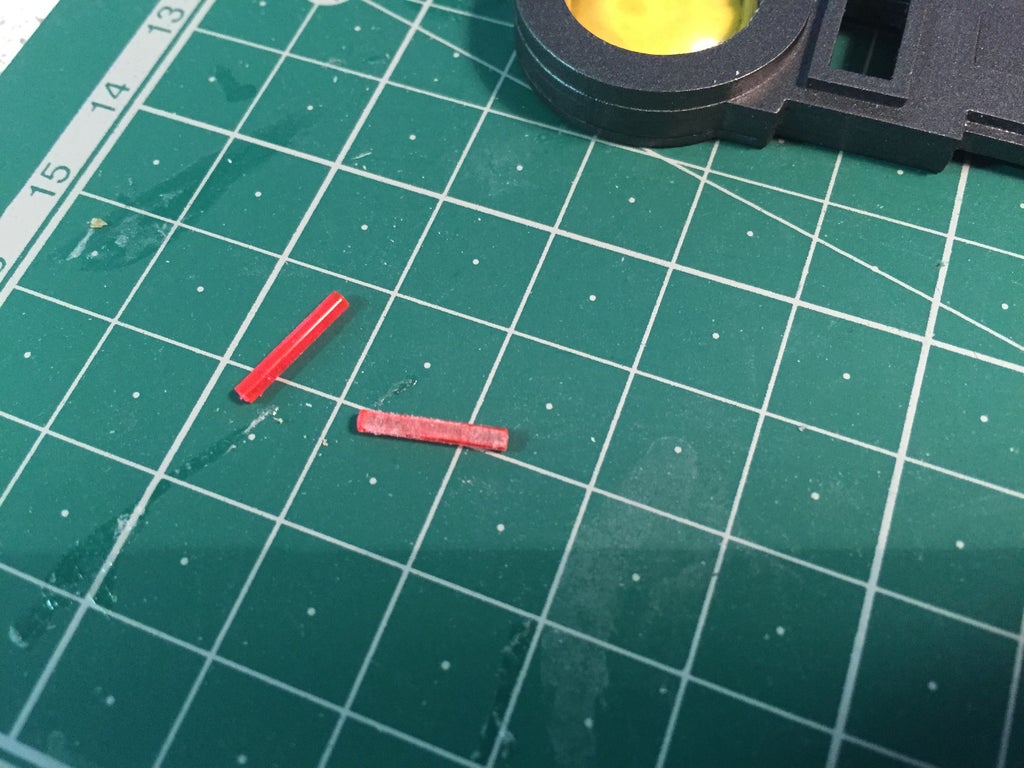
I got some translucent acrylic rods for the fine details and cut them to size.
i cut the red rod to the same length as the hole for the diode and i cut the green/yellow rod to the length of the gap between the button on the chain hole. These parts will need further work before being attached to the final prop.
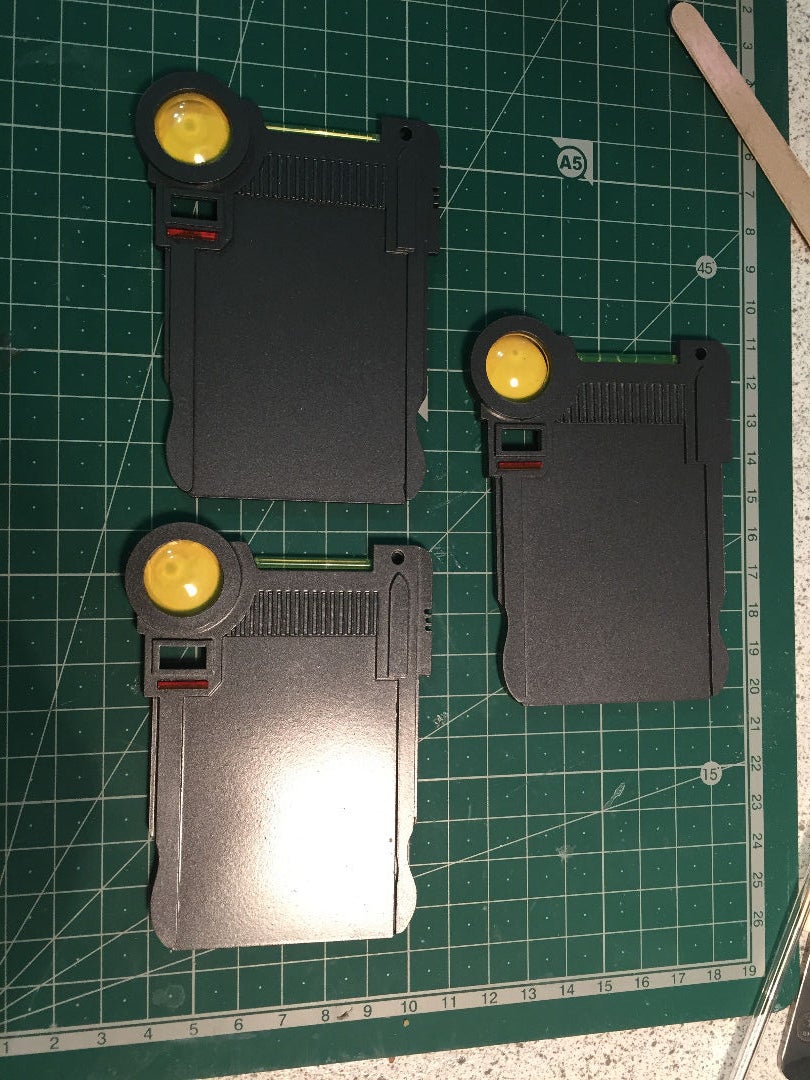
Final paint and final details.
I gave all the parts a coat of dark metallic paint.
The green/yellow rod had to have a notch taken off the end to trim it down to the thickness of the middle layer of plastic (2mm) so the rear face frame can fit correctly.
The small red rod had one side of it sanded to a flat surface so it would be easier to glue it to the main prop.
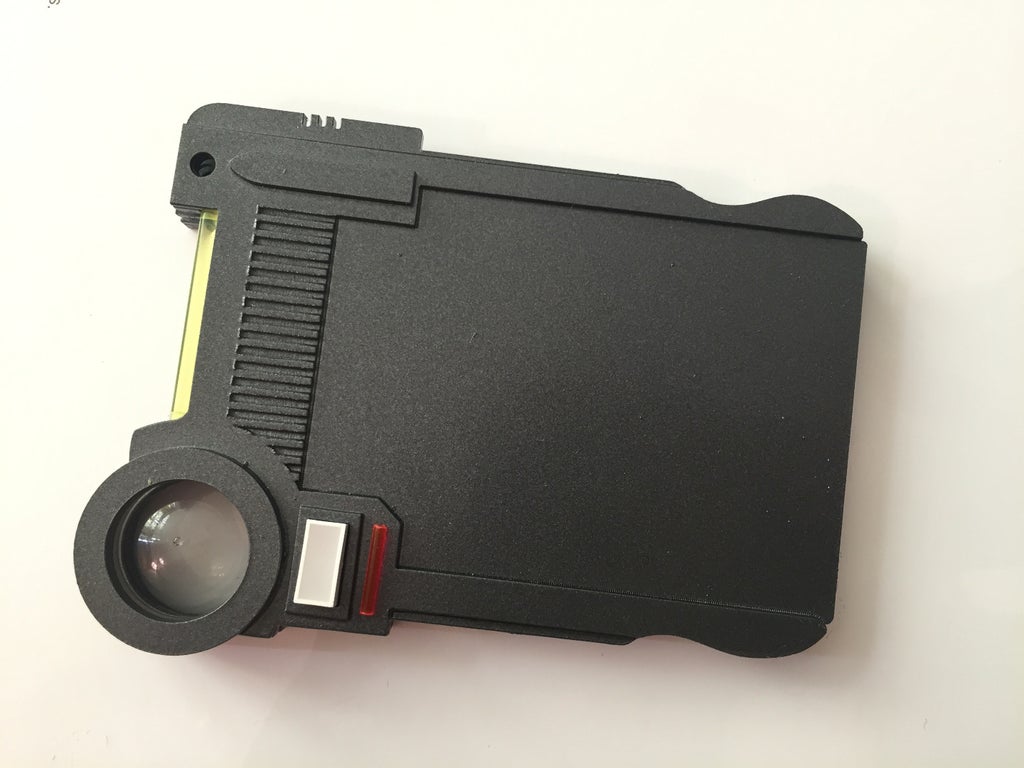
The diode is just inserted into the hole cut for it.
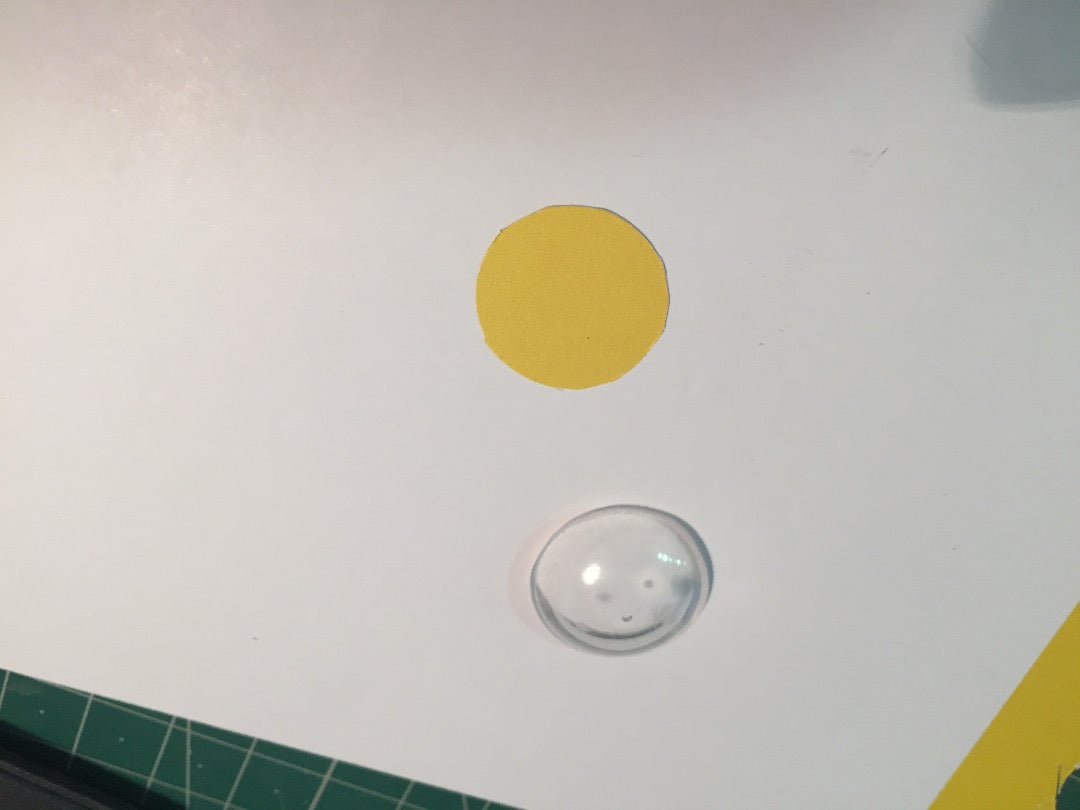
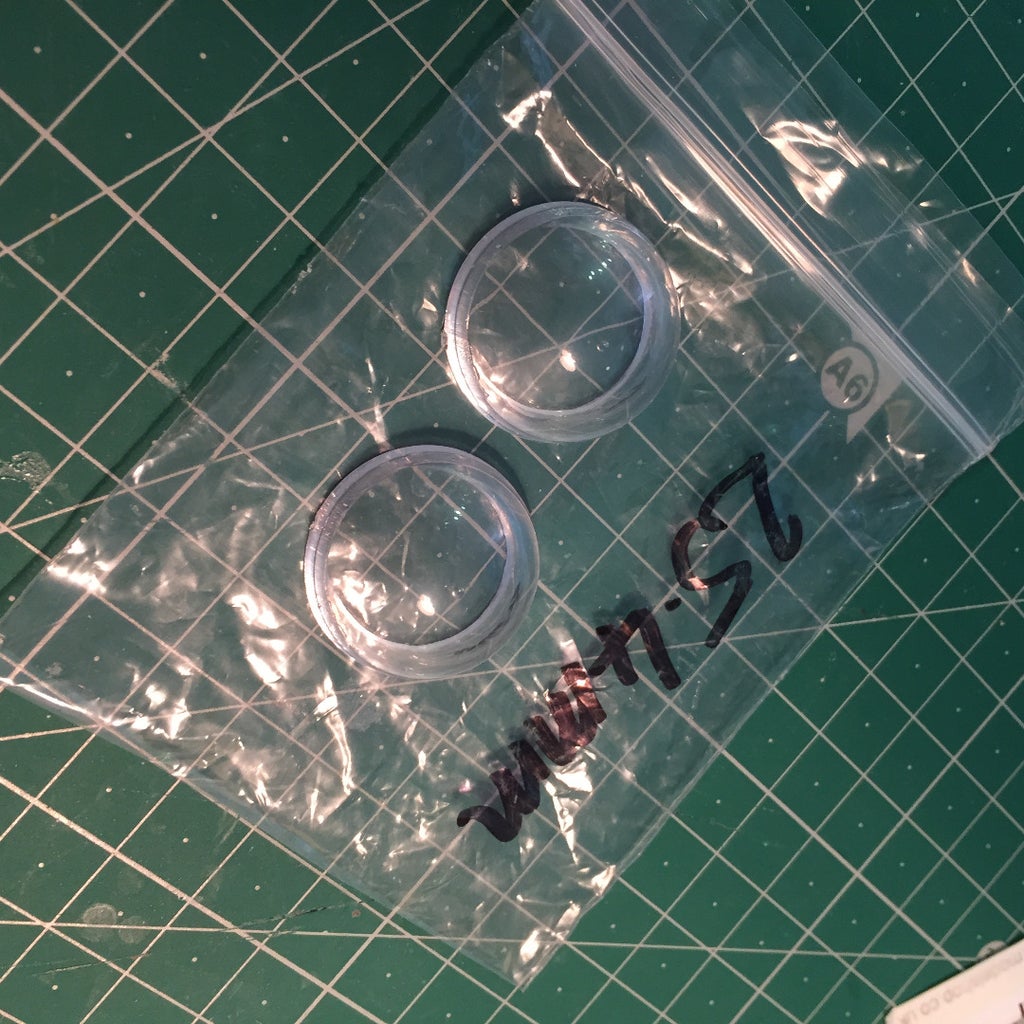
To make the Yellow button i got some 25.4mm domes and sanded them down to fit inside the hole in the multipass.
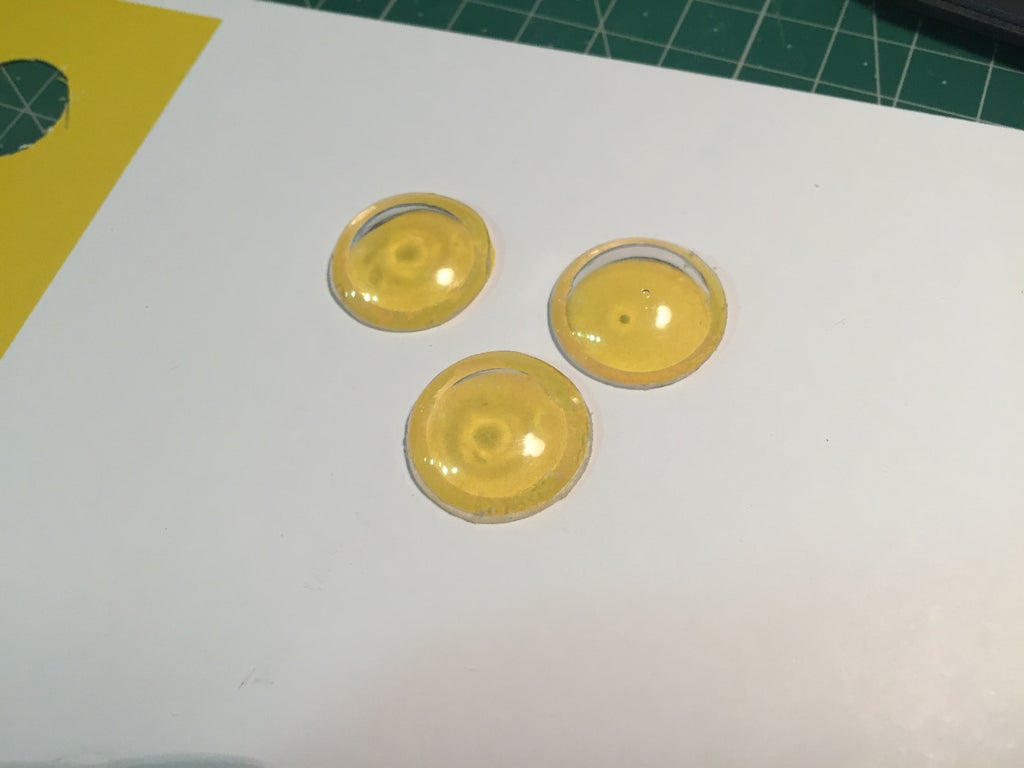
I made many more than i needed as i scratched some and its always good to have some redundancy when making things.
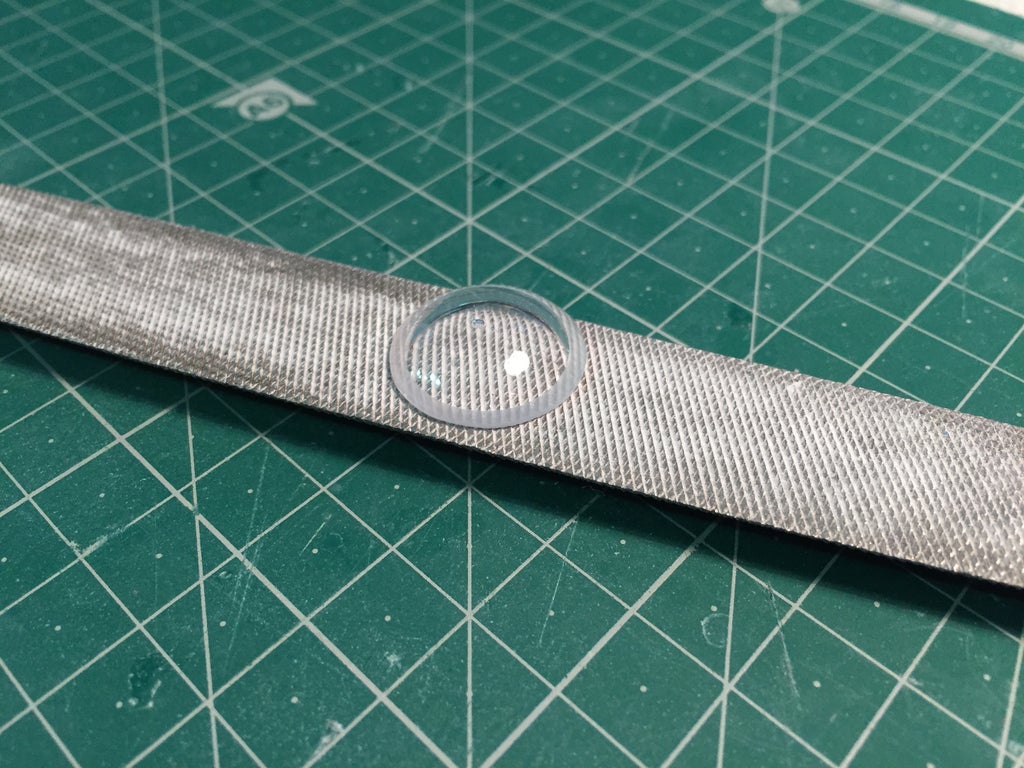
Once i had filed the domes down i printed some yellow off and cut it into circles and glued them to the rear of the filed domes.
These will then be put in the hole for the yellow button (or whatever it is in the film)
I glued the yellow button in so it would not move as i am using the back panel as the activation for the lights.
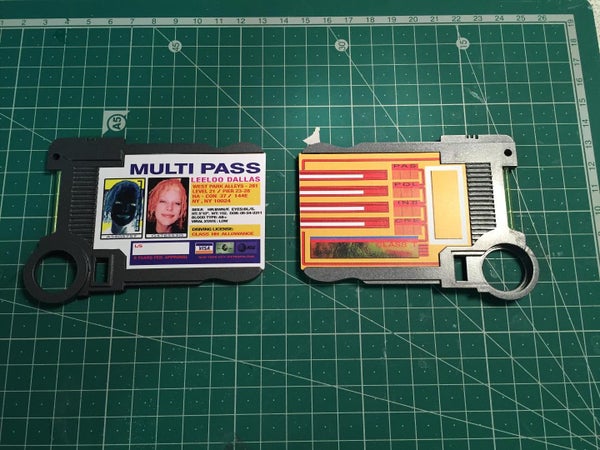
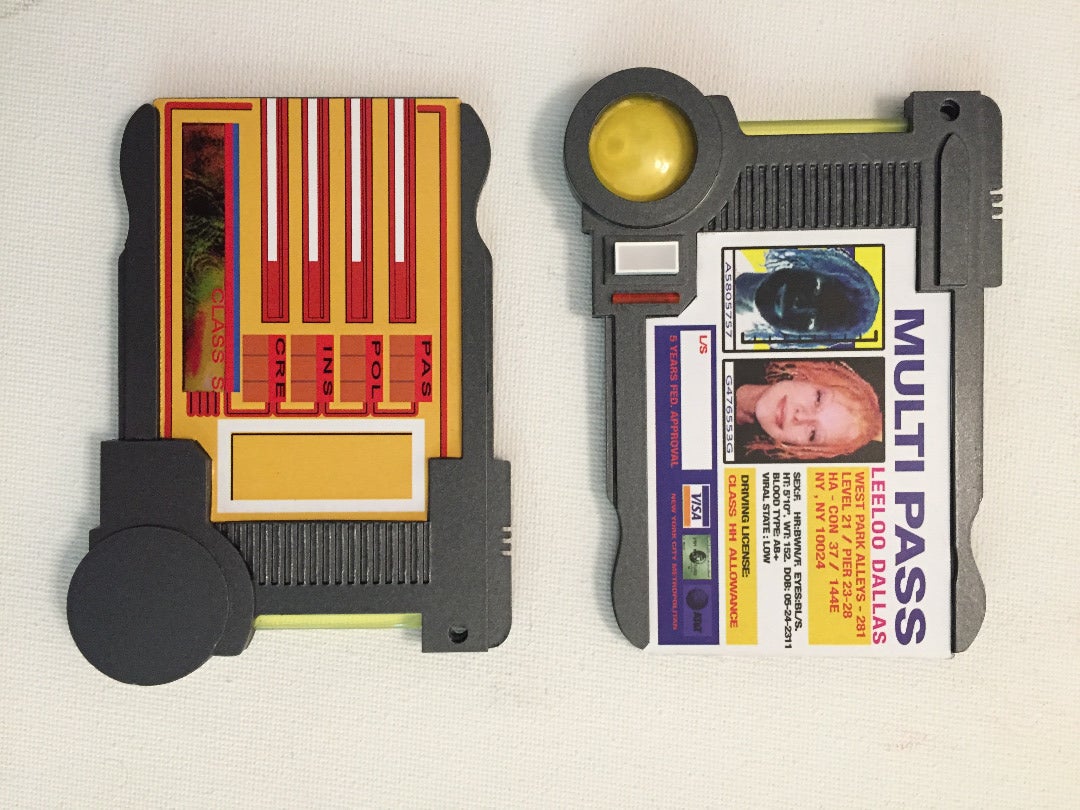
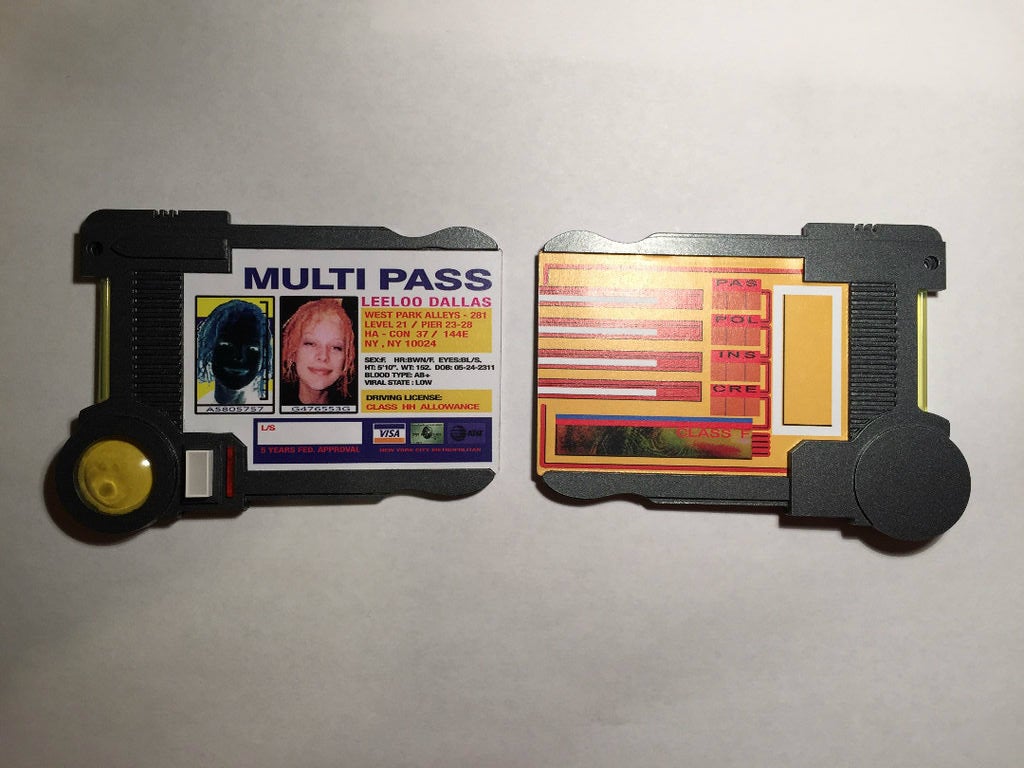
All three of the mulitpasses without the diode or the art work.
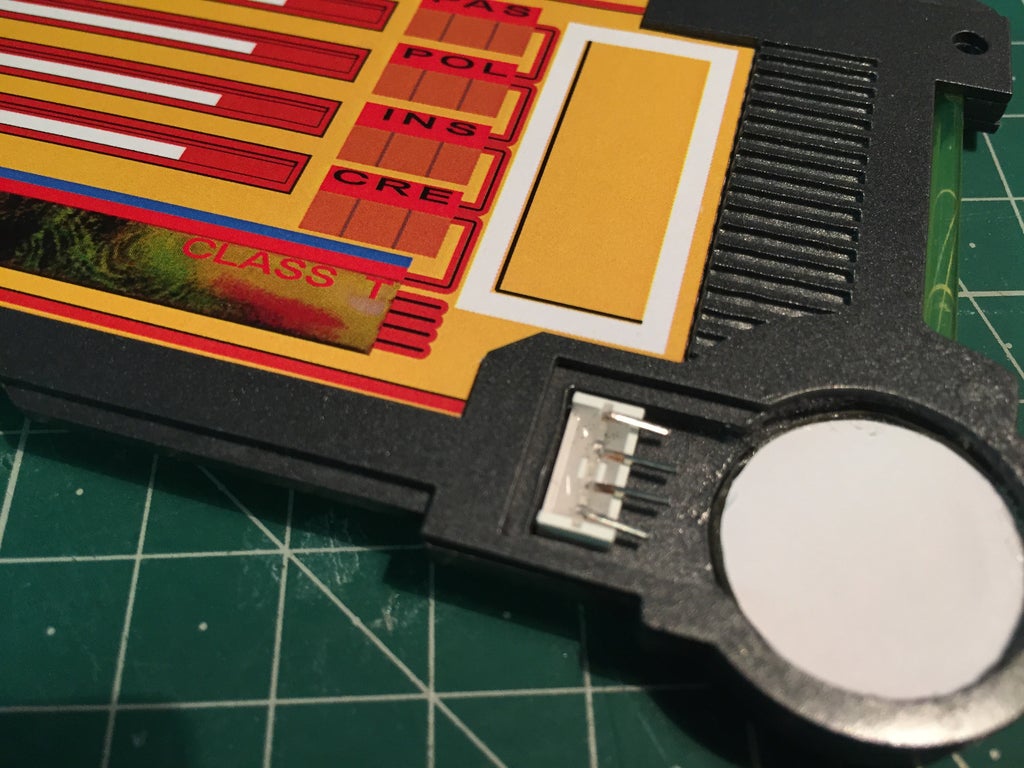
I used spray adhesive to mount the artwork.
Each side was stuck down directly onto the painted prop.
here are the passes with all the parts in place.
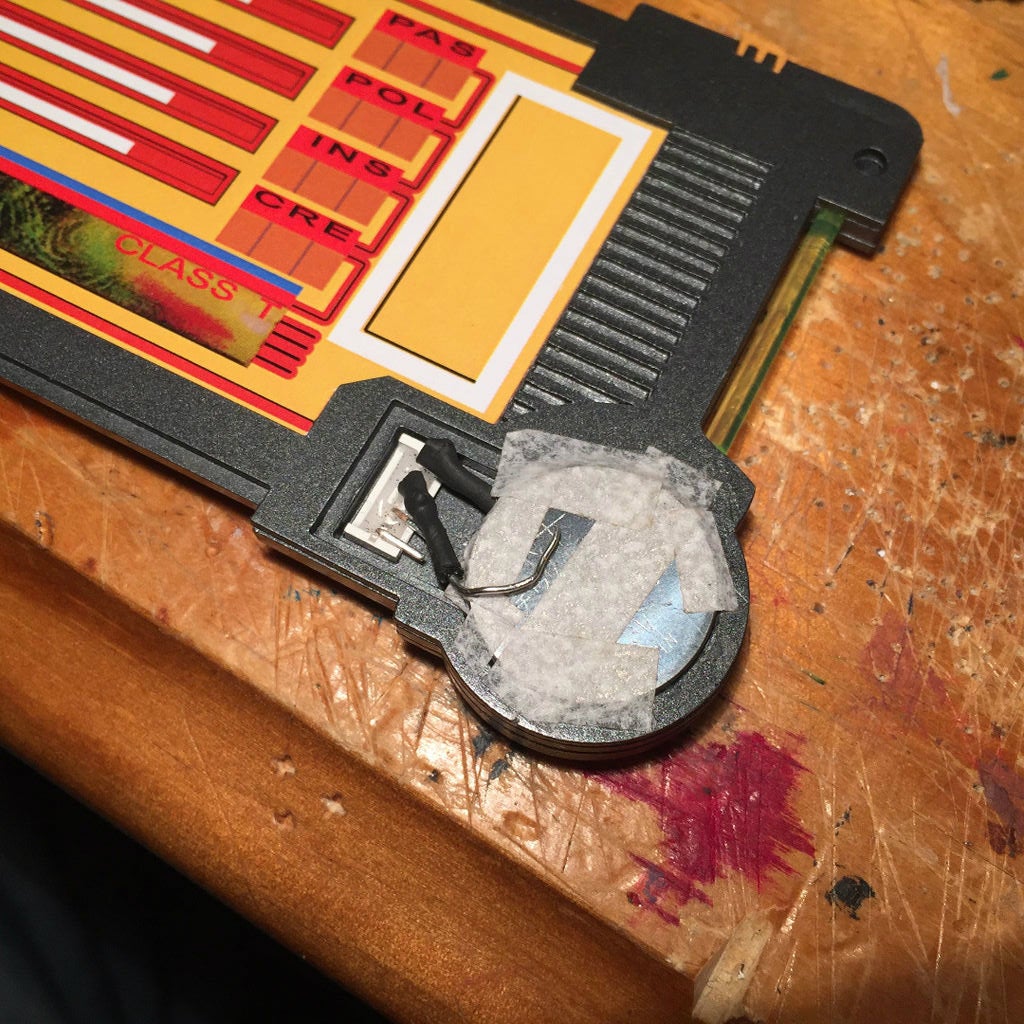
Connecting the diode.
I bent all the wires on the diodes towards the yellow button, this allows for the back to fit and the battery to be connected.
There was very limited space in the back for the battery and a switch, so I just bent the wires that I soldered onto the top LED of the diode (that was more than enough to light it up) the bottom wire was bent so it would always be in contact with the battery, the second wire was bent and taped so it didn't actually make contact with the coin battery.
This is so when the rear of the battery compartment is only glued along one edge it acts as the switch for the battery to light up the diode.
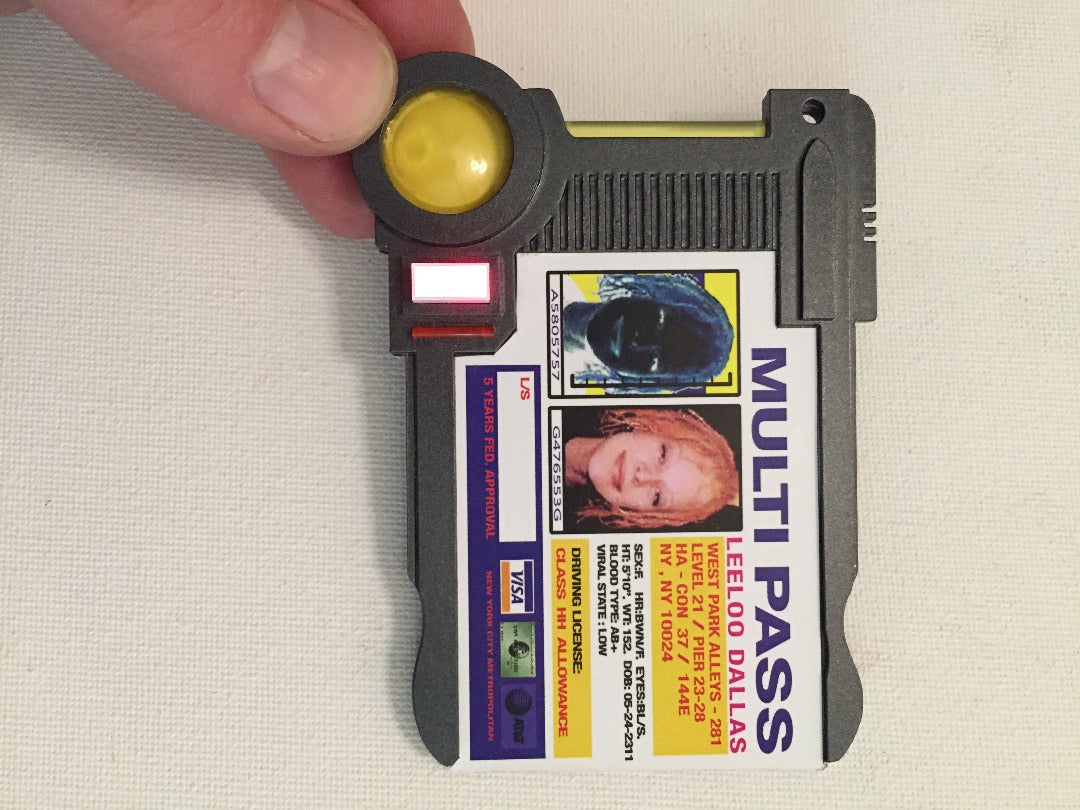
This is only the top LED of the diode lit up so it is more than enough to light the whole thing up. :)
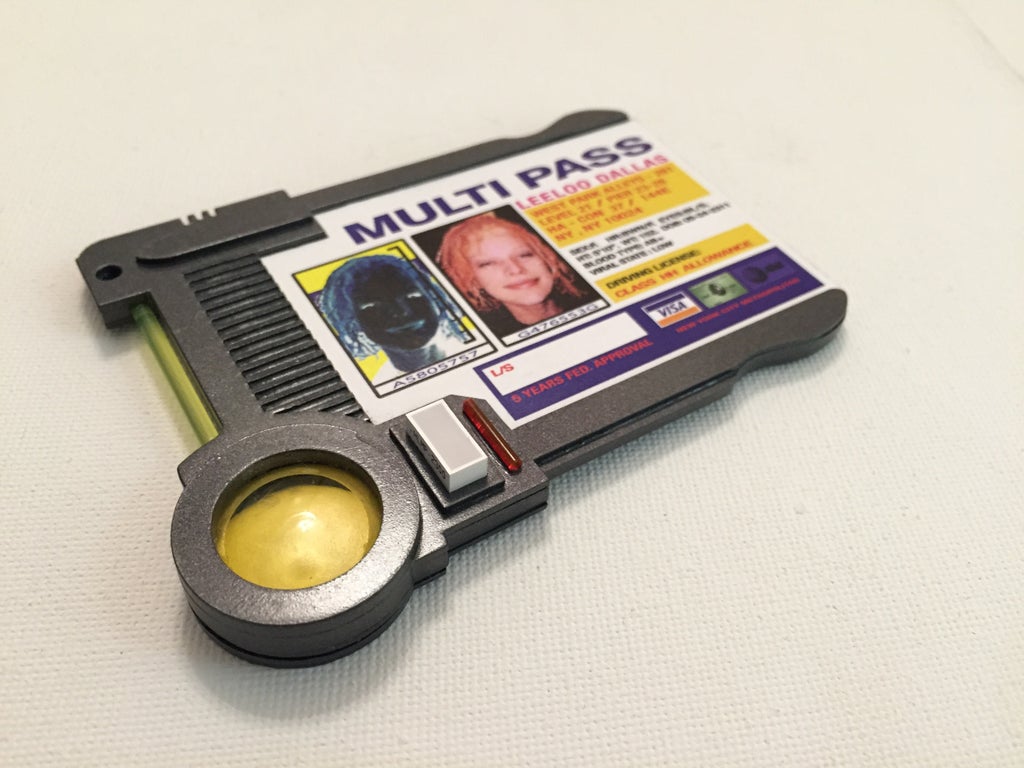
once you have done all of the above you will have a cool looking MULTIPASS.
The final touch will be adding a Ball Bearing Chain through the chain Hole, then you will have an awesome looking prop from the movie :)
Thank you for looking and if you have any questions please ask and i will do my best to answer them.


