
Hi there, this is my first blog post.
This prop was created for a Halloween party in 2011.
I was having problems deciding what to go as, all i knew was i wanted to make something. (and to be geeky)
I came to the conclusion that i would make a portal gun. ( i had just finished my second play through of both portal 1 and 2)
so here goes.
i started with a little research, looking at as many in game shots and screen grabs and promotion shots as i could.
after a few hours googleing i found this blue print Portal Gun Drawing by bevbor on flickr. it was just what i needed.
i set to work.

Using the files i found i started to rough carve out the shell shape in some blue insulation foam.

50/50.
Half of it has been carved and slightly sanded and the other half has just been carved.
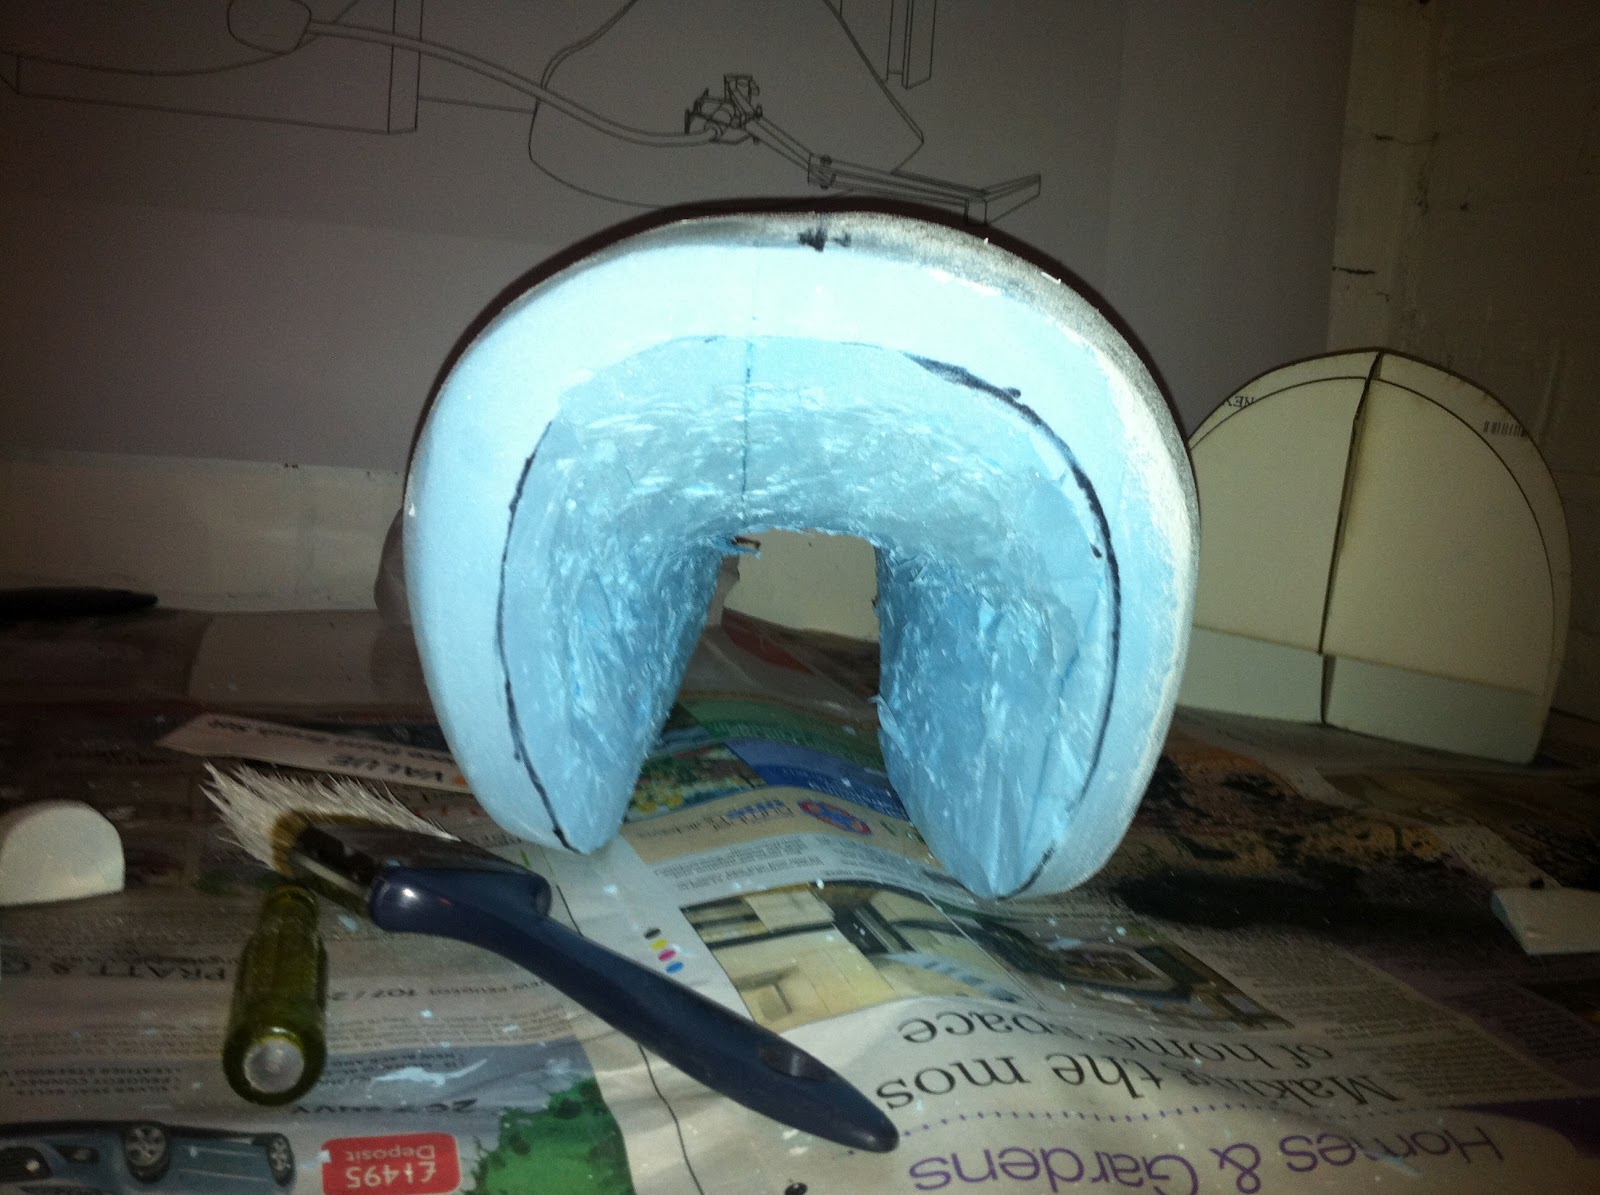
I then began to carve out the centre of the shells to hold the gun barrel.
I did the same for the front shell. i just forgot to photograph it.

Once i had carved out the shape of the shell and the top light hole i painted the whole thing with white emulsion to seal the insulation foam from the filler and paint that would be used next.
I put the shells to one side and began work on the barrel of the gun.

I acquired two pvc pipes from a builder friend of mine, he also got me a pvc coupler that will act as a handle and house the electronics of the gun.

Using the plans i traced out the outline of the cut out on the larger tube and cut it out.
then i placed the smaller tube inside, using some Acrylic rings with an outer diameter of the inside of the large tube and an inner diameter of the outside of the smaller tube. this was to keep it centred in the main tube.
I made sure to leave enough if the smaller tube sticking out of the front of the large tube to create the front barrel.
Then i traced through the hole in the large barrel onto the smaller one and cut it out.
Then i used a car body filler to fill the gap between the two tubes.
once it had cured i sanded and filed it down then i carved out the vent indents in the front of the barrel below the to claw. (again i forgot to take photos of this step.)

Here the shells and the barrel have been sprayed with primer and sanded then filled and are about to be sanded again. i did this until the shells and barrel were smooth and free from dents.
above the carved vents i cut a hole in the pipe and inserted a small mounting point for the claws.

I made the three claws using the plans and sprayed them a matte black.

In this picture you can see the mounting point in the top of the pipe.
I made three of them, two to go in the front shell and the other where it is now.

I did a test fit of the shells and the front claws.

I made three rings for the front barrel two of the same size and one slightly thicker by roughly 3mm
I filed down one of the small ones and the large one.
The larger one had one edge filed down to meet the same size of the smaller ones, and one of the smaller ones was filed down in the same manner.
The larger one had one edge filed down to meet the same size of the smaller ones, and one of the smaller ones was filed down in the same manner.

The three rings were then glued at equal spaces on the fron of the small tube at the fron of the barrel assembly.
 Once all the glue had set and the imperfections were sanded out i sprayed the whole assembly matte black.


for the light chamber of the gun i needed something to hold the central light bar and o didn't want to create something so i found some paper spool ends from a large format plotter at work. i sprayed them black as they were white.


After being sanded and filed until smooth i gave the shells a coat white spray.

for the lighting i used two bright LEDs or red and two of blue and wired them up to a three way switch. top position on the switch was red middle off and bottom is blue. i mounted it into an acrylic four holed mount i made that is the same size as the solid acrylic bar that im using as a diffuser.
the diffuser sits inside the two paper spools and they all go into another clear acrylic tube. then the whole lighting rig goes into the barrel.

i had to make sure that the paper spools are in the correct position so they arent inside the opening of the barrel..

There were still some irregularities in the back shell so i gave it a skim of filler and sanded it again.

Once the white paint had dried i added the two front claw mounting points into the front shell by drilling them out and gluing in the mount points. Then sprayed it all white.

I then stuck on the cable ports. these are made in the same way the shells are made. carved from foam then painted and filled and sanded. these will be where the three cables that connect to the claws will come out from .

i started by attaching the front shell the barrel of the gun first. i used epoxy glue to hold these parts together.
the claws are in place here just to see what it would look like.
the claws are in place here just to see what it would look like.

The painted shells had decal stickers put on to make it look like the game.
the front shell had two holes drilled into it to hold the wires from the rear shell.
the front shell had two holes drilled into it to hold the wires from the rear shell.

once the front shell was set in place the wires were glued into the holes.

i took another length of the solid bar that was used as the diffuser and added it to the top hole of the rear shell and made sure it lined up with the LEDs below to create the top light.
i drilled into the wire emitter ports on the shell and glued in the wires and bent them into shape.
i drilled into the wire emitter ports on the shell and glued in the wires and bent them into shape.

in the front of the barrel i added a aperture shaped frame on a wire mesh back by a clear disc to hide the diffuser end and to make looking down the barrel more interesting.

when it was all in place and had dried i had my finished portal gun.
No comments:
Post a Comment