As some of you reading this might know, I'm a little bit fond of the film franchise Star Wars.
I love the toys that were produced for the original films and have
collected them i recent years (after my childhood collection went as
dust to the wind in many house moves) i have been collecting the
original figures, I'm not too bothered about the condition as long as
they aren't broken in some way.
I have made
a display case for the little fellas, I had the
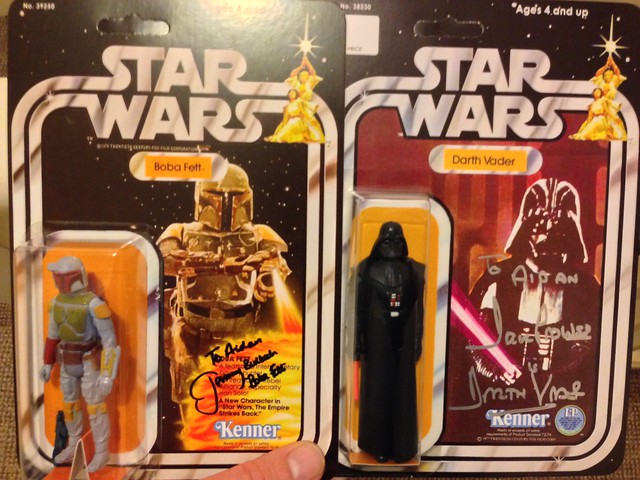
pleasure to meet David Prowse and Jeremy Bulloch last year, knowing i
was going to meet them i wanted to get something unique for them to sign
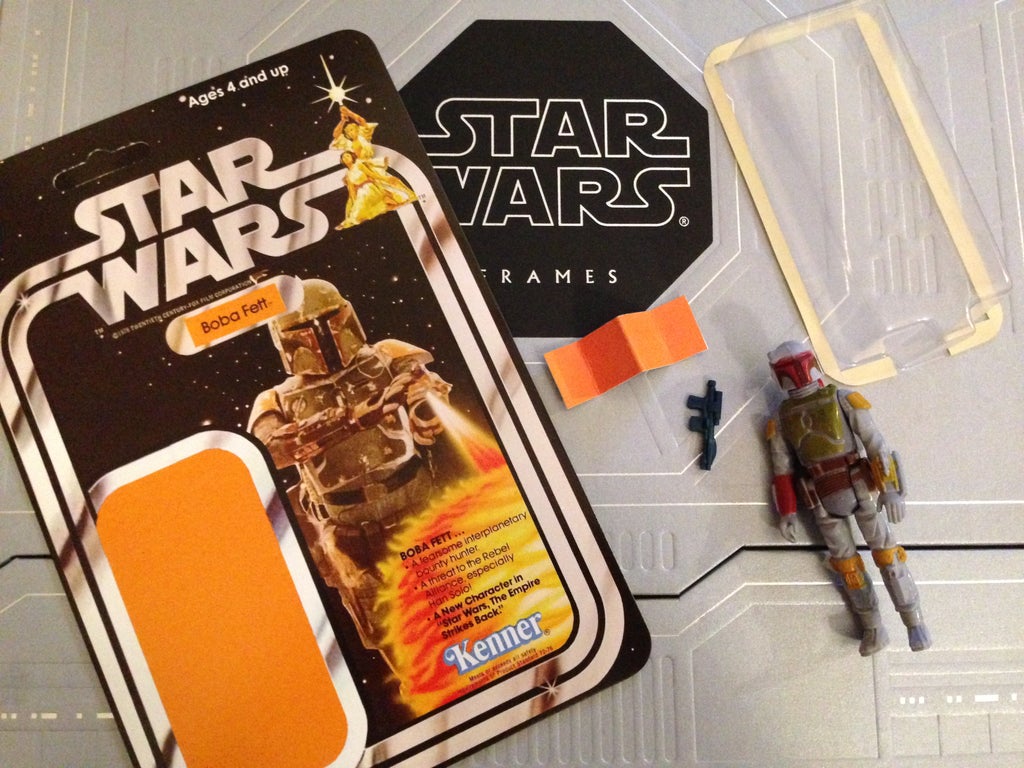
for my collection so i looked into Re-carding my vintage Darth Vader
and Boba Fett figures. and doing so
with the re-card kit i thought it would be fun to make some custom
figures from the films using similar techniques.
Re-carding Boba fett.
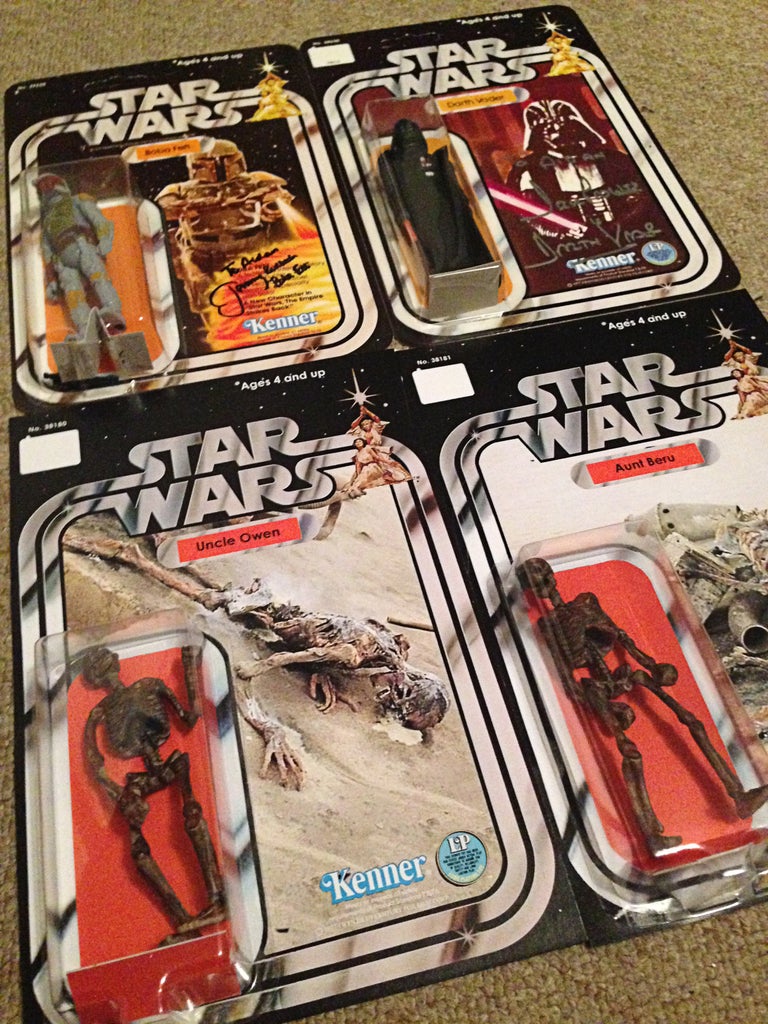
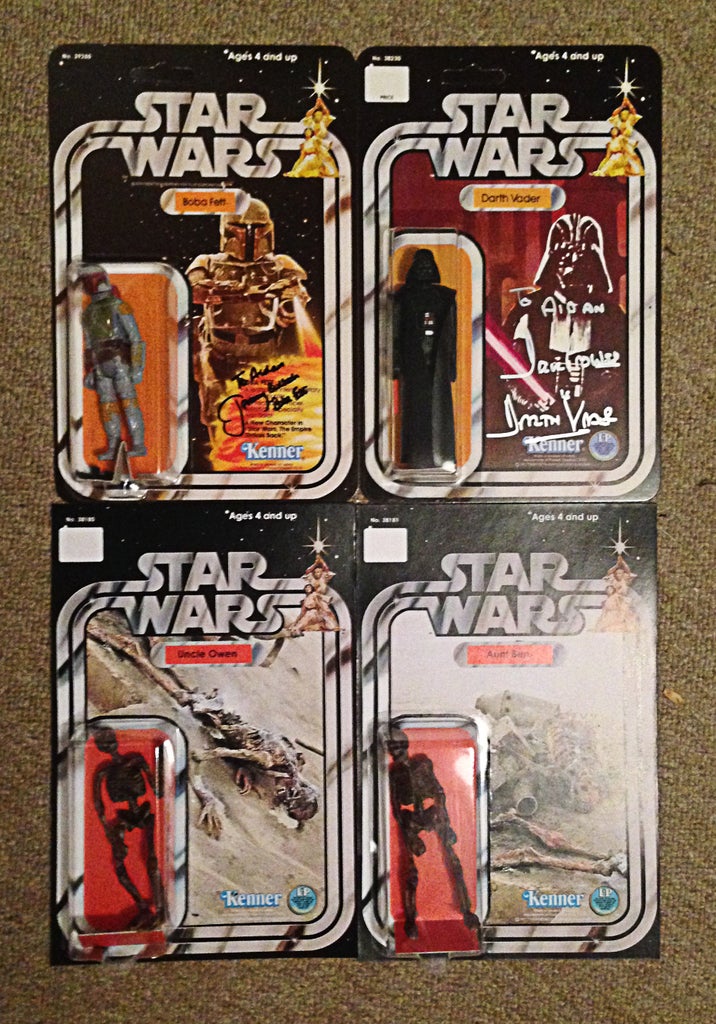
Re-carded Original kenner figures signed by Jeremy Bulloch and David Prowse.
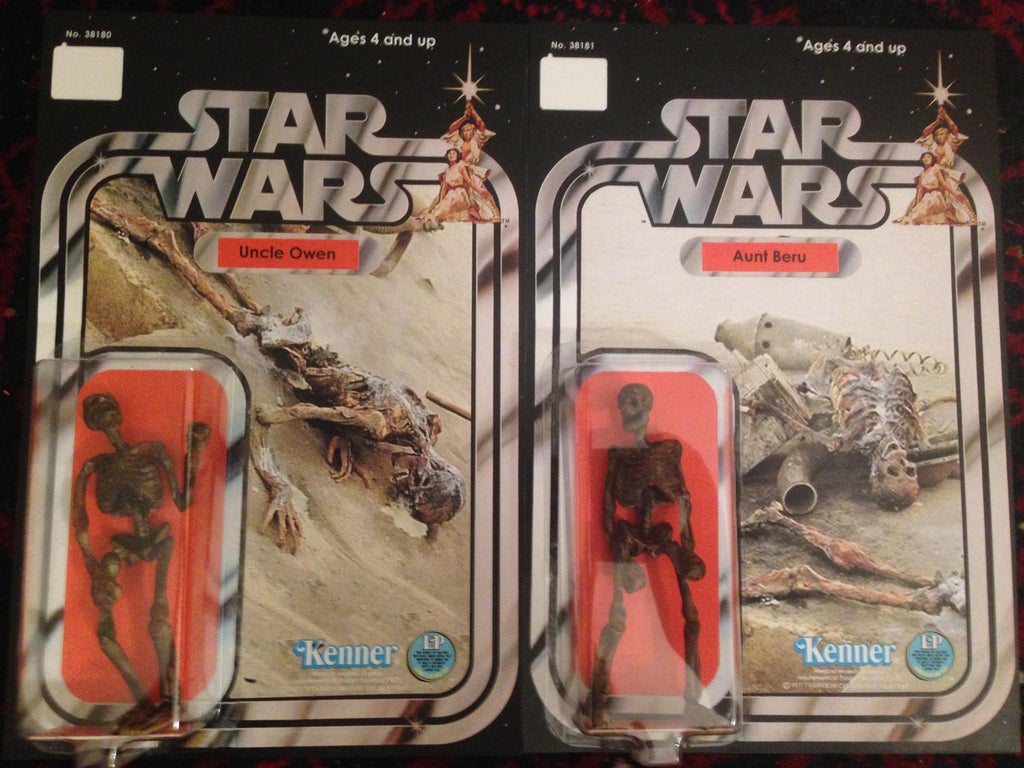
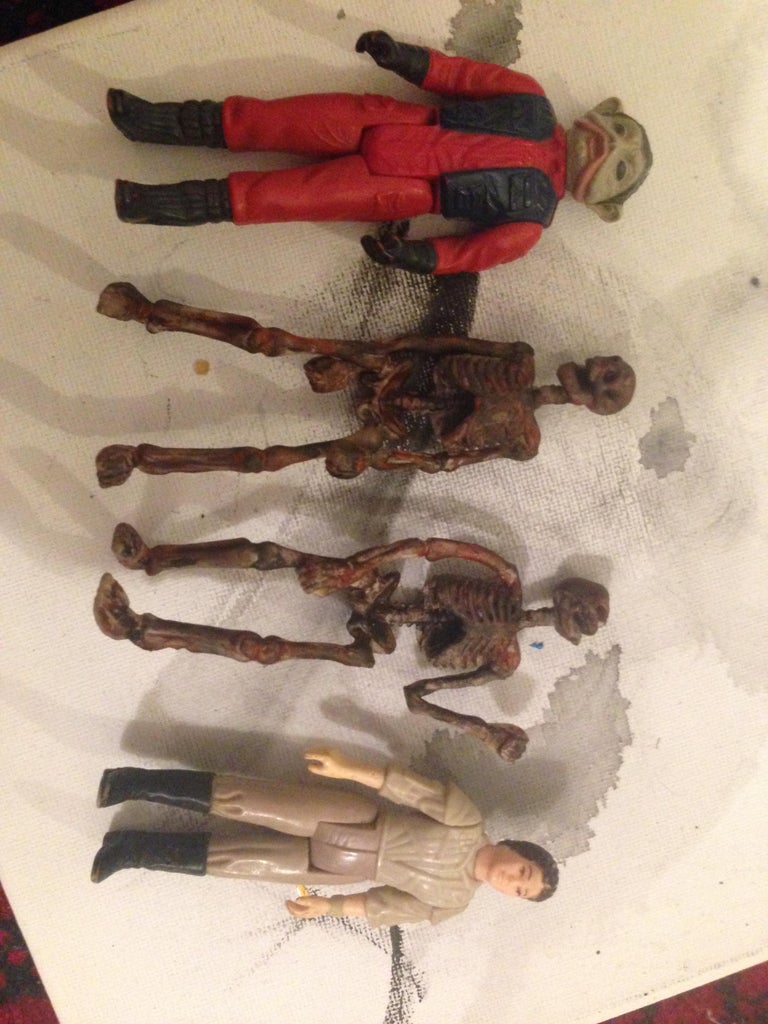
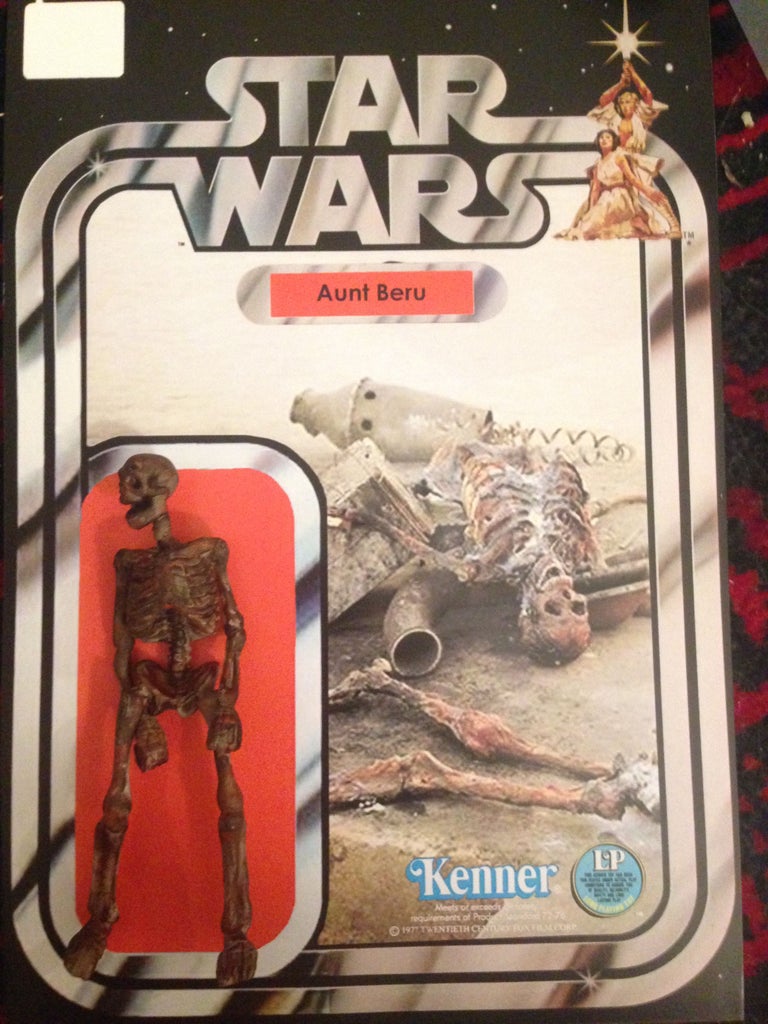
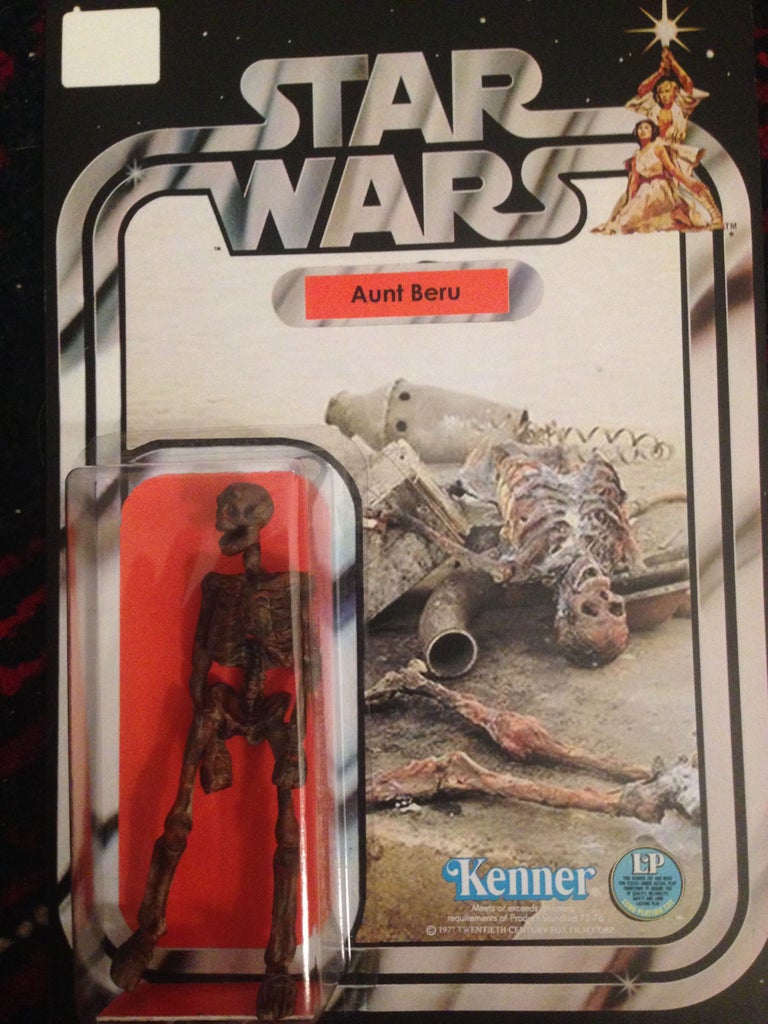
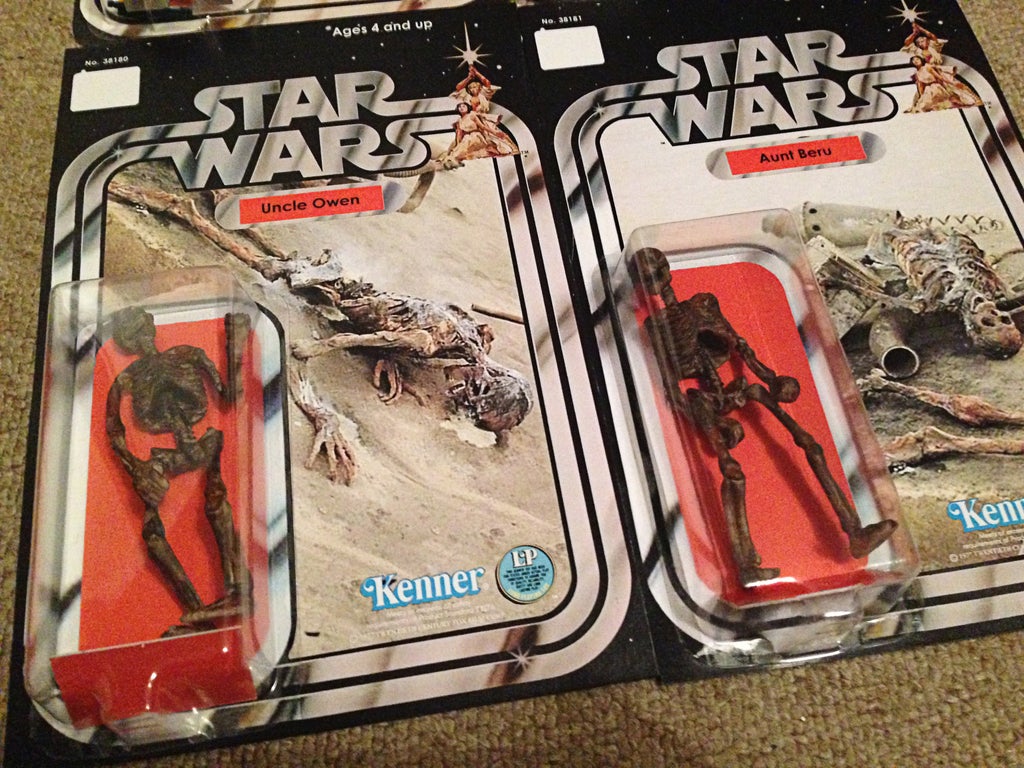
Custom made Lars figures.
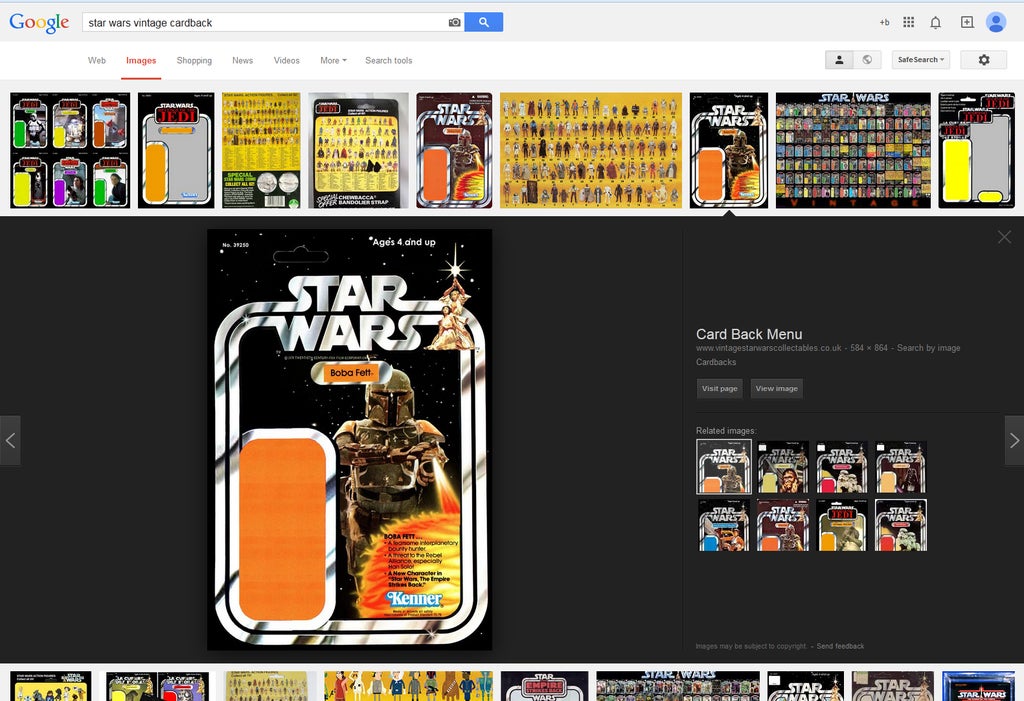
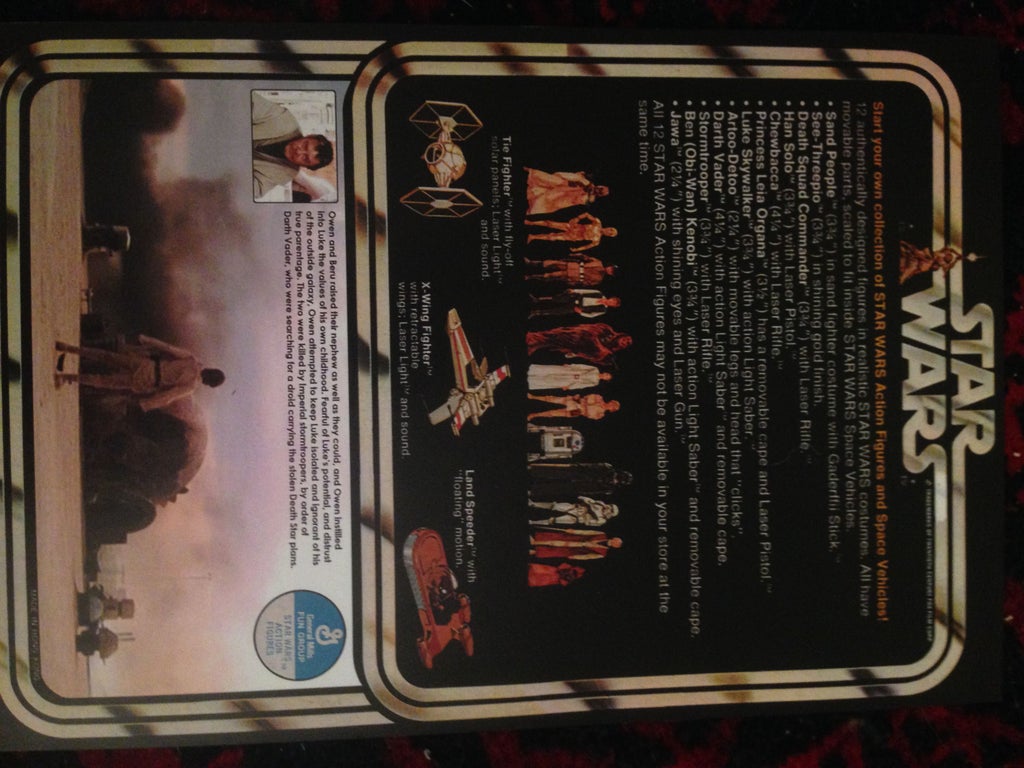
The first step i took was to do some googling of card backs to make the custom ones as authentic looking as possible.
I found the highest quality images on the googles.
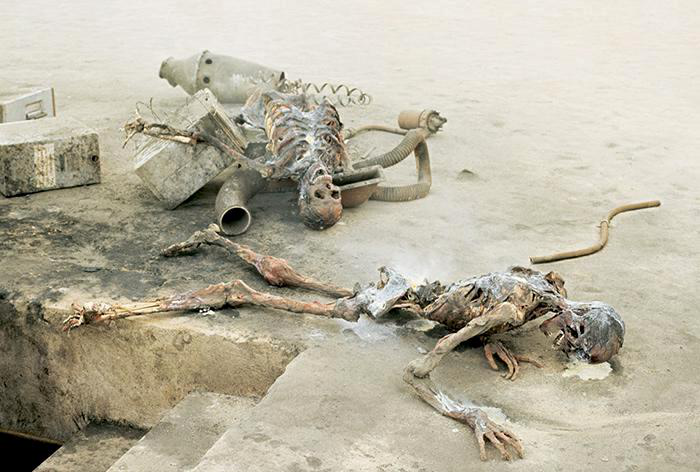
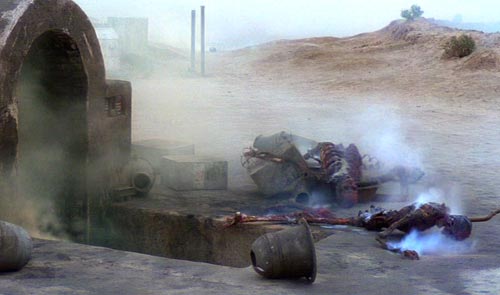
I also searched for screen grabs of the scene when luck comes back to the Lars homestead to see the burning skeletons.
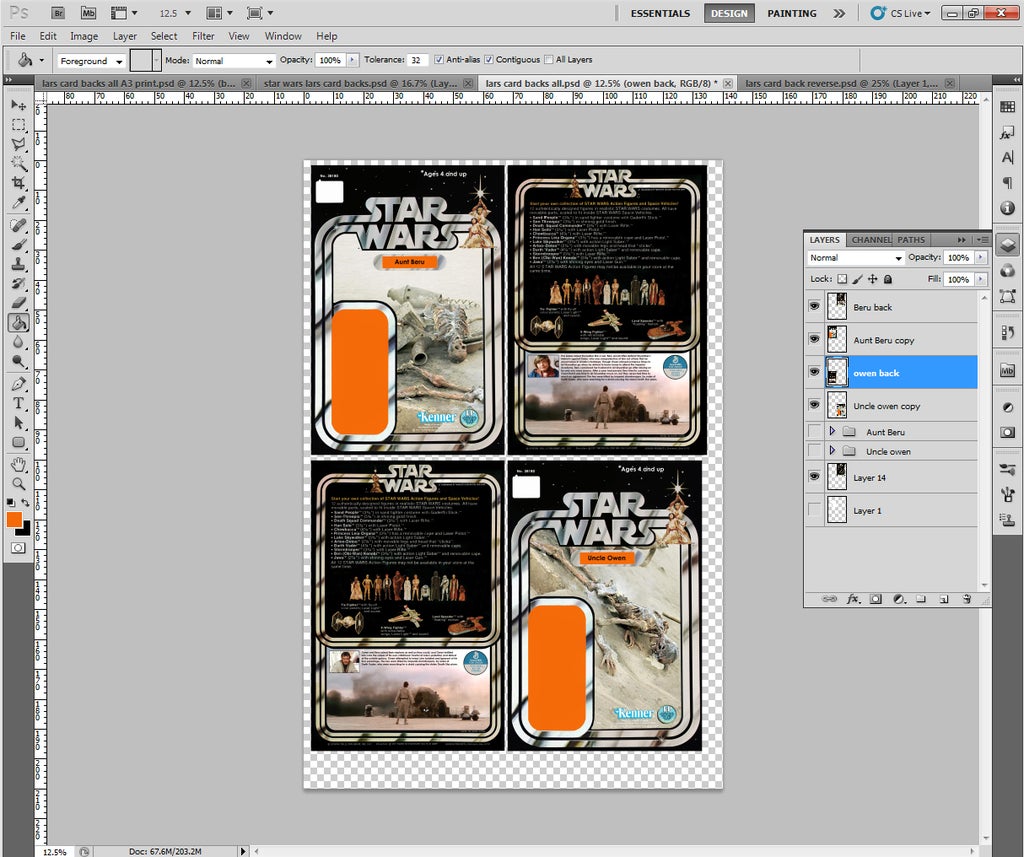
In Photoshop i removed the original character from the card backs and replaced it with one of the two skeletons, and on the back of the card i replaced the bottom half with a screen grab and a little bio of Uncle Owen and Aunt Beru from Wookipedia.
i printed the images out onto some high quality medium gloss paper. I gave each of the images a large bleed and very faint markings so if i misaligned them when sticking them to the card it wouldn't be so noticeable.
After printing them i glued them to some thin Card, i started with the back side of the cards and then cut it out and aligned the front half and stuck it down, then i trimmed all the excess paper away from the card.
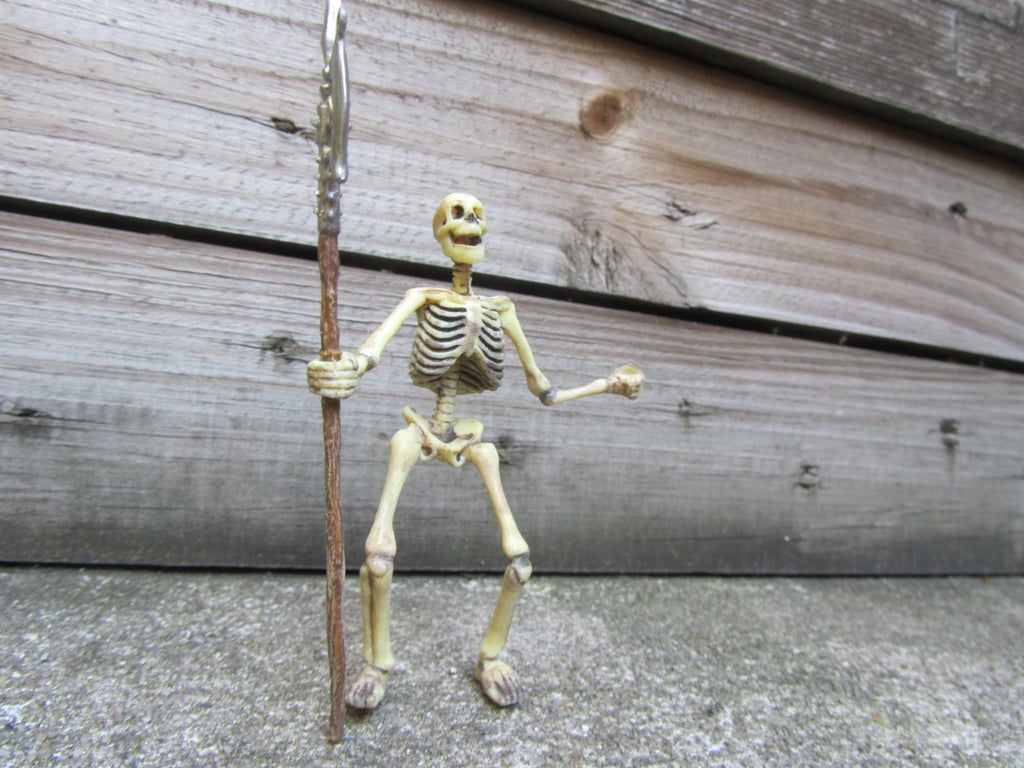
To make the figures i purchased two "fantasy skeletons" from a local toy shop. These figures are great as they are almost exactly the same size as the vintage kenner figures.
The axe/spear they hold is easily removed just by pulling it out of his hands, im pretty sure they are designed to hold a large variety of weapons.
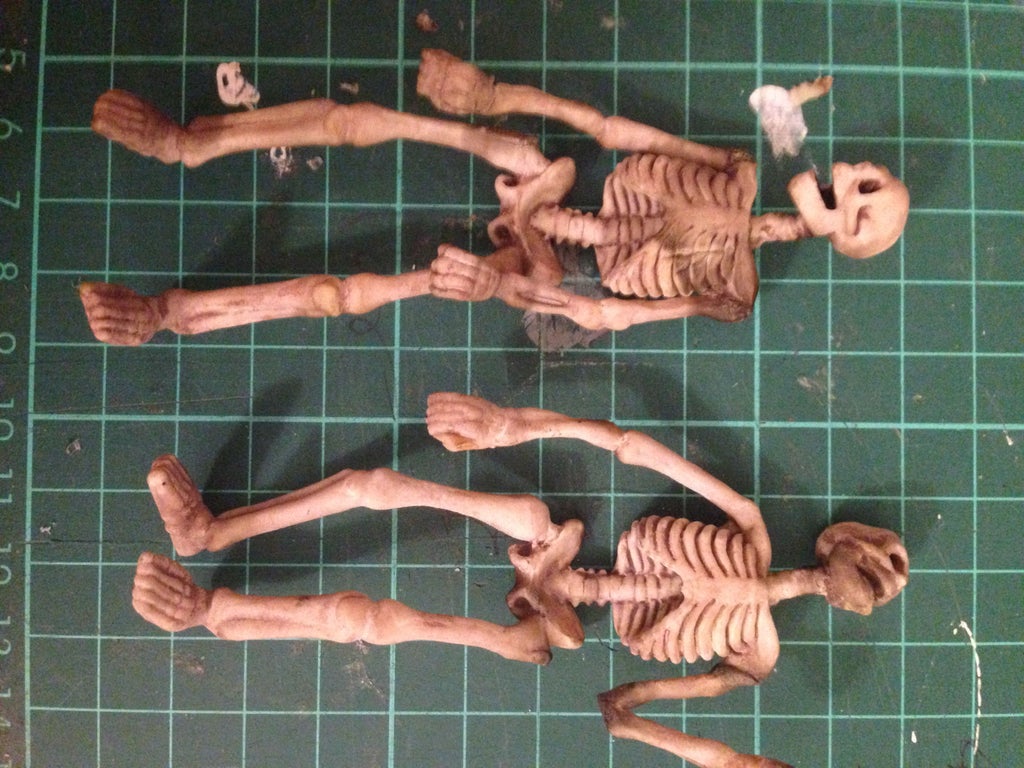
using a lighter and a knife i heated, bent , cut and glued the skeletons into shape to make them look less like the fighting stance they came in.
The singeing and melting of the plastic from the lighter doesn't matter as I'm going to paint them anyway.
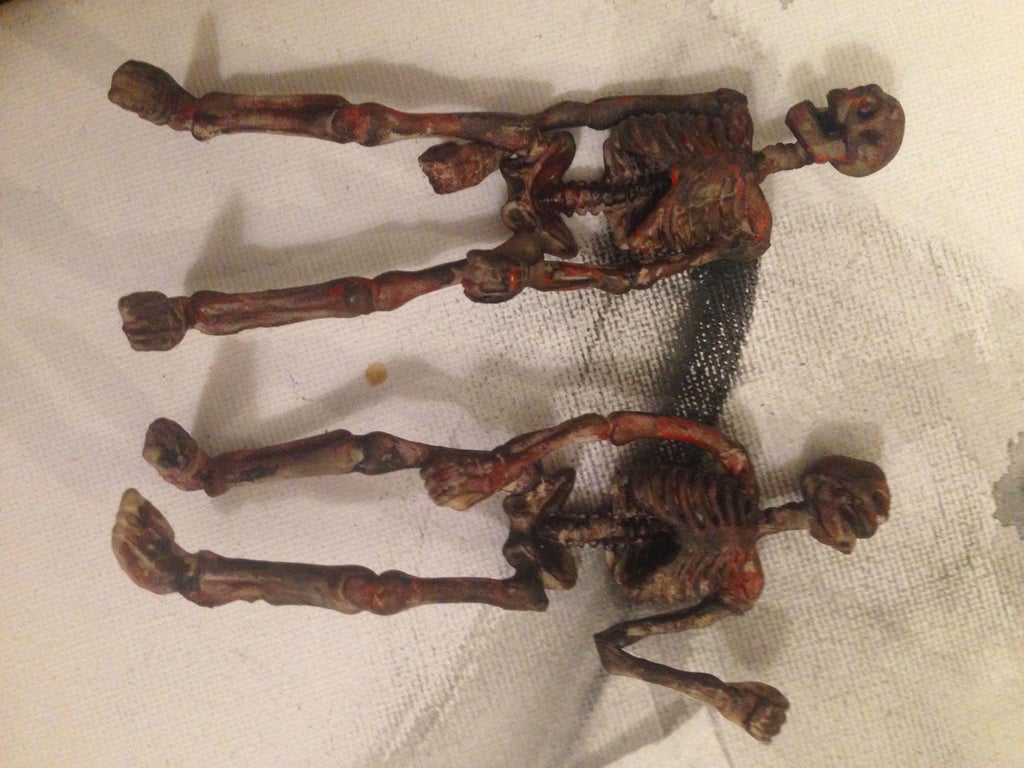
Once the glue had dried and the plastic had cooled i used acrylic paint to darken the skeletons down to make them look like they had been burned by some evil stormtroopers. once the layers of brown and dark red paint had dried i gave it a little coat of bright red to make them look a little bloody.
The figures are almost exactly the same size as the original kenner toys.
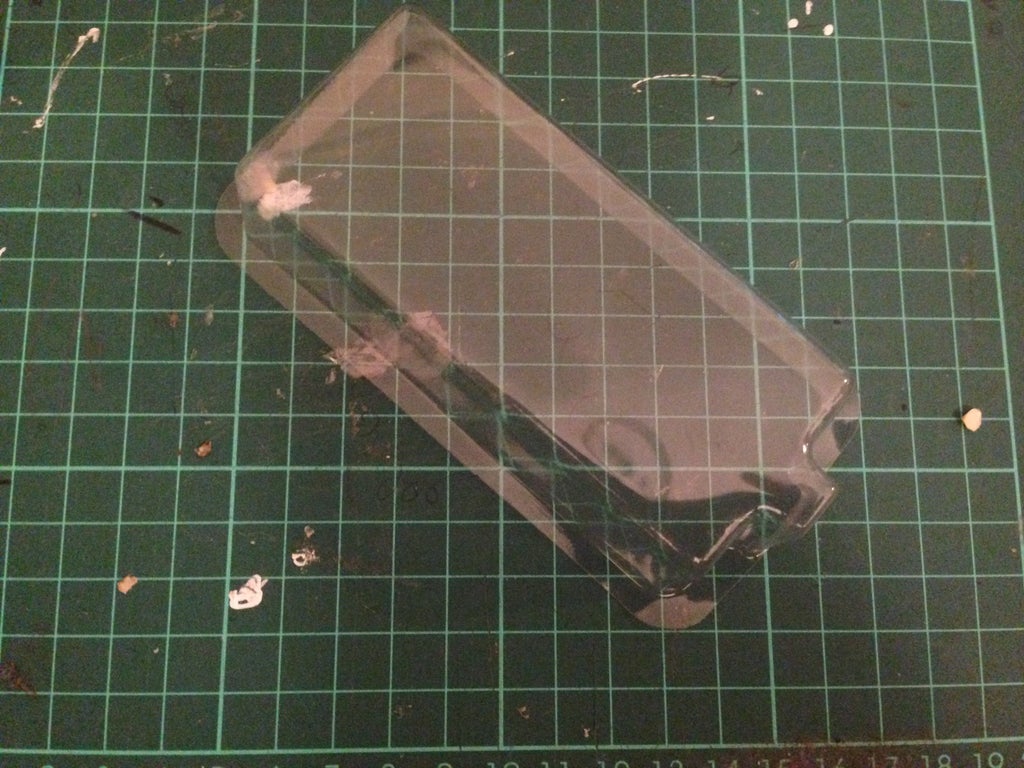
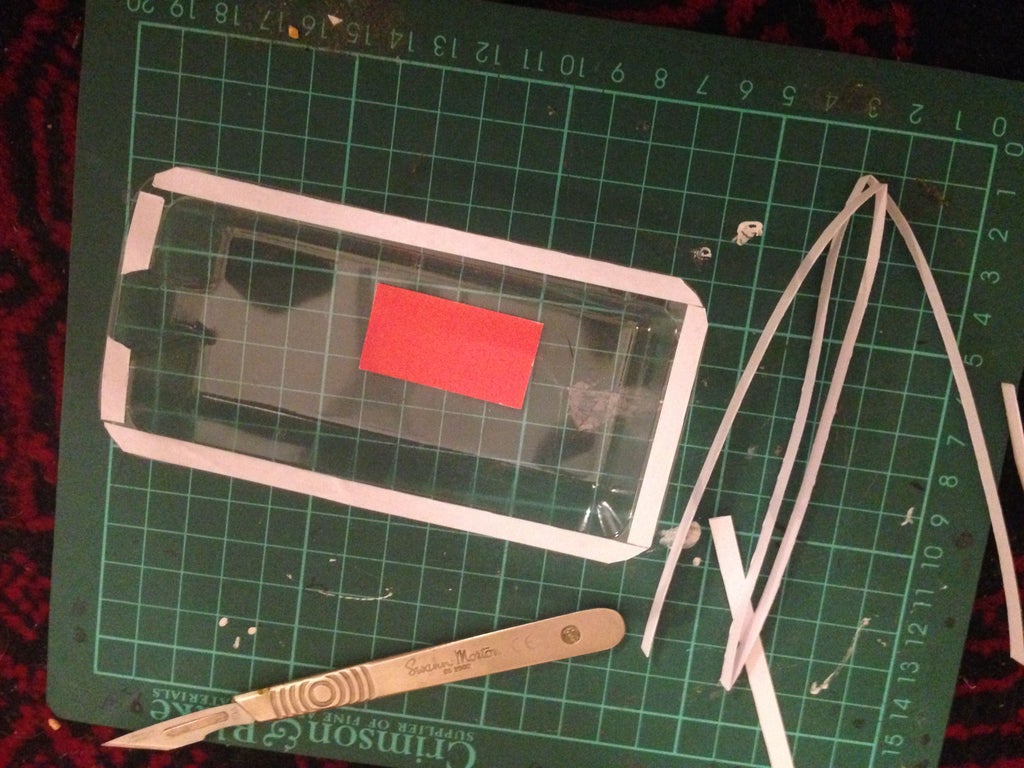
I Purchased Two blisters from the same seller that i got the re-card kits from for Darth and Boba. He sells on ebay and sells loads of reproduction stuff for people to complete figures and retard etc.
I applied a thin strip of double sided tape to the edges so i could stick it down around the figures.
I placed the skeleton on to the coloured section where the figures sit and placed the blister over the top of the figure. this section was a little tricky as i only had one shot at getting it in place as the tape sticks it almost instantly.
Side by side comparison to the re-carded vintage figures and my custom made figures.
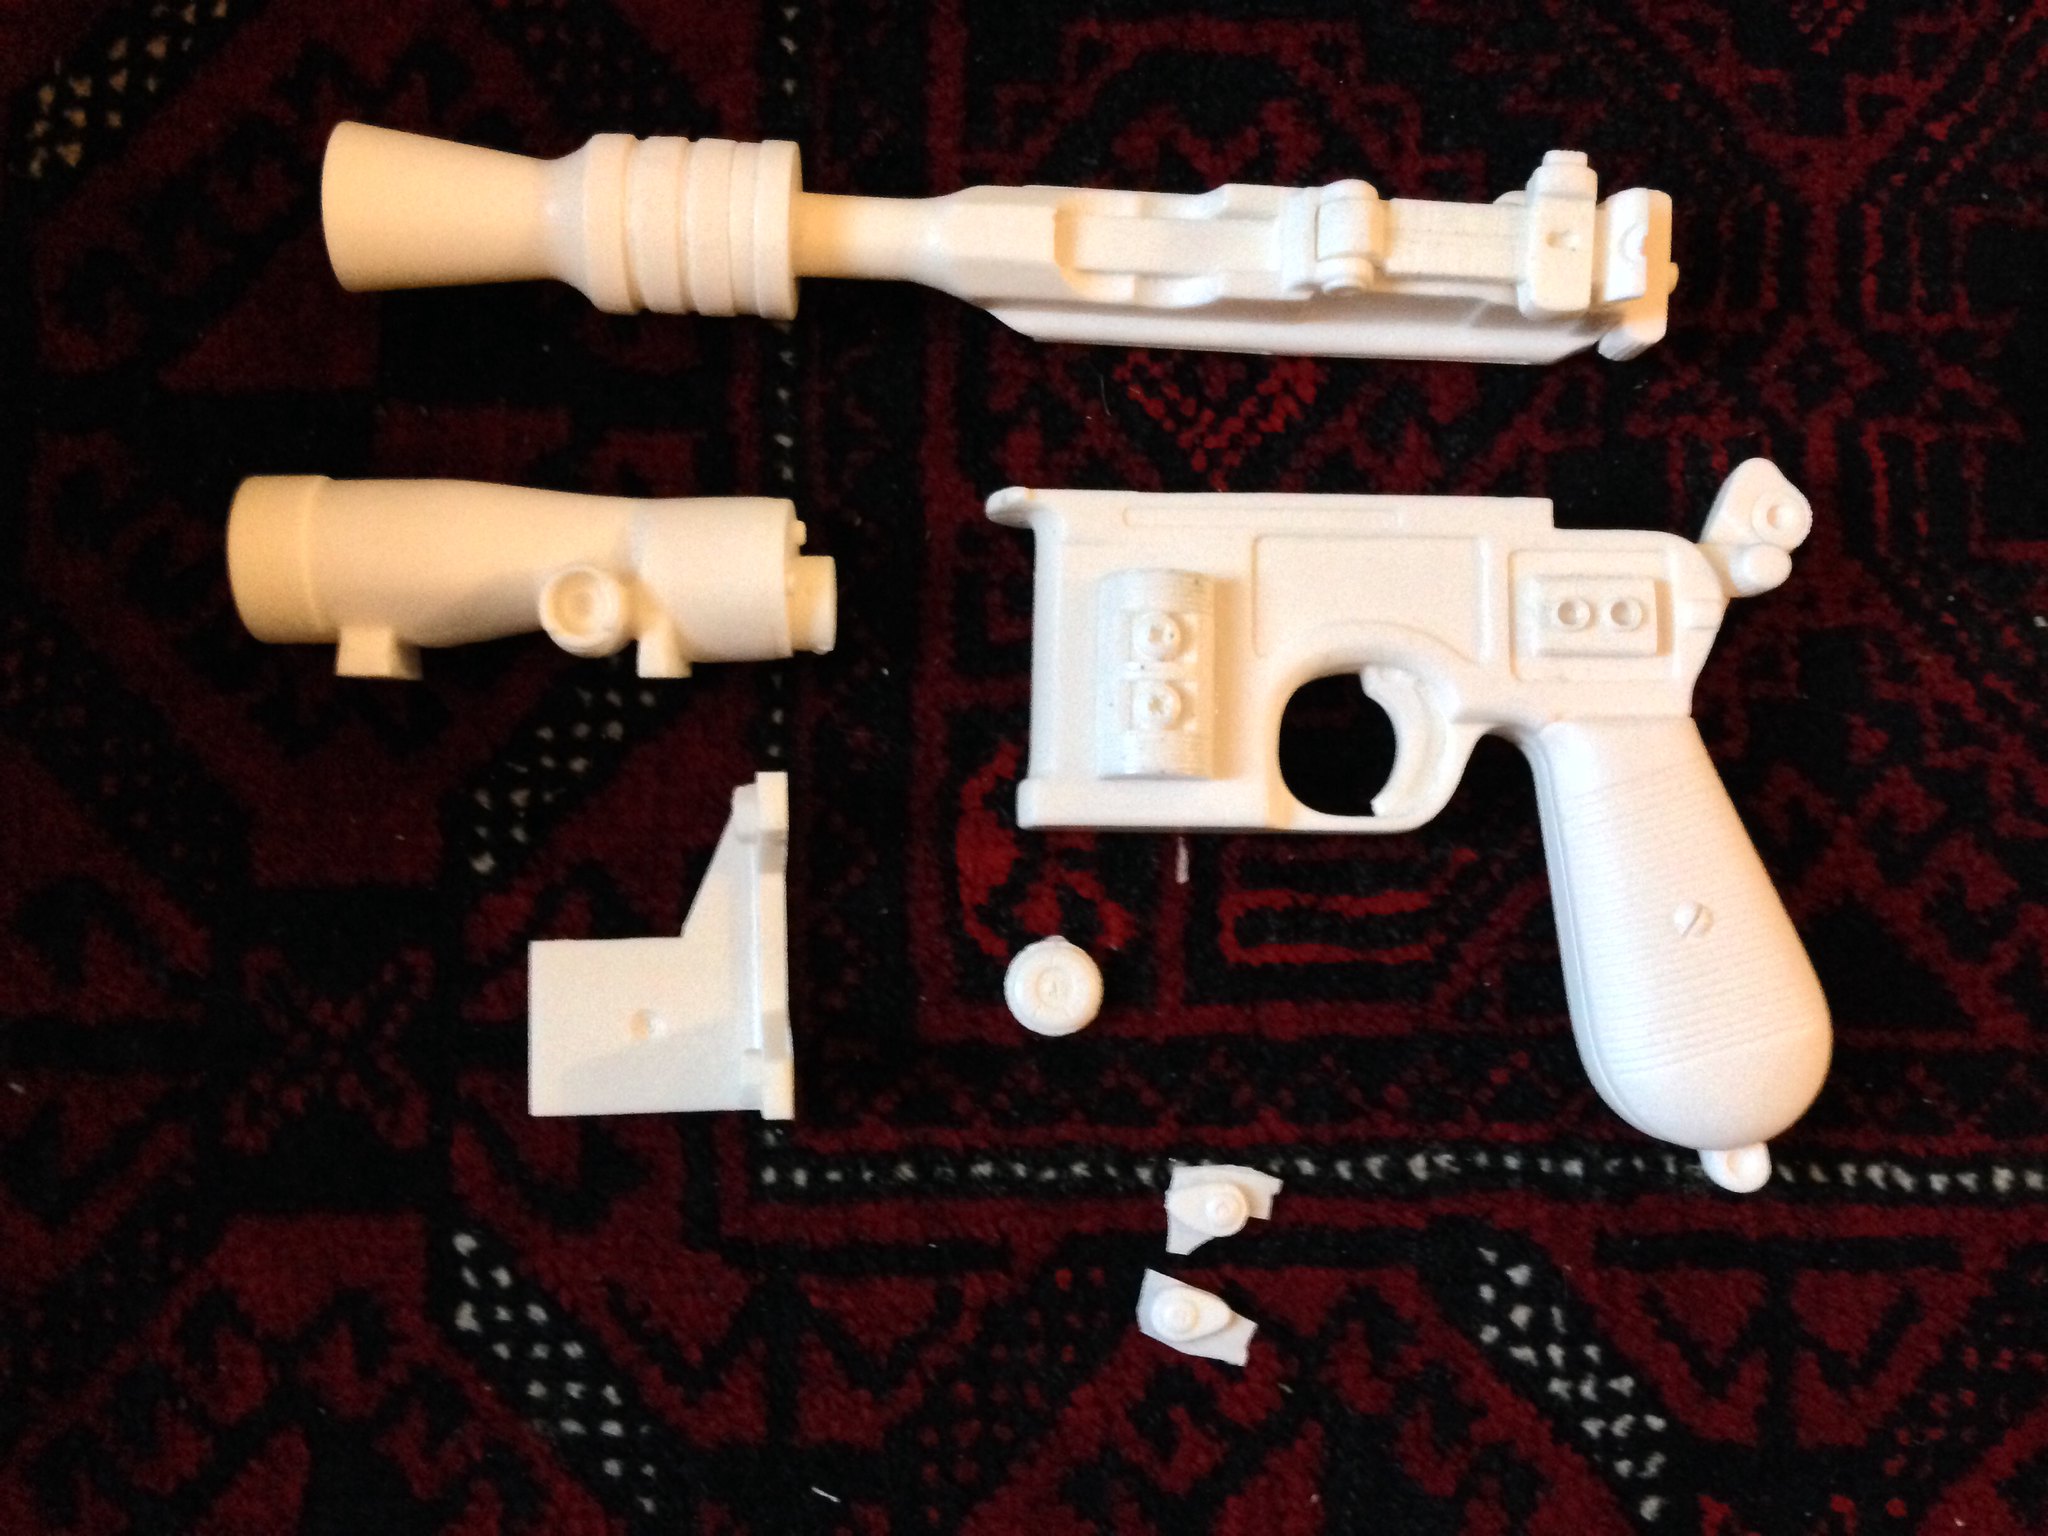
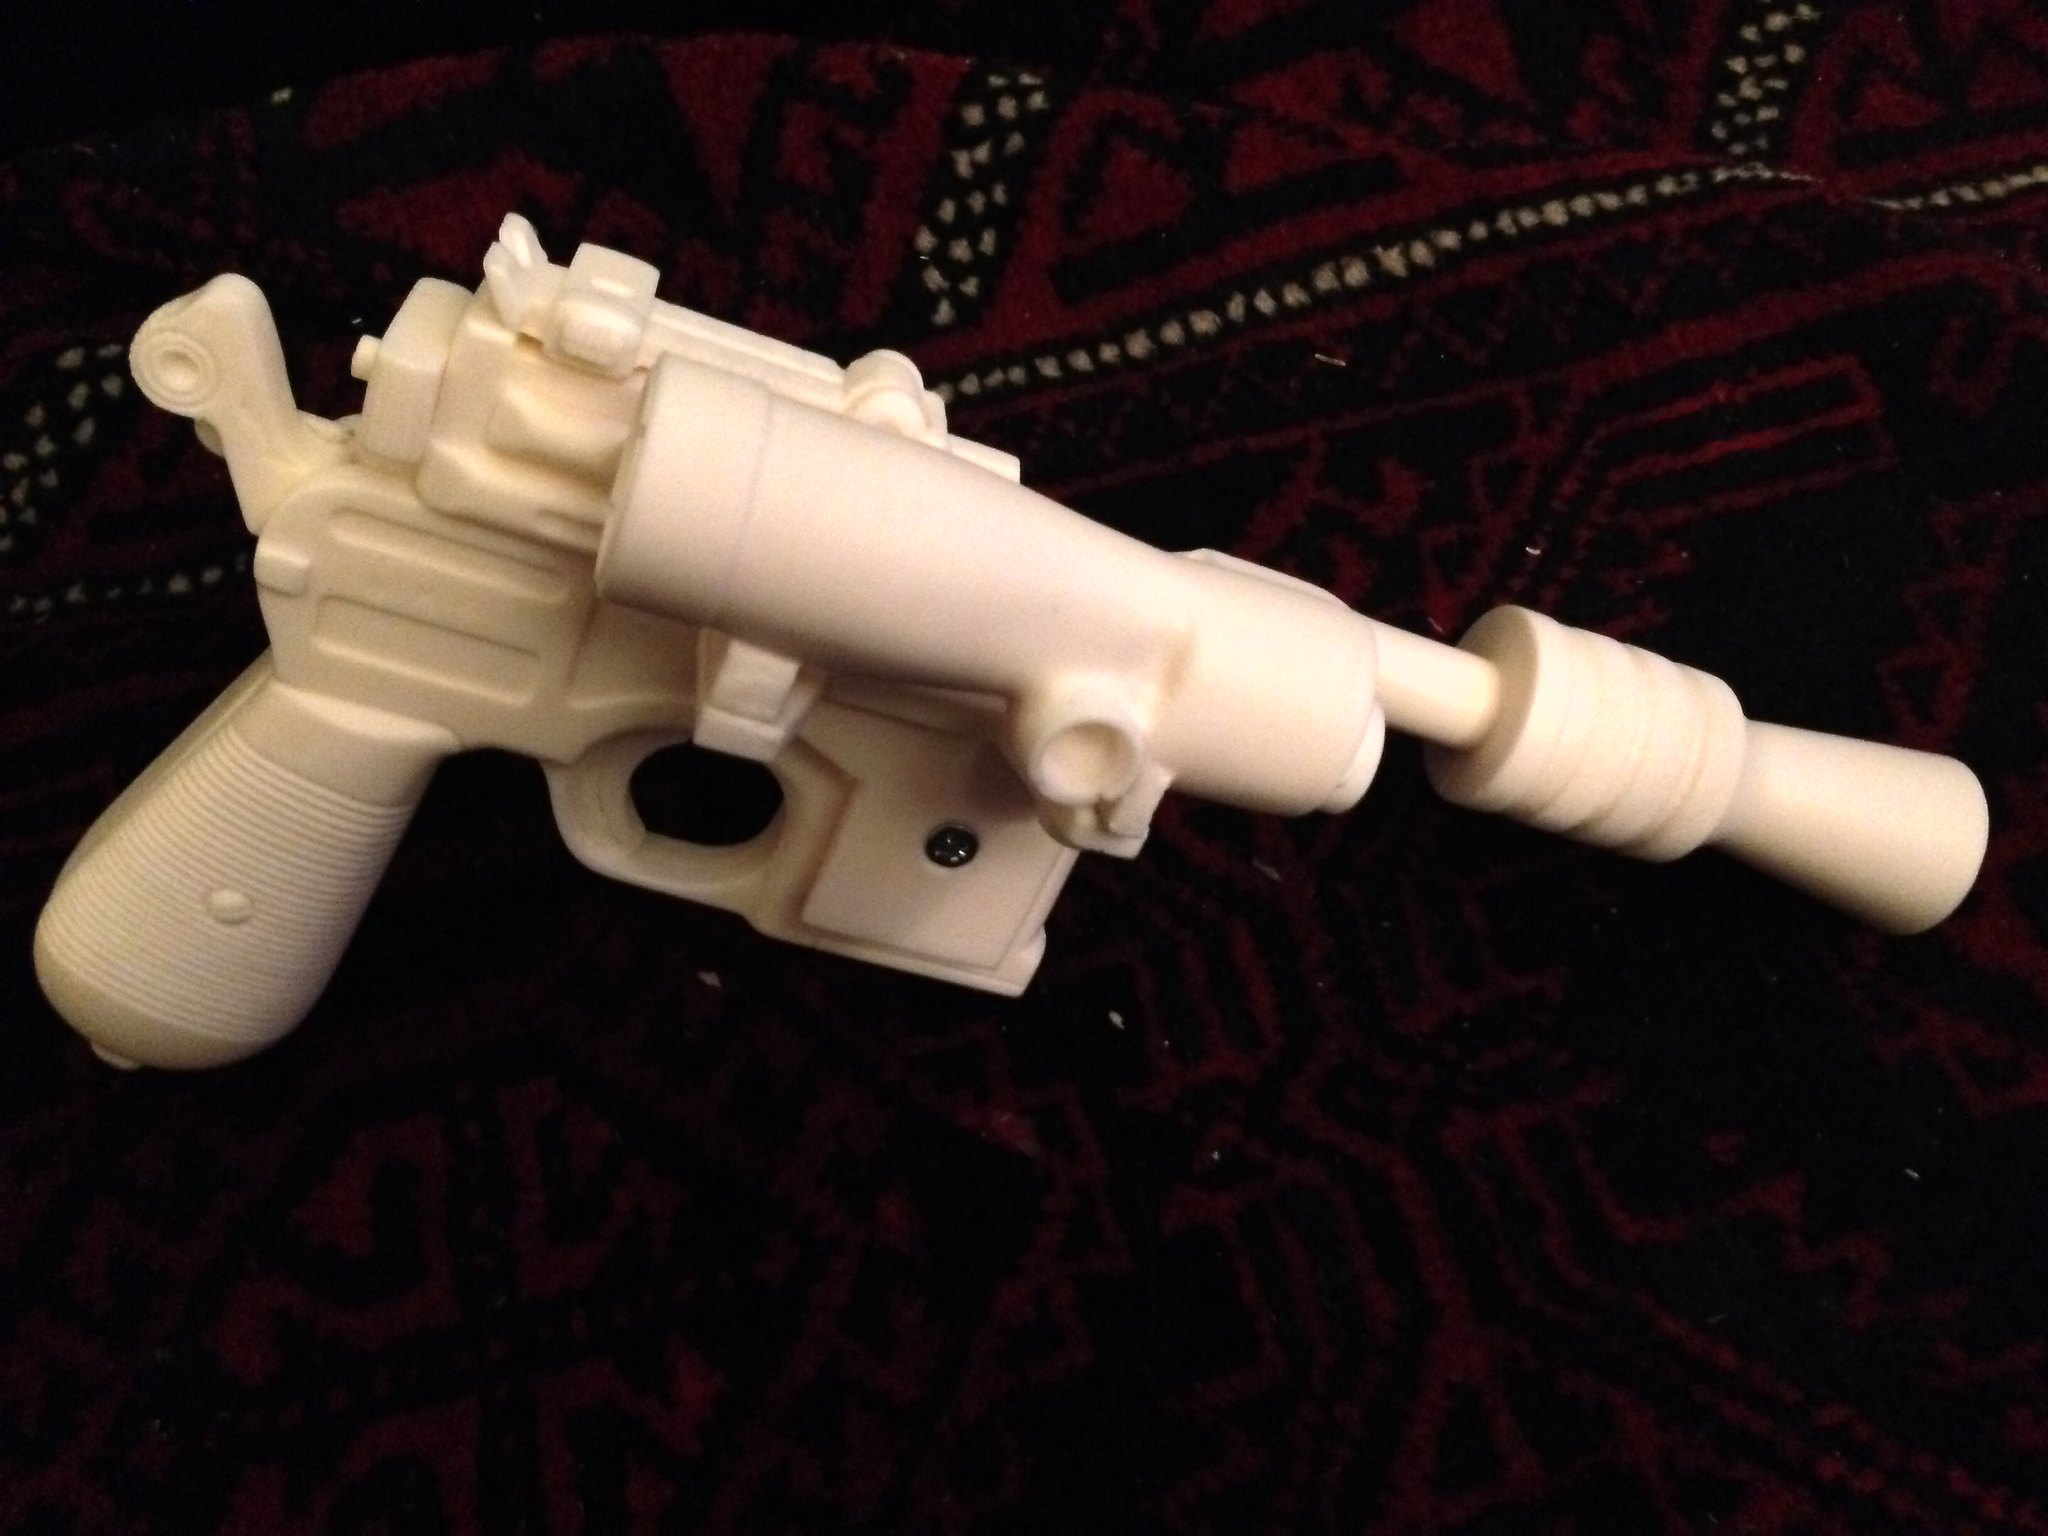
For christmas my brother got me a doopydoos Han Solo blaster, the Empire Strikes Back version.
This is how i built it up and painted to my liking :)
first off i got the kit out and laid it out and worked out how every thing went together, i also did a google search and got some screen used shots and some replica shot as references for the painting.
The main parts go together pretty well. some tiny little detail parts were a little harder to know where to put them (this is where the reference pictures come in handy)
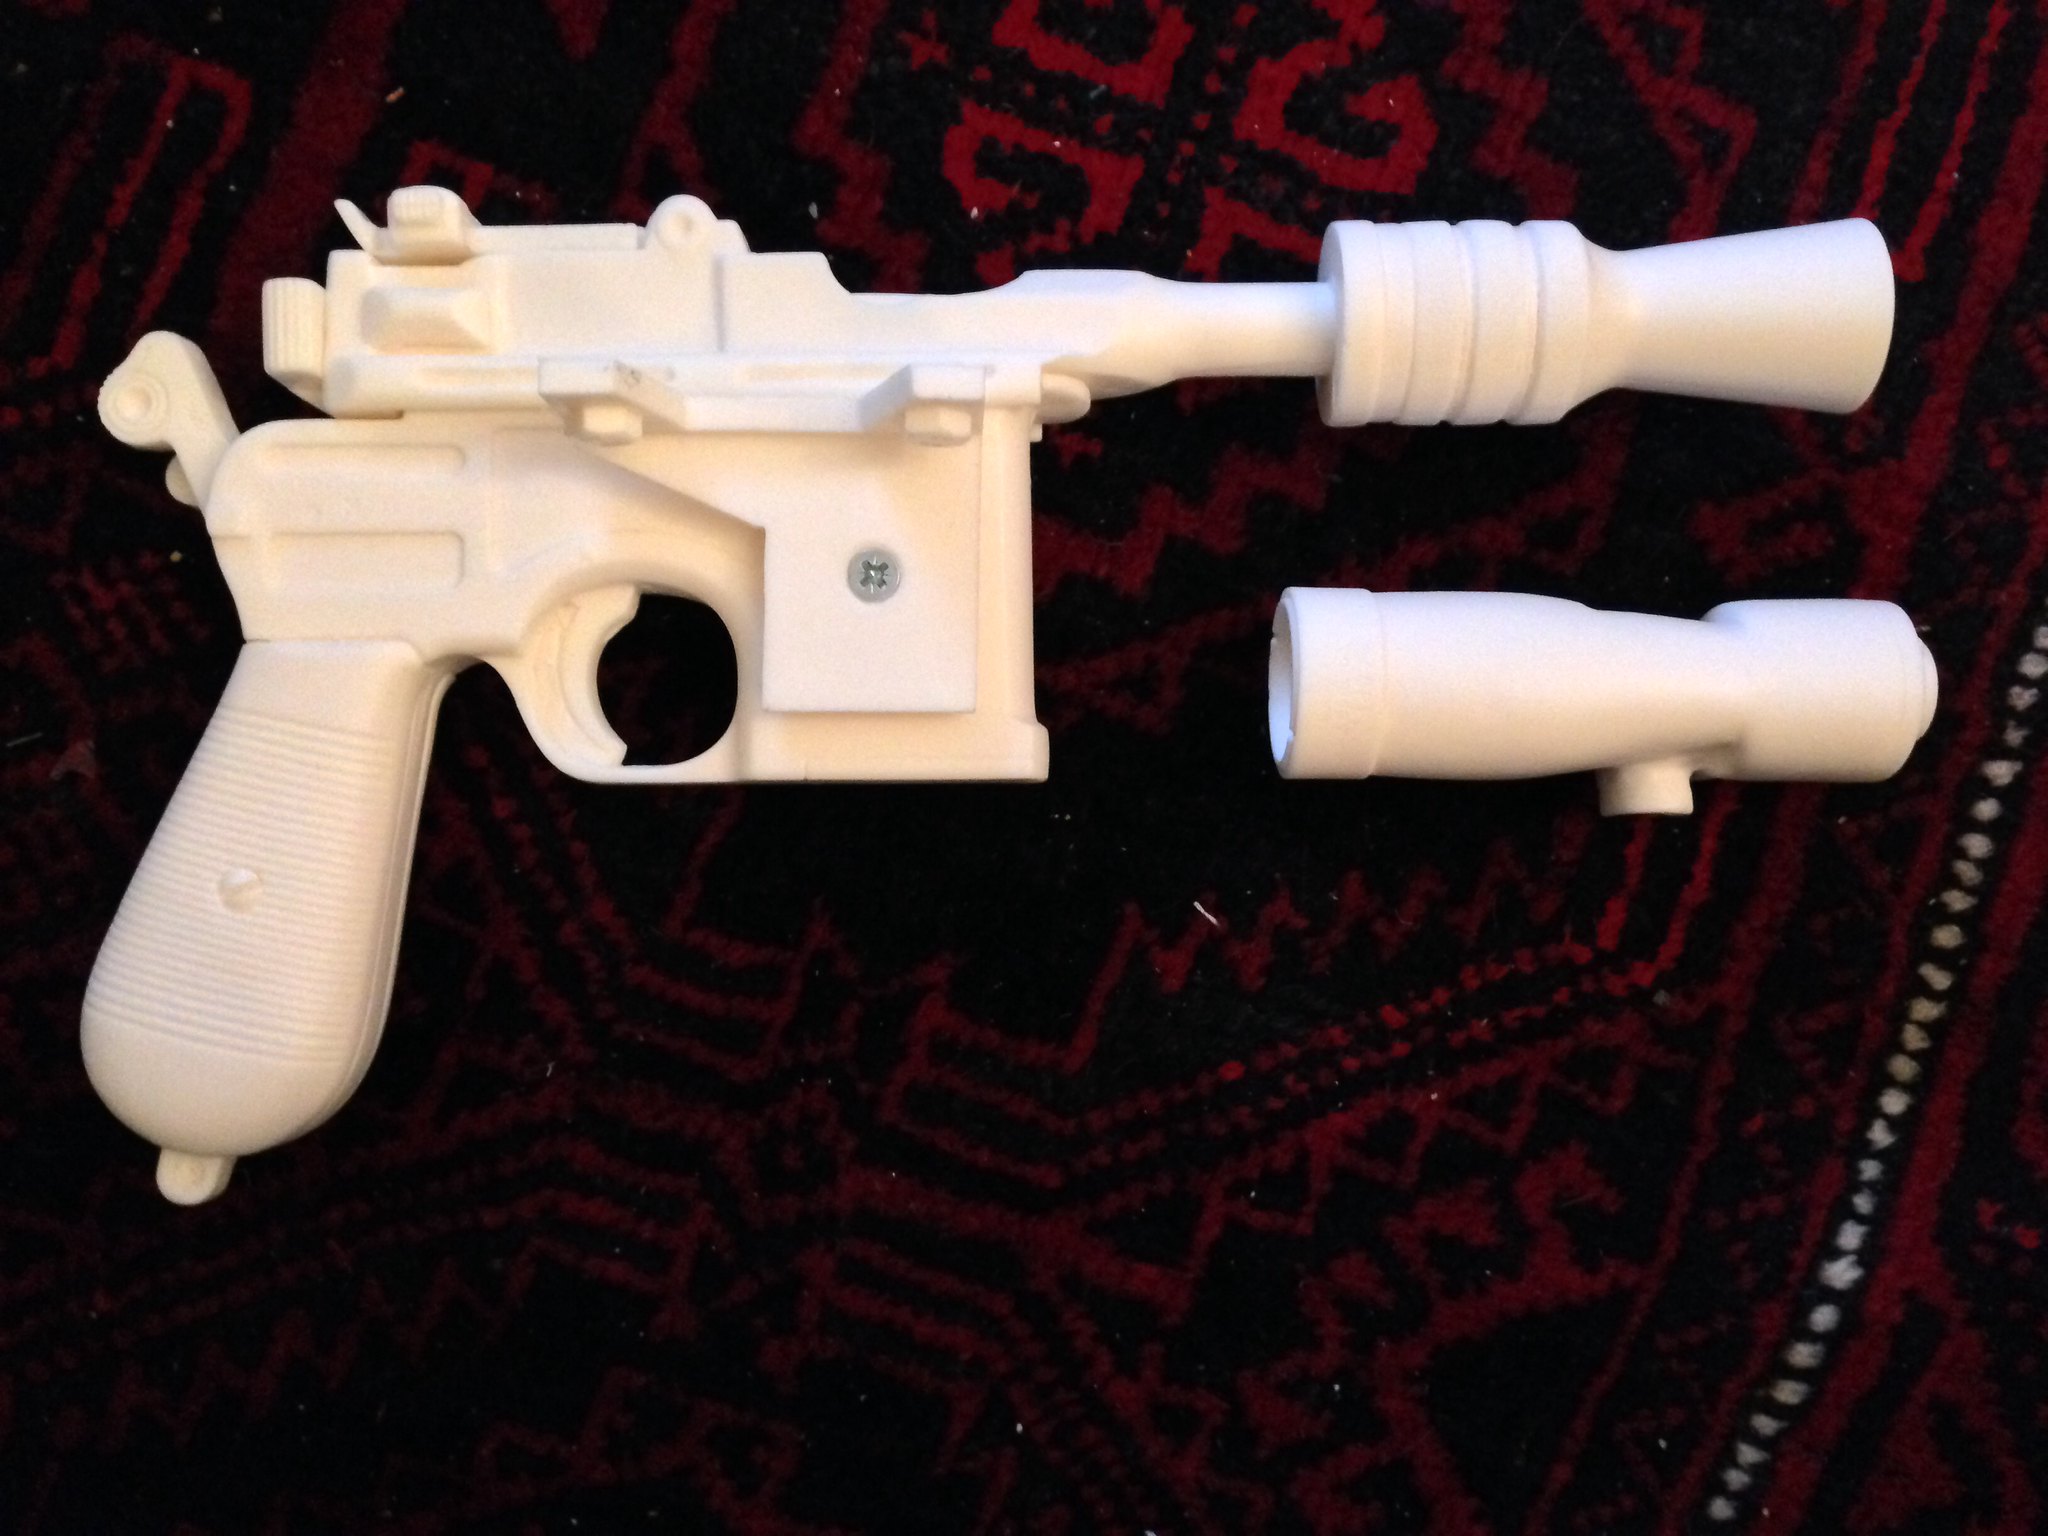
The barrel of the gun slides ontop of the body of the gun (this will be glued later)
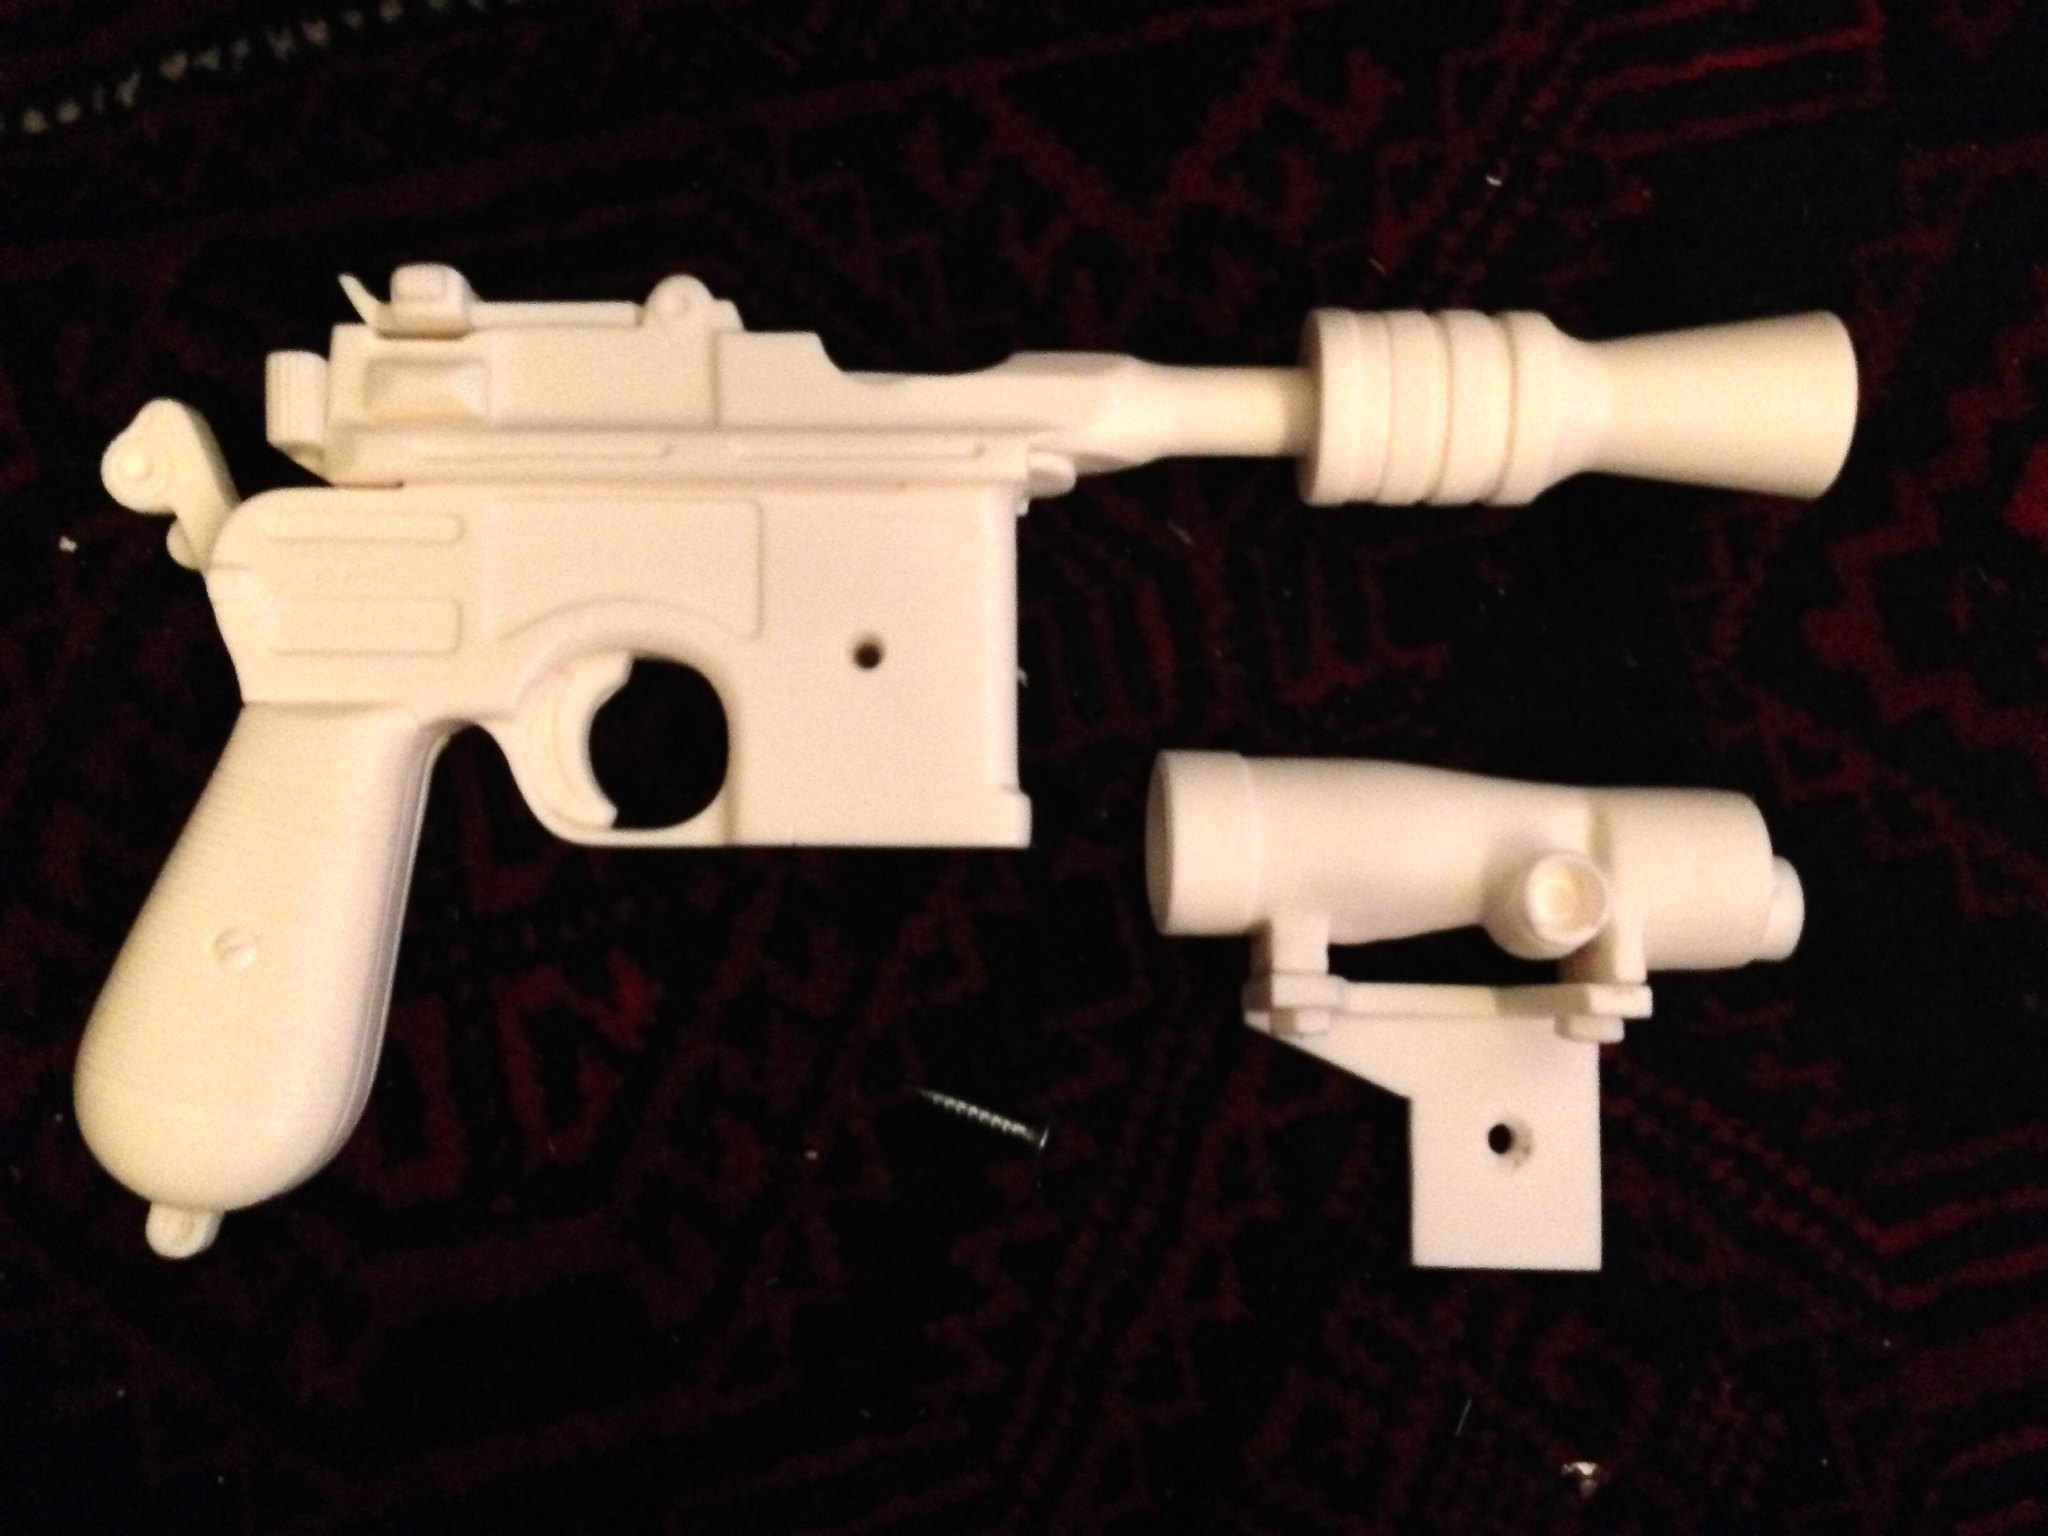
i drilled a hole in the right hand side of the gun to mount the scope bracket on.
I also drilled a matching hole in the bracket and counter sunk the hole so the screw head would sit flush to the bracket surface, the screw head is hidden under one of the smaller parts of the kit.
the scope mount can be held with just the screw but i am going to fill the hole with glue and screw it together once everything is painted. I'm painting the the scope and bracket and the rest of the gun in two parts as its difficult for the paint to get into the gap behind the scope and mount.
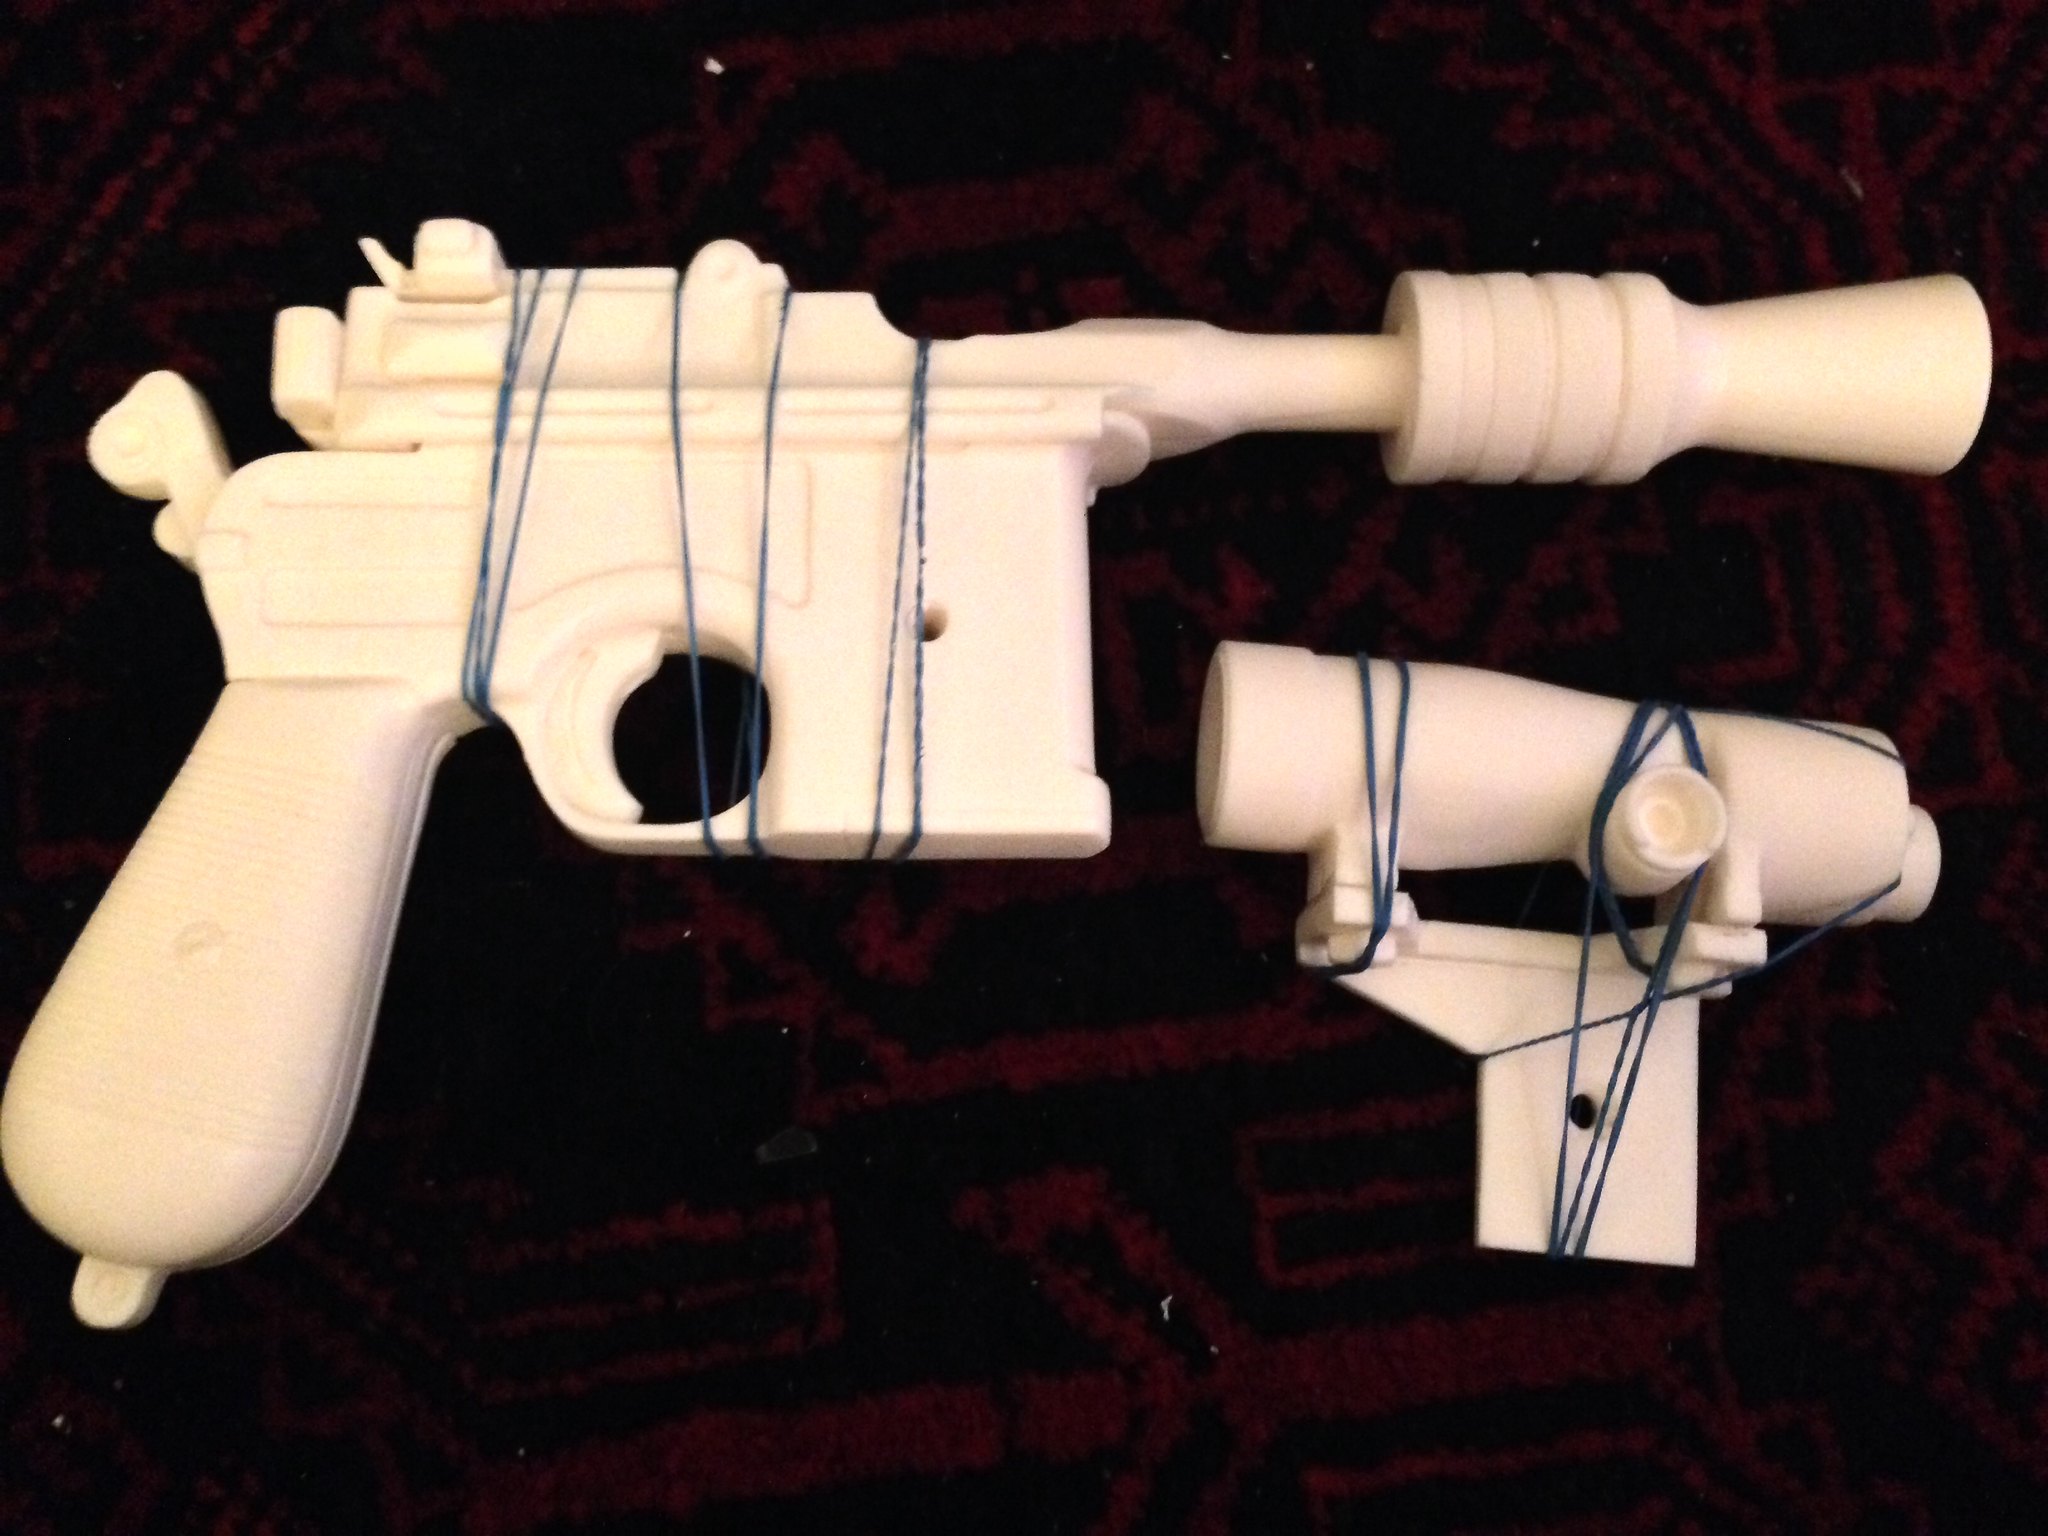
I used a epoxy resin glue to glue the barrel to the gun body and the scope to the mount. The elastic bands are to hold the parts in place while the glue set.
Once the glue had dried i assembled the parts to see what the gun would look like and to make sure it was all in the right place.
I gave the whole kit a coat of white primer and then a black coat. (i forgot to take photos of these stages)
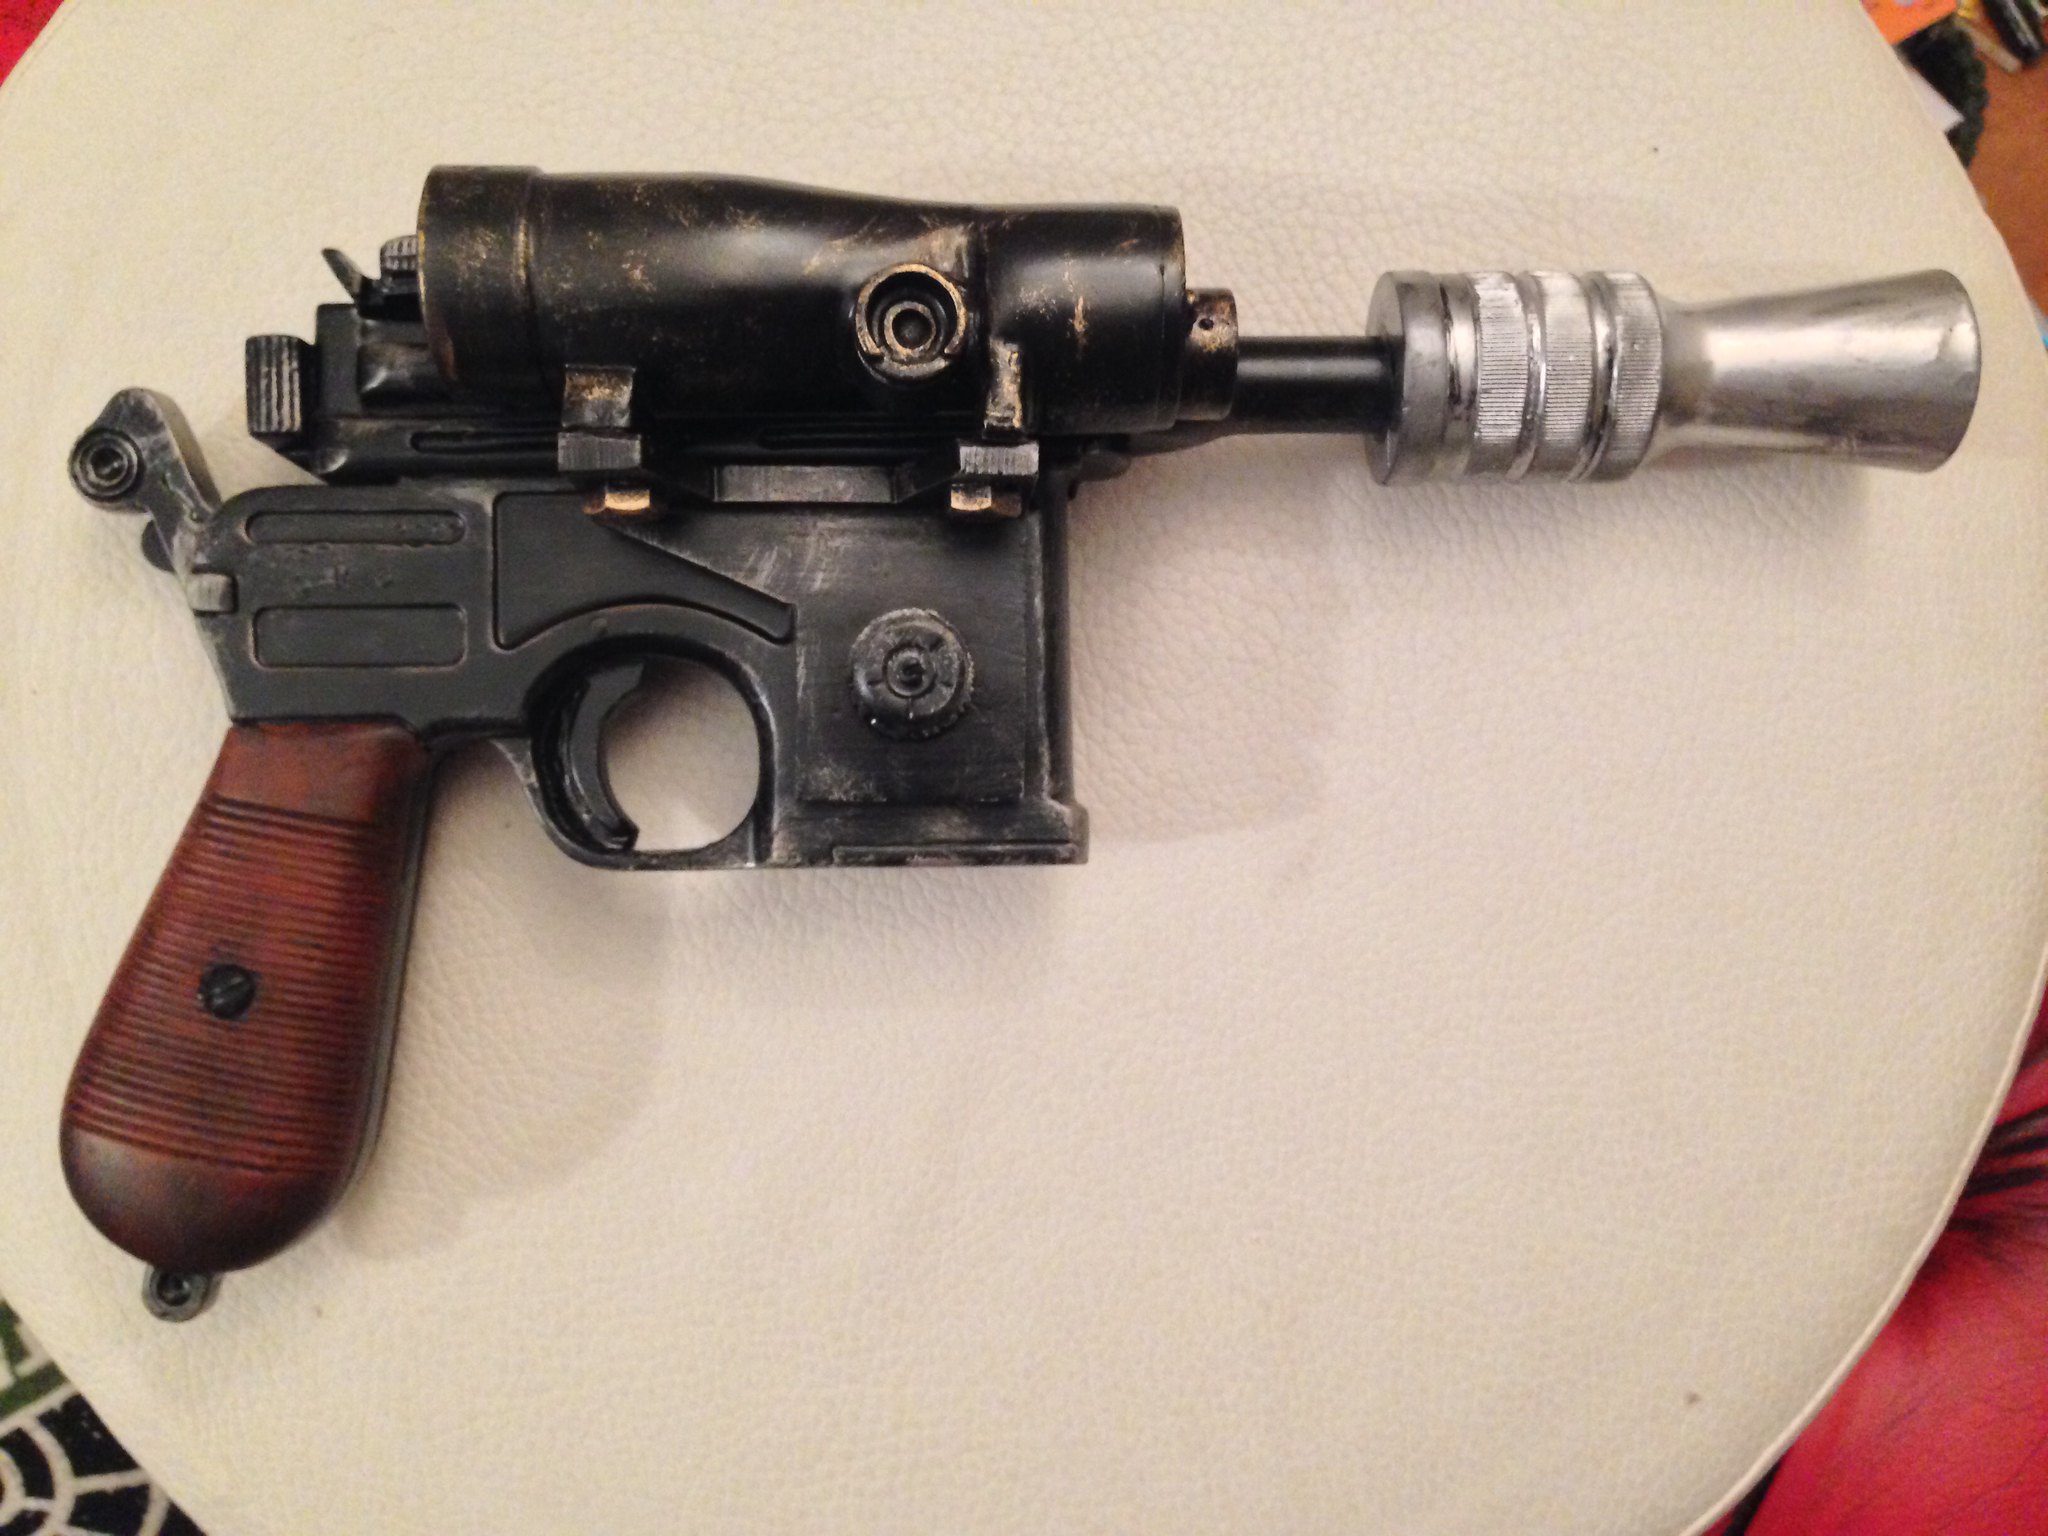
once the black had fully dried (i left it for two or three days as the cold weather here slows the drying time and it stays tacky for a long while.) i masked off the rest of the gun and left just the flash hider and sprayed it with a nice metallic silver paint.
I glued the thumb screw part over the screw head after gluing it into the hole for extra security.
The white marks in the black paint on the main body are from where i hung the gun to paint, i retouched these.
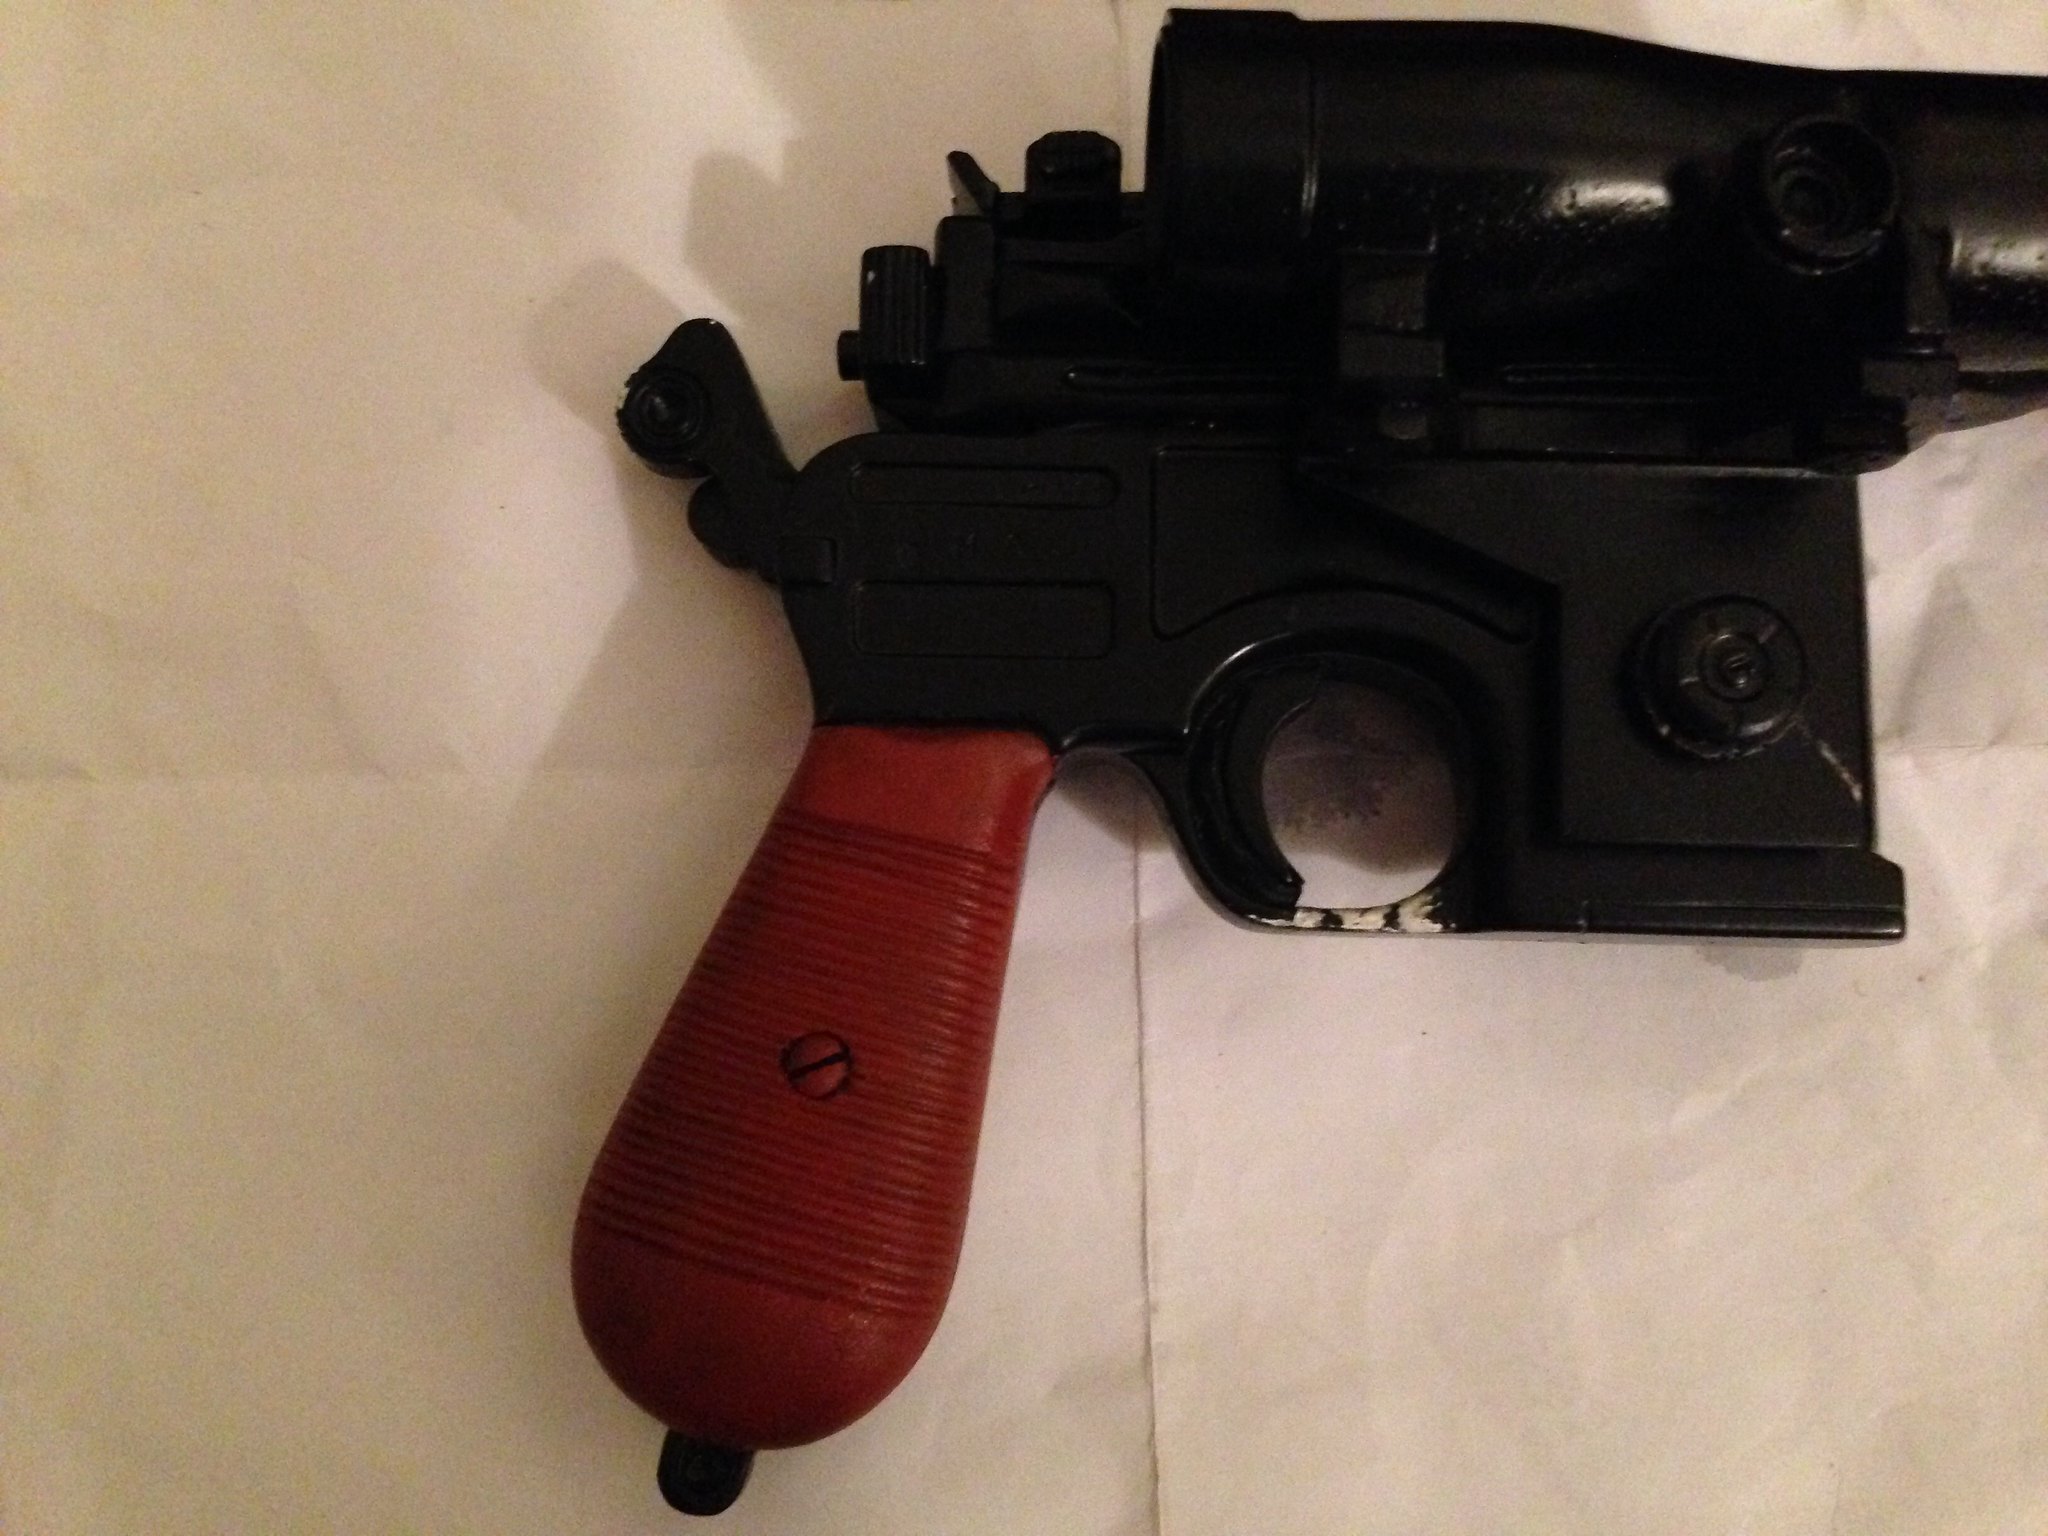
I painted the handles with a light brown, the brightness of the brown will be dulled down in the next stages.
I gave the handles a wash with black to dull down the brown. this gave the effect of a grain in the wood and aged it making it look dirty through use.
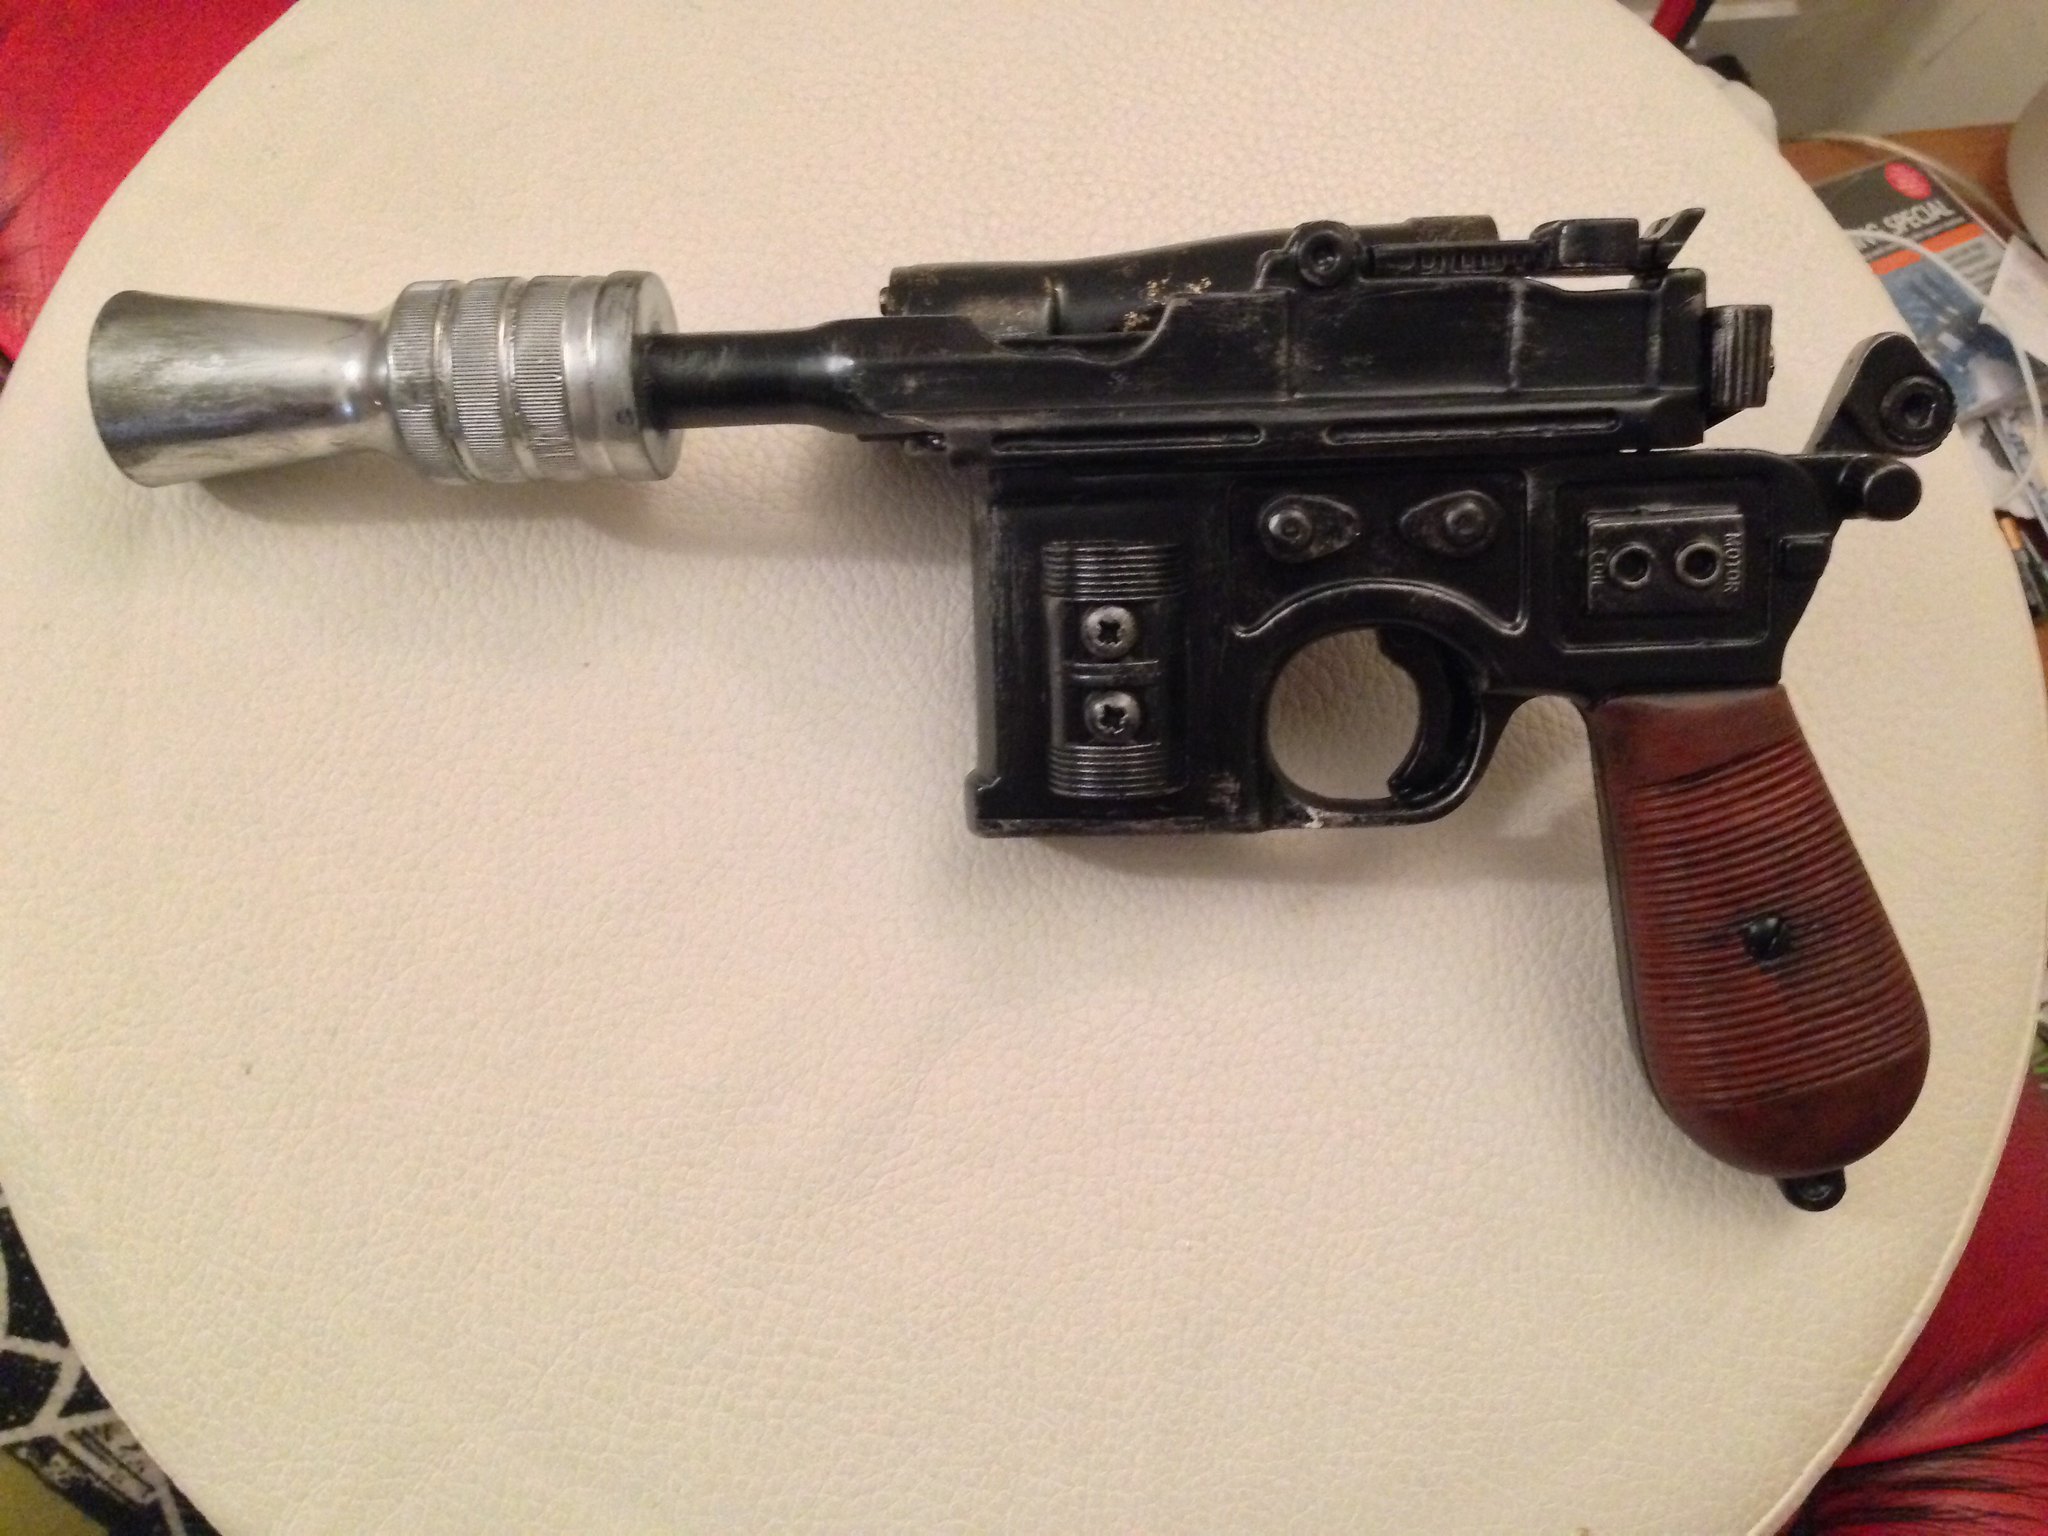
The scope and scope bolts were dry brushed with a gold. The bolts and screws on the scope were to be painted to look like brass fixings. the scope was dry brushed to look like a brass scope that has been painted black and the paint has weathered off over years of use.
The body of the gun was weathered down with a dry brushing coat of silver paint to give it a worn effect.
The flash hider was weathered with black to make it look like it had been fired and been smoke damaged and dirtied up.
I gave some of the silver a wash with black to knock it back down if it was too bright to make it look dirty.
I was tempted to paint it up and have it look factory fresh, but there were some little defects in the resin cast and in my painting so i went with a weathered used look, i feel that it looks much better used.
I will make a stand and it will be displayed with my E-11 Hasbro conversion.
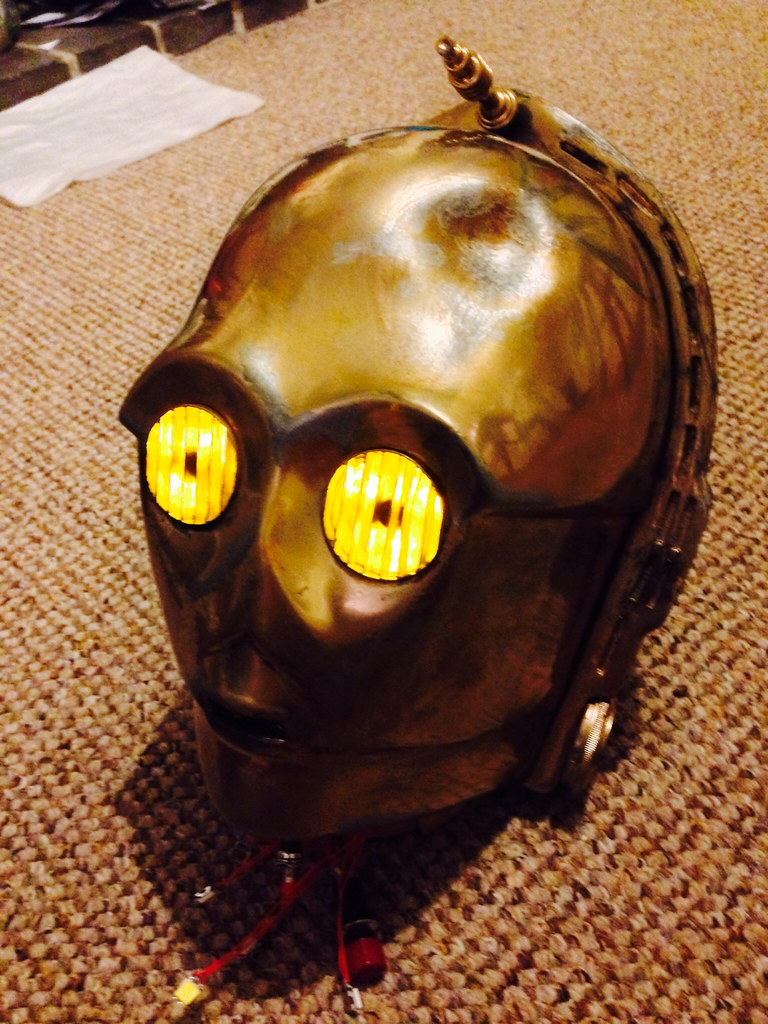
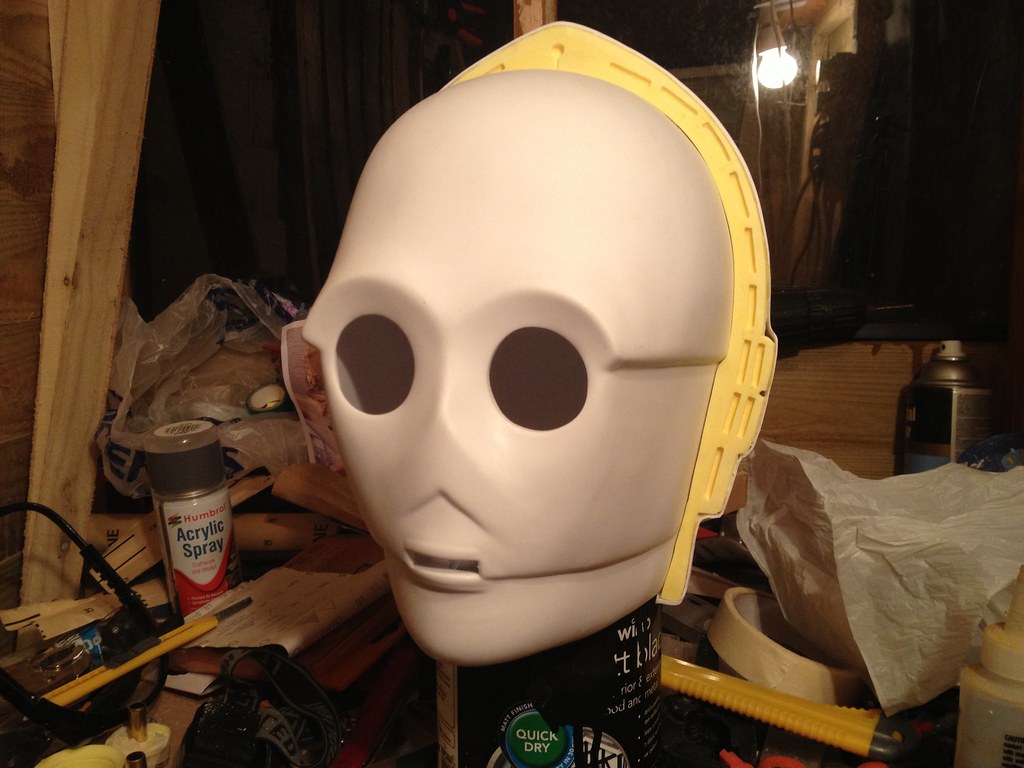
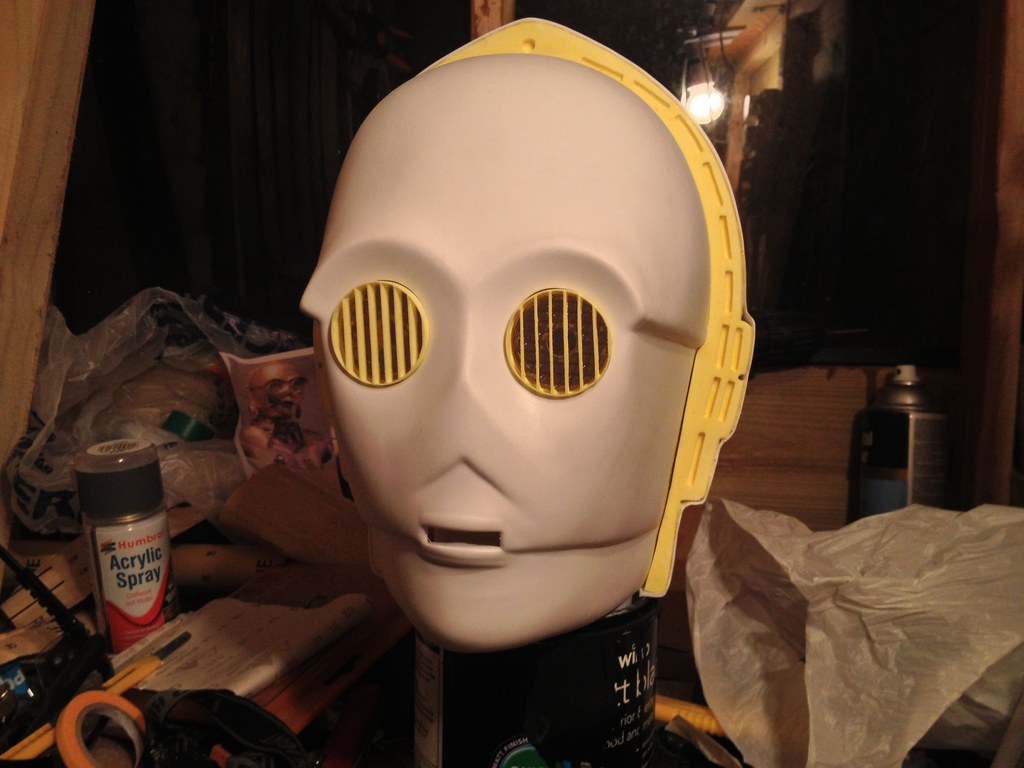
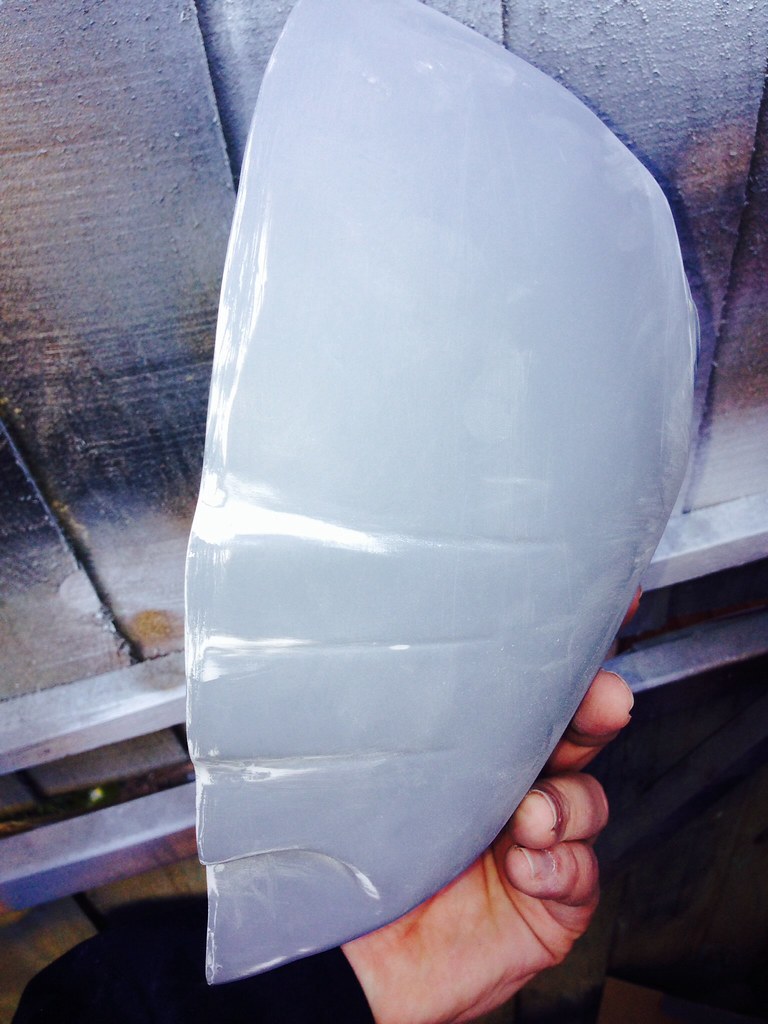
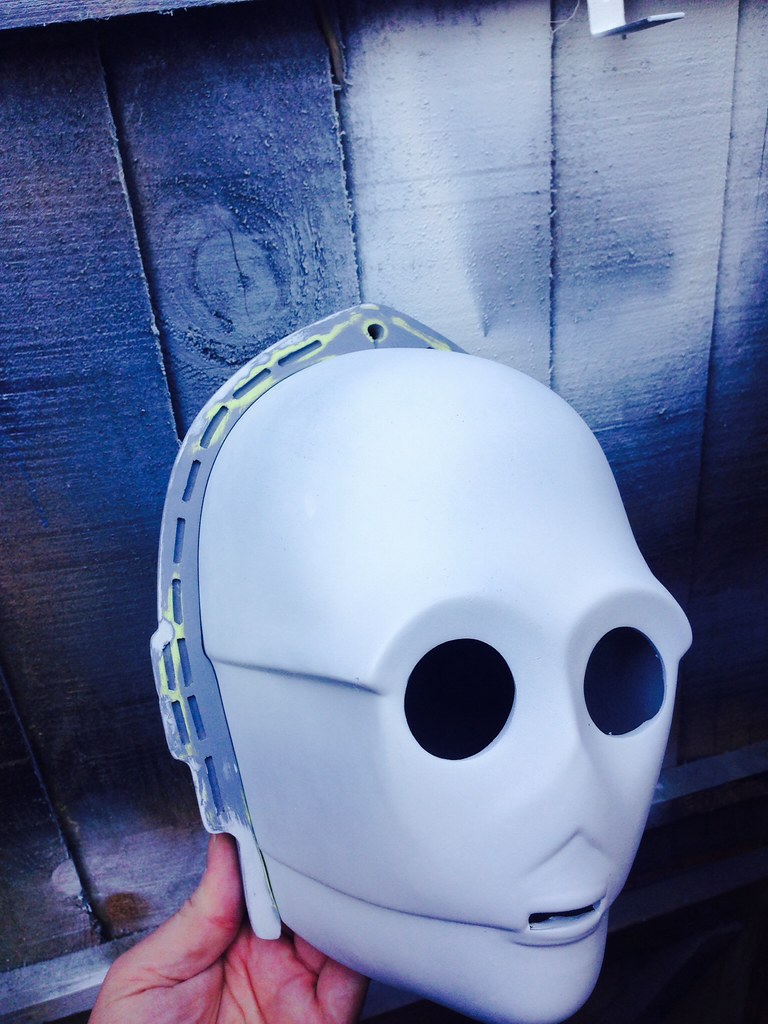
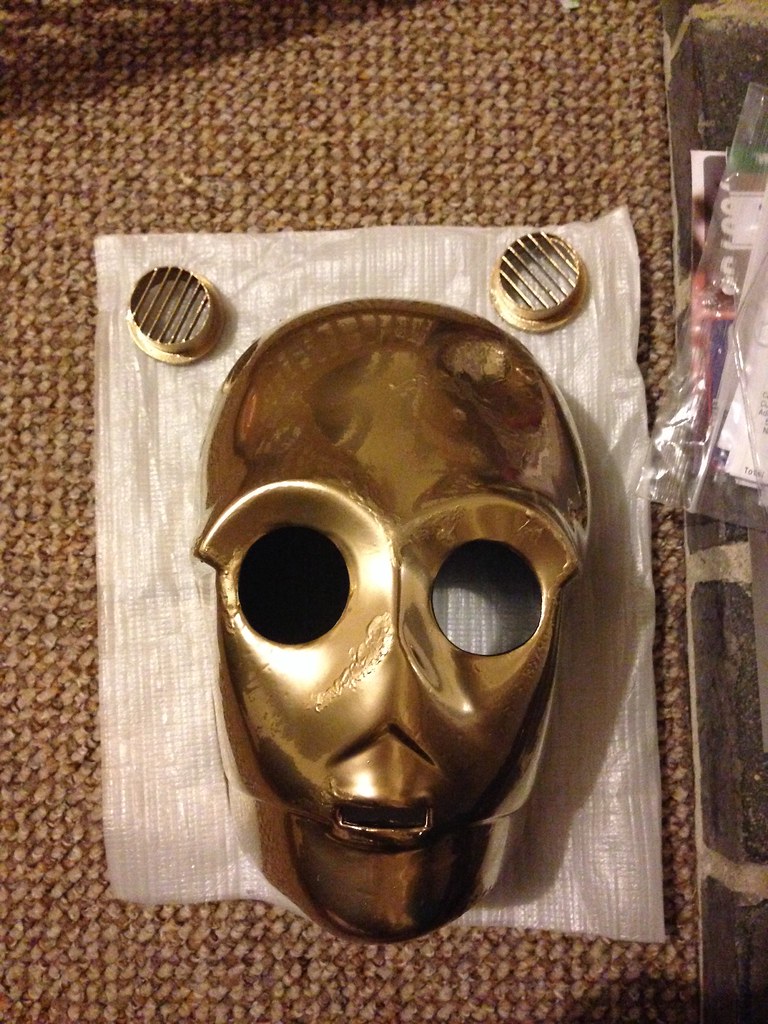
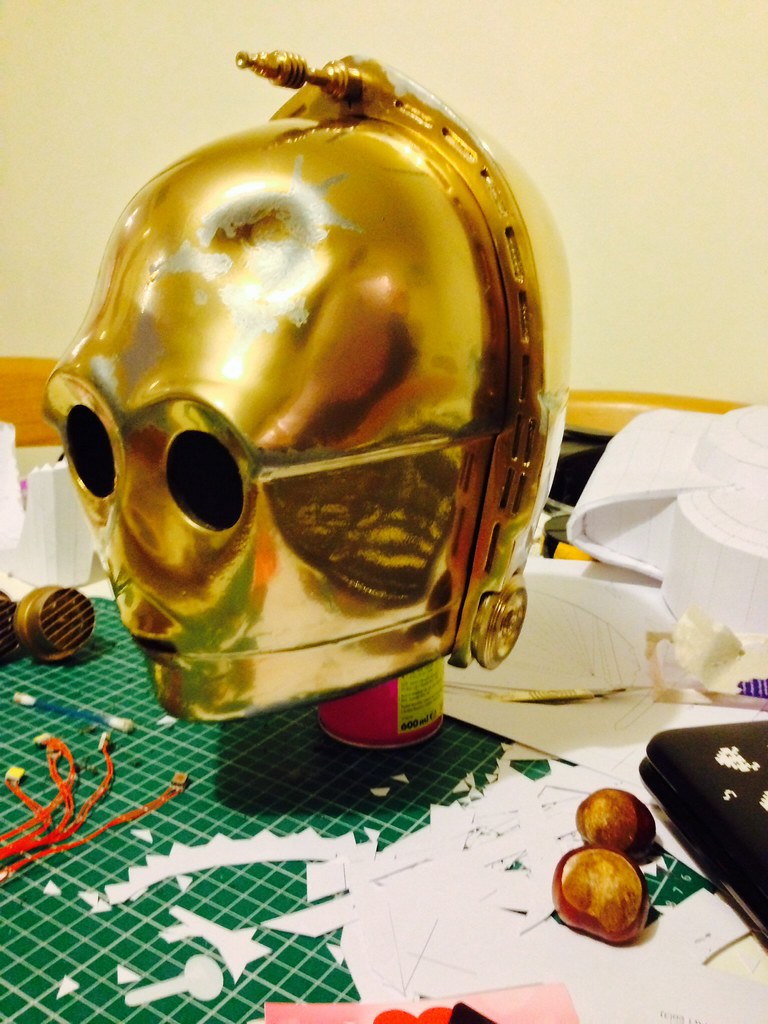
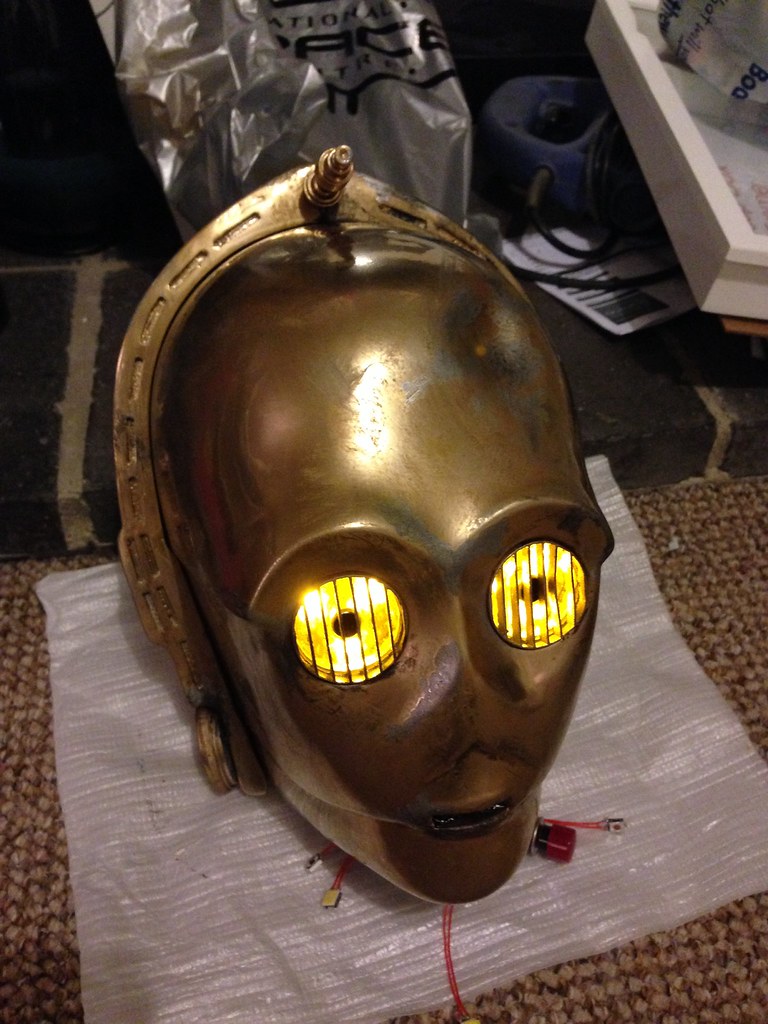
A while back i got hold of a nice little C3PO helmet kit, its not perfect but its still pretty damn good, and i love it.
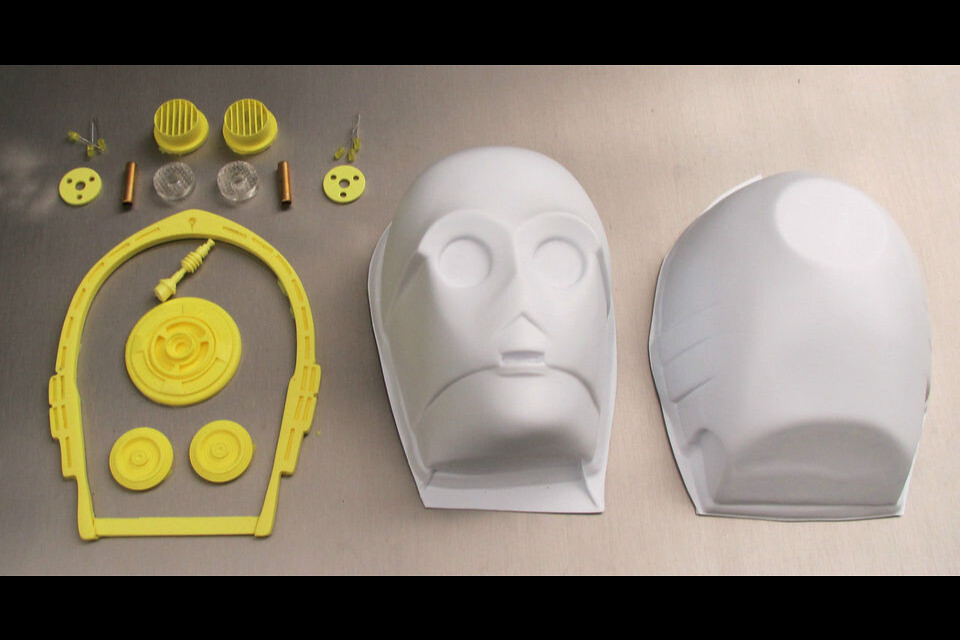
The kit came with all the parts you need to make the head of your very own protocol droid.
You get the front and back shells of the head (vac formed)
Resin neck bolts.
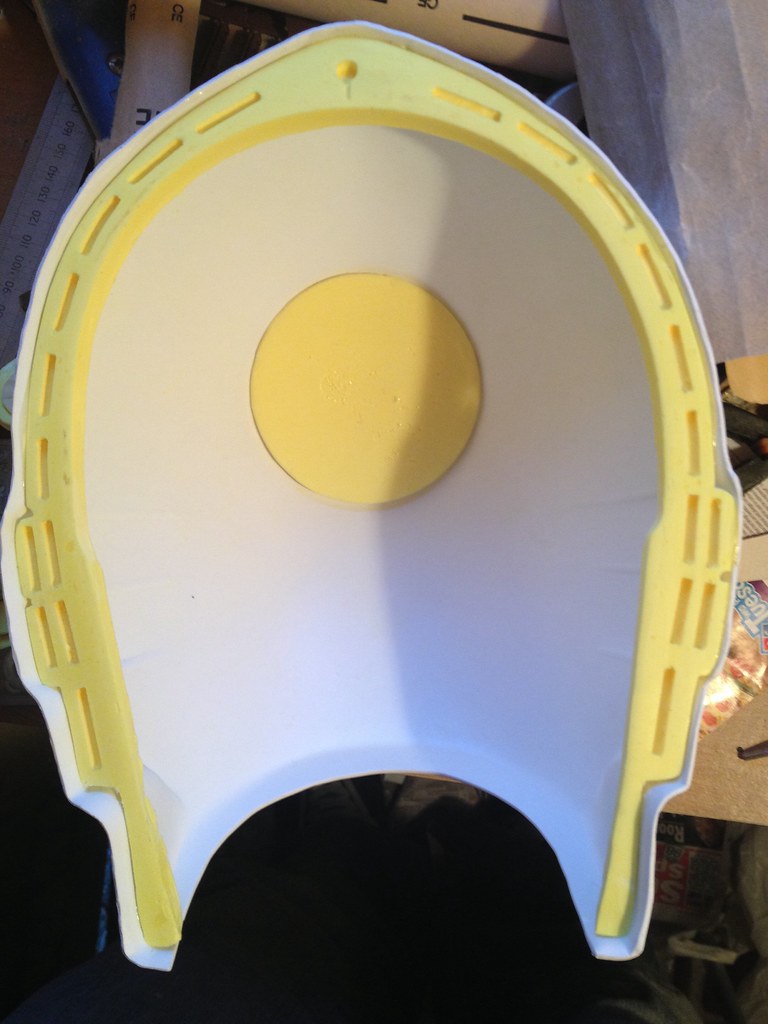
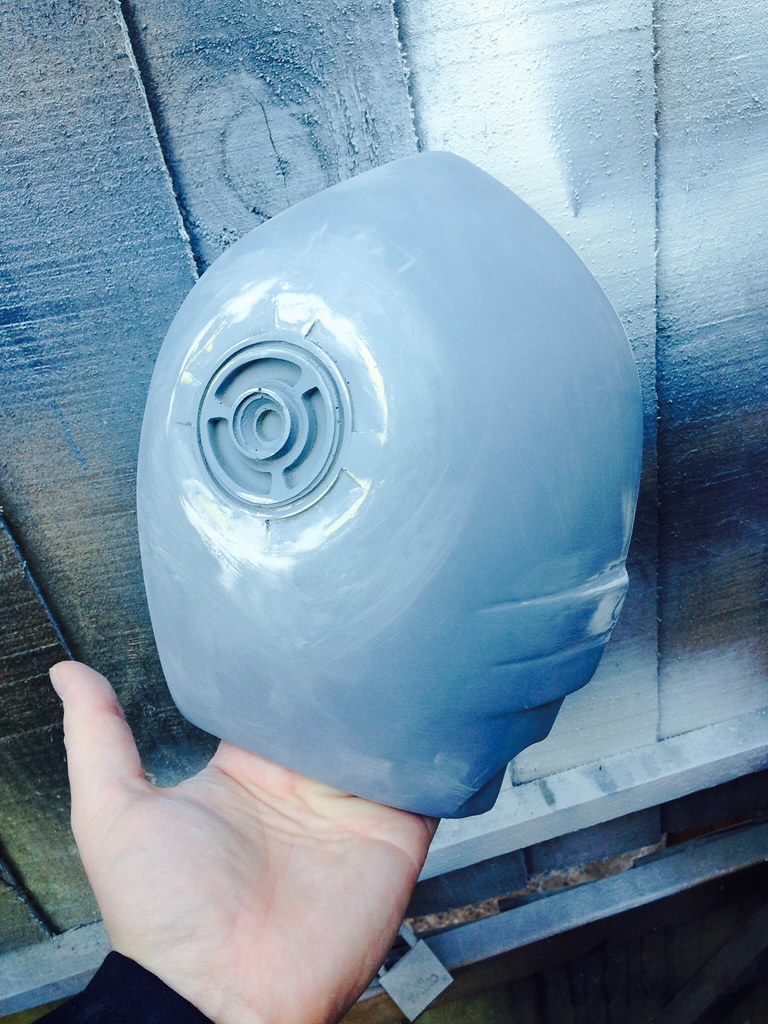
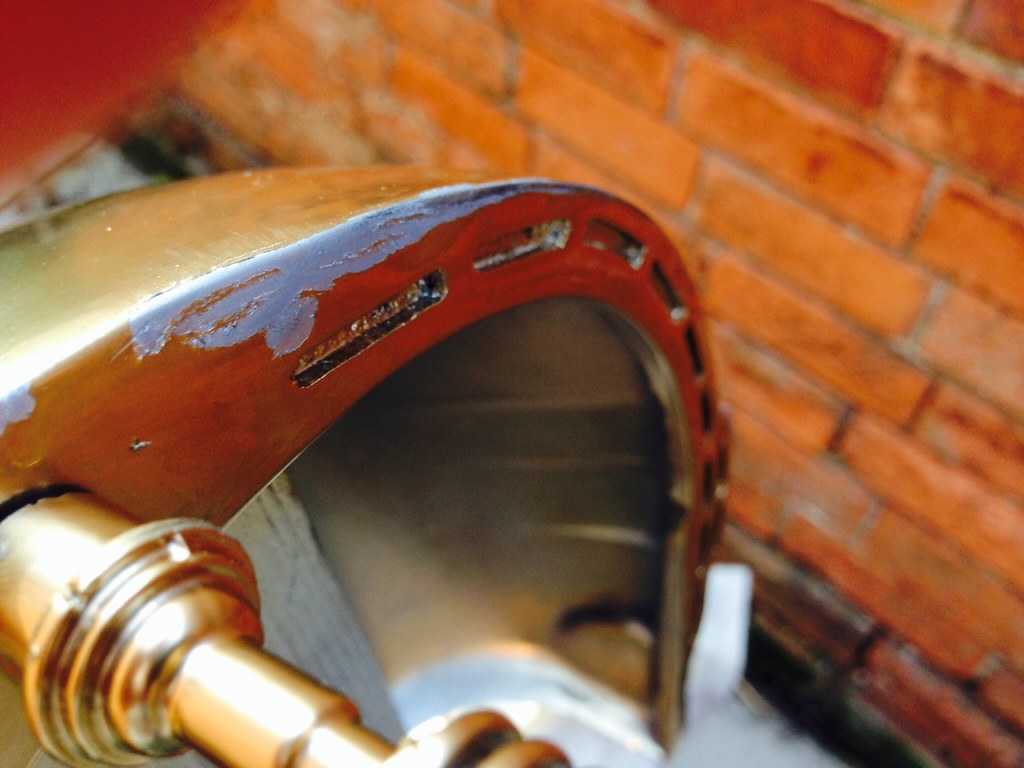
Resin halo, to go inside the rear shell of the head.
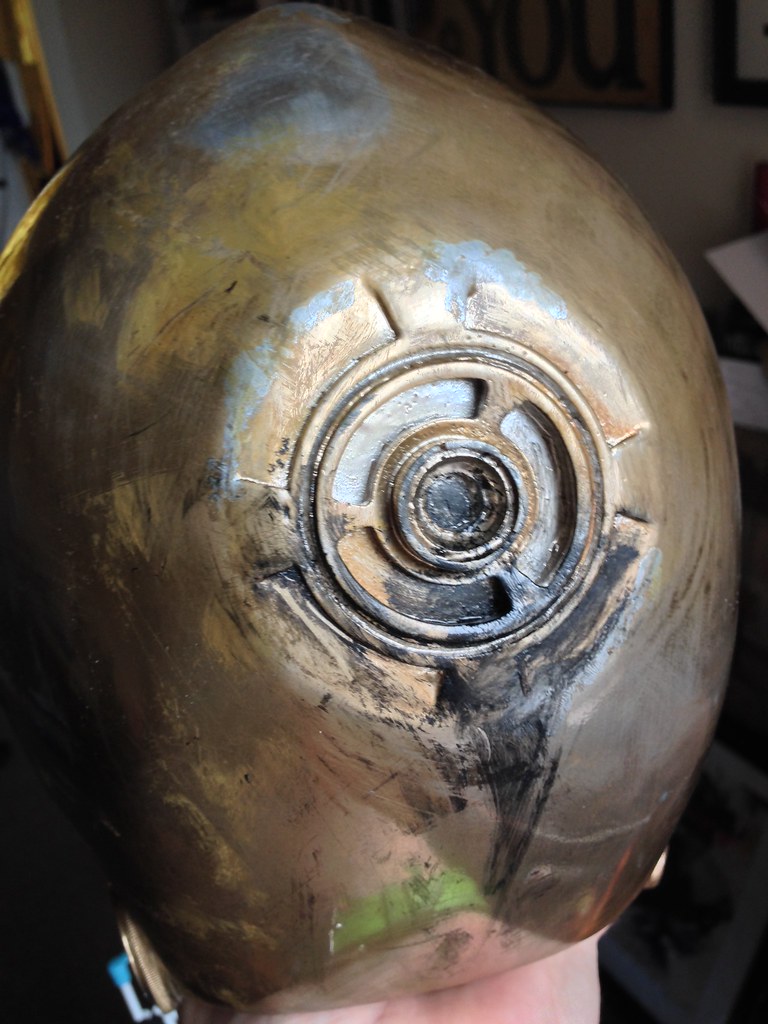
Resin rear detail for the back of the head.
Resin antenna
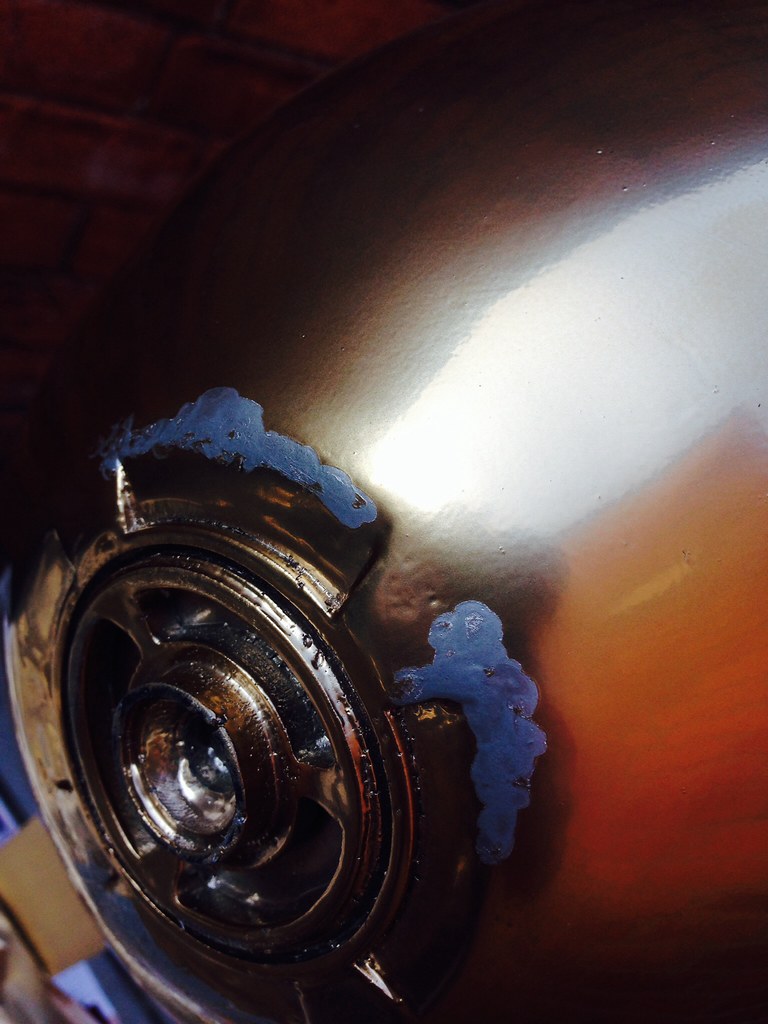
multiple parts for the eyes.
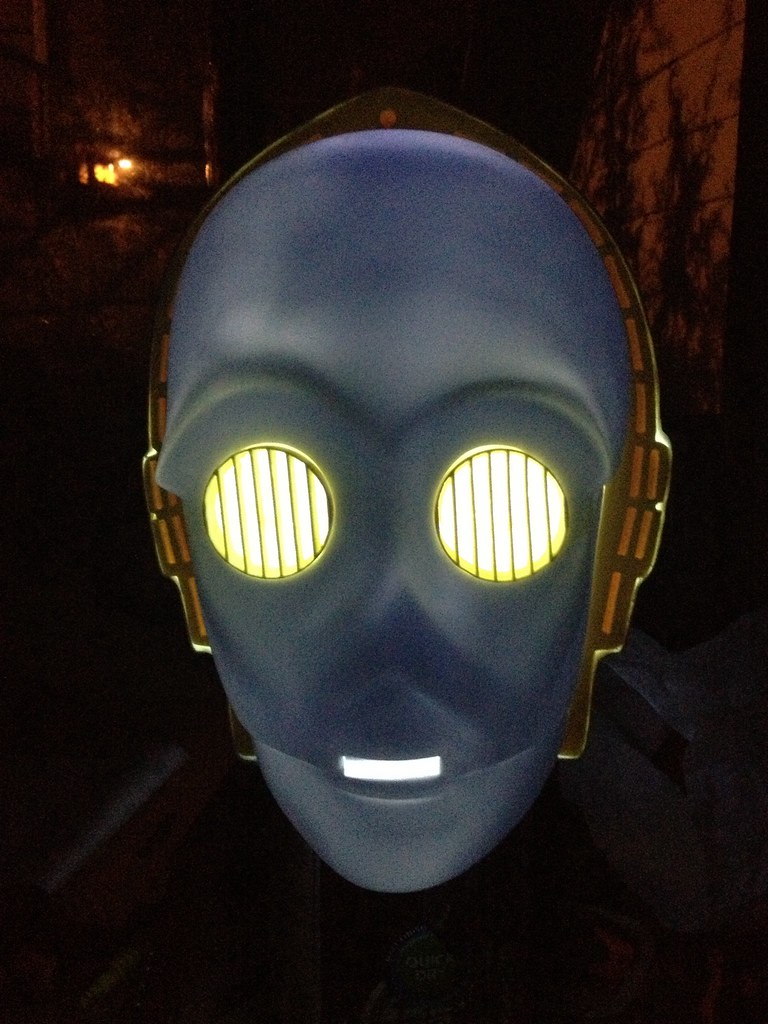
It even came with some nice colour accurate LED's for the eyes.
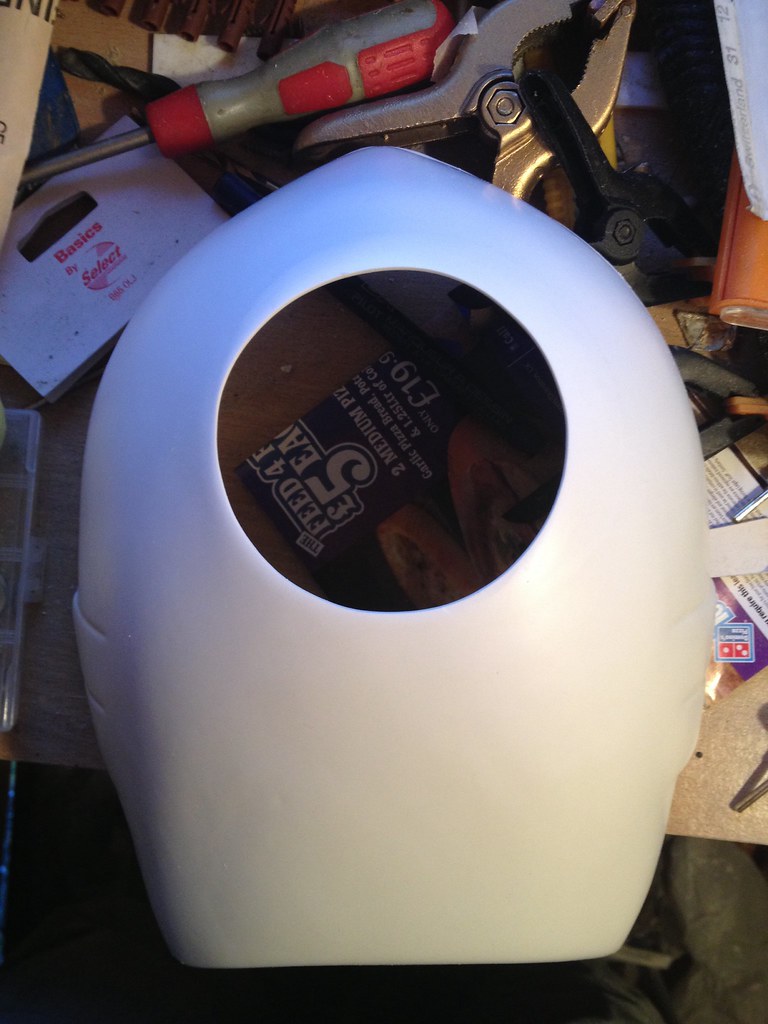
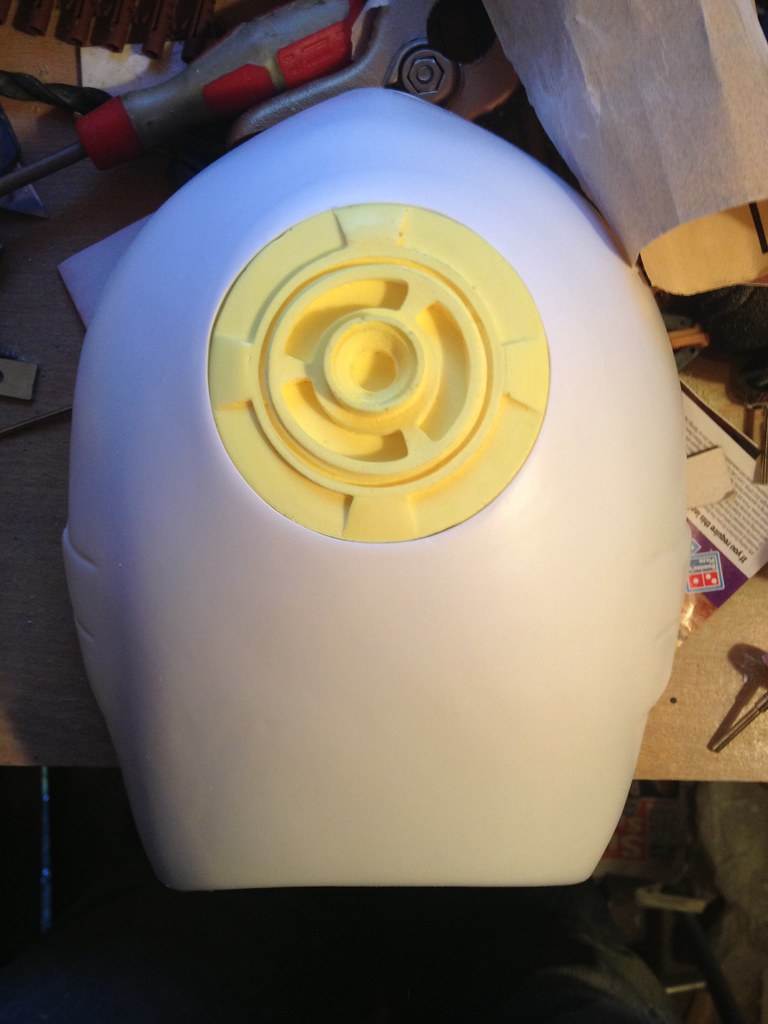
The first step i took was to cut the flat section out of the rear shell to the same size as the raised detail section of the rear 'plug' i then glued the detailed plug in to the hole and made sure it was the correct rotation.
I then glued the halo into the rear shell at the right depth, there was some extra plastic around the halo as the vac form was pulled with extra which was perfect to get it in the right place and flush against the halo.
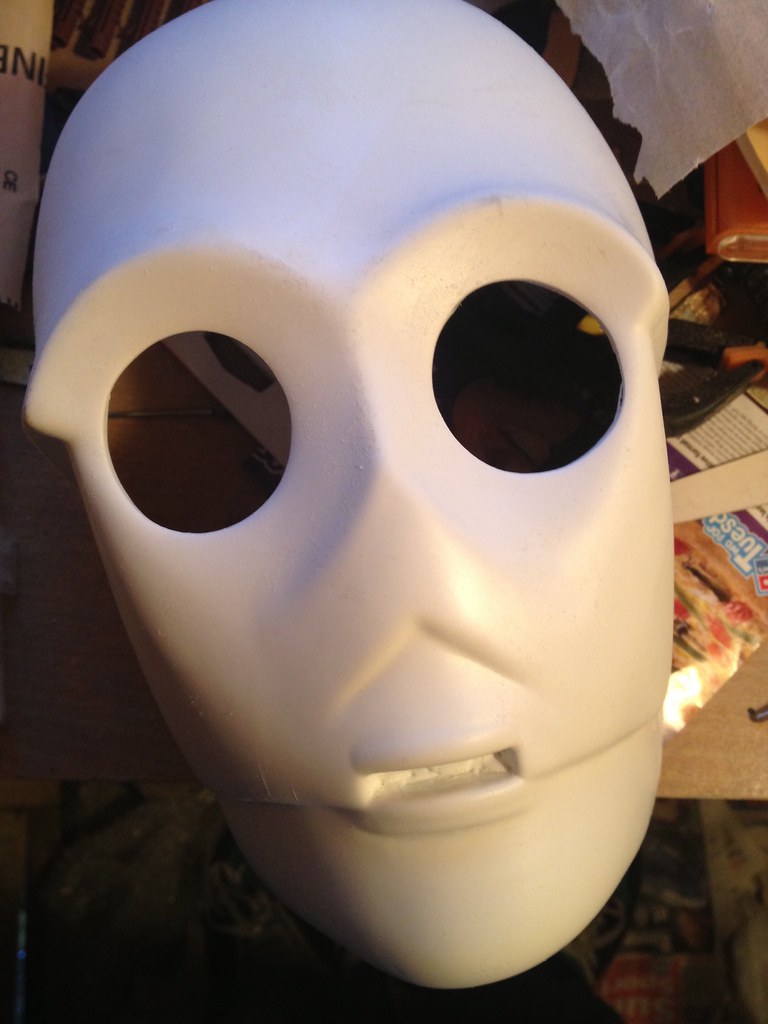
The eye holes were the next thing to be cut out.
I started by trimming them out to the line in the shell and test fitting the eyes the holes were slightly too small so i then began slowly sanding the edge of the hole until the eyes fit inside the shell.
I didn't glue them in place as this was just a test fit.
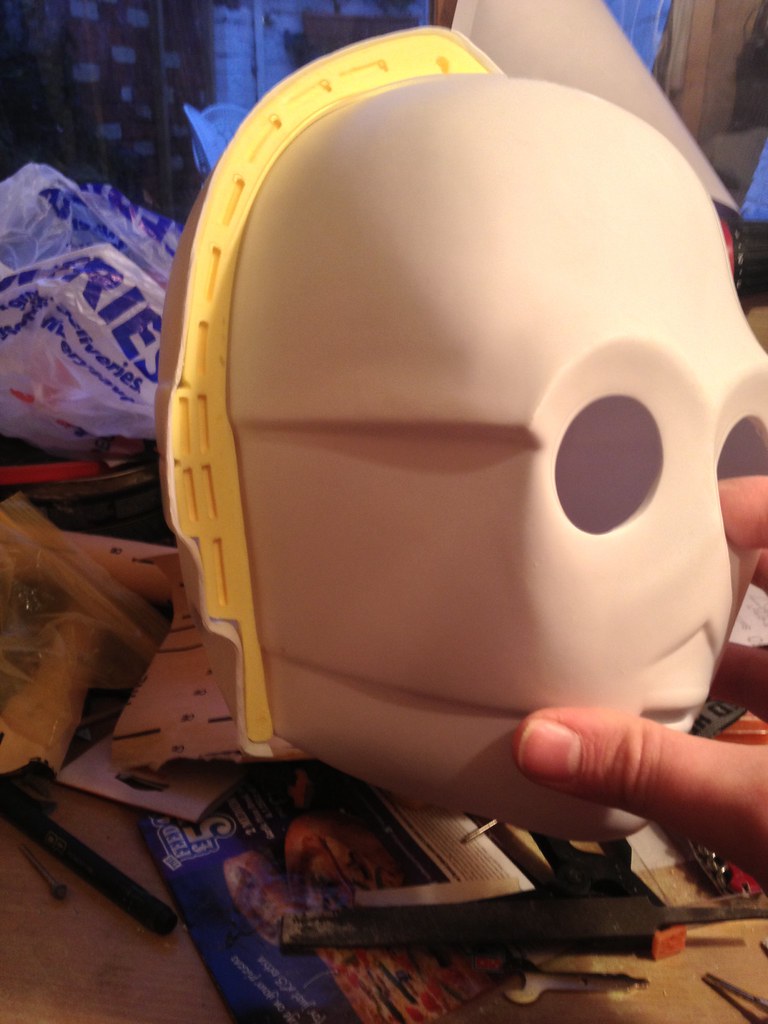
The front plastic shell has to fit inside the halo so the halo will have to be sanded and shaped to fit the shape of the front of the head.
This process is a slow one as i needed to do it bit by bit to make it flush.
In one place i went to far so i had to fill it and re-shape and get it to fit.
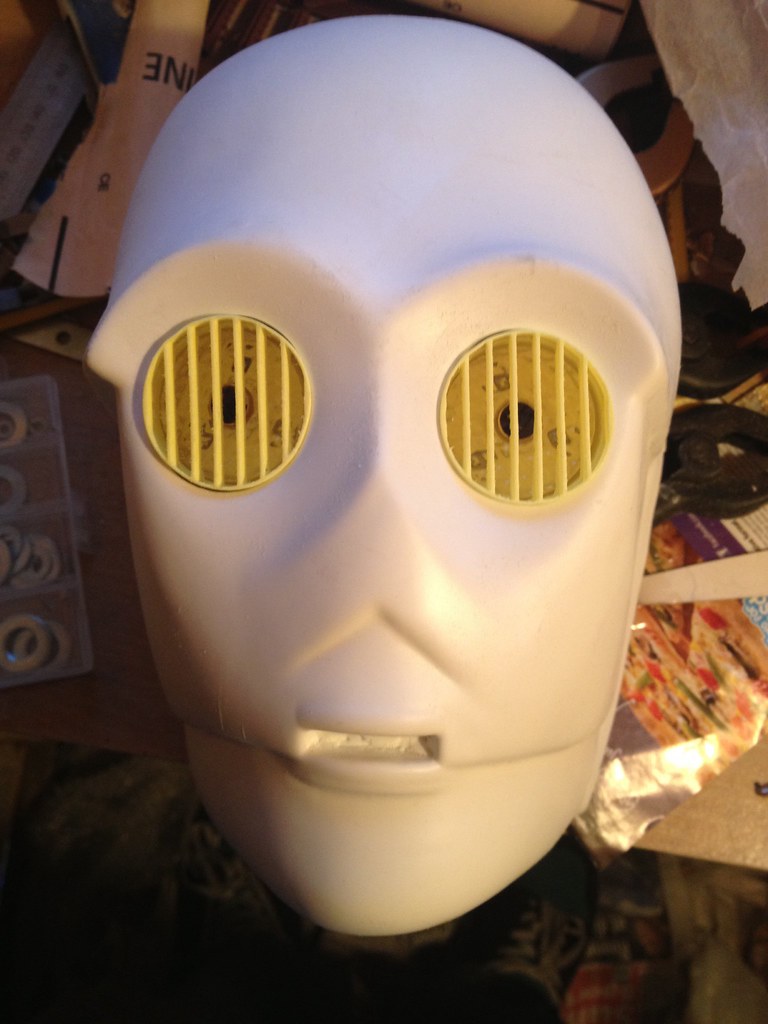
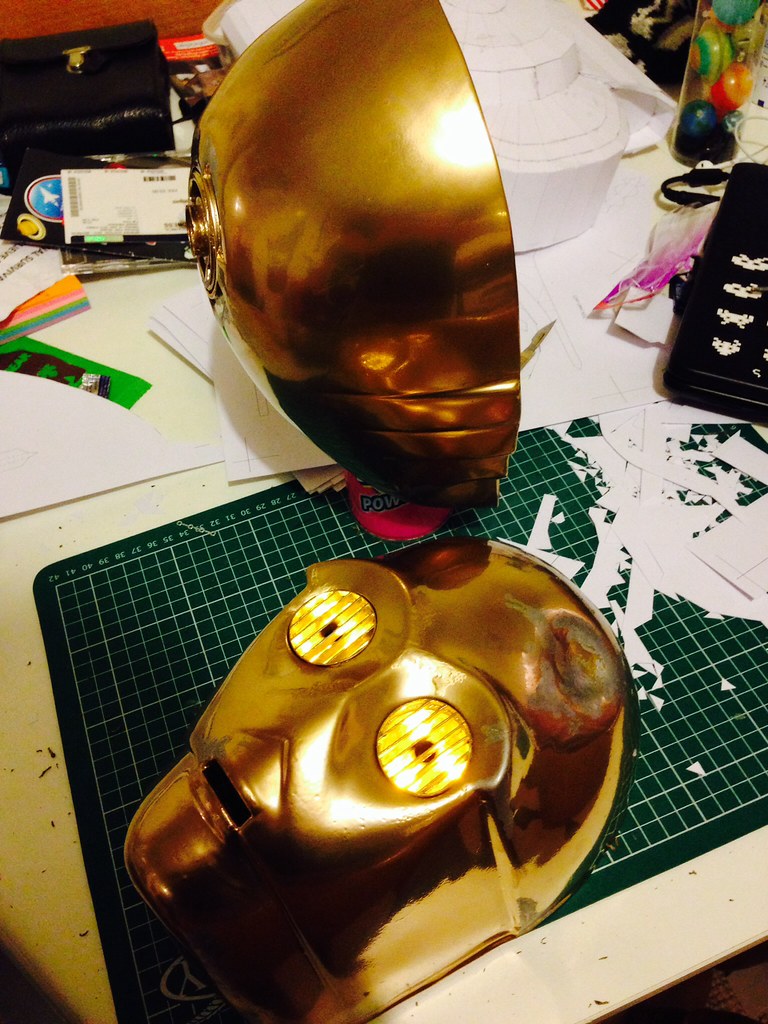
I did a little test of fitting all the parts together and i put a torch inside just for fun to see how his eyes might look lit up.
On the rear detailed section i filled the gap between the resin plug and the plastic shell and sanded it flush and gave it a coat of primer and then filled any gaps i missed the first time round.
I did the same for the gaps around the halo and the rear shell.
Test fit of the face after priming and sanding.
At this point i made the dent on his forehead. i did this by heating a small section of the front shell with a heat gun and then i pressed it in when it was pliable.
(i forgot to take a photo but you will see the result lower down.)
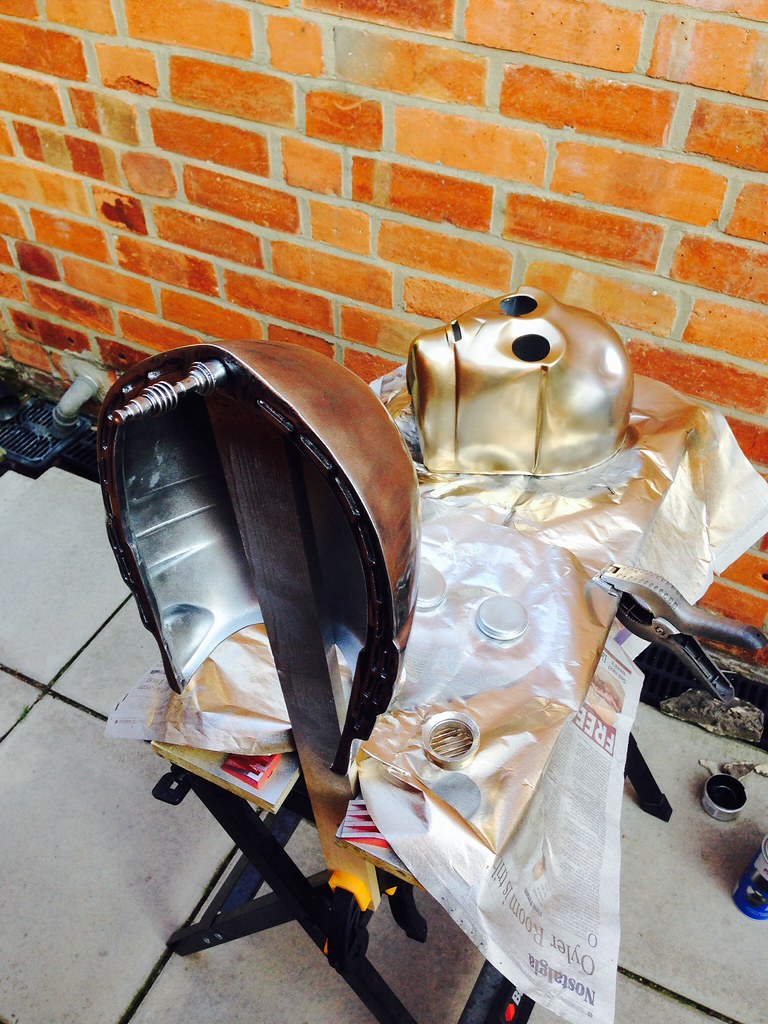
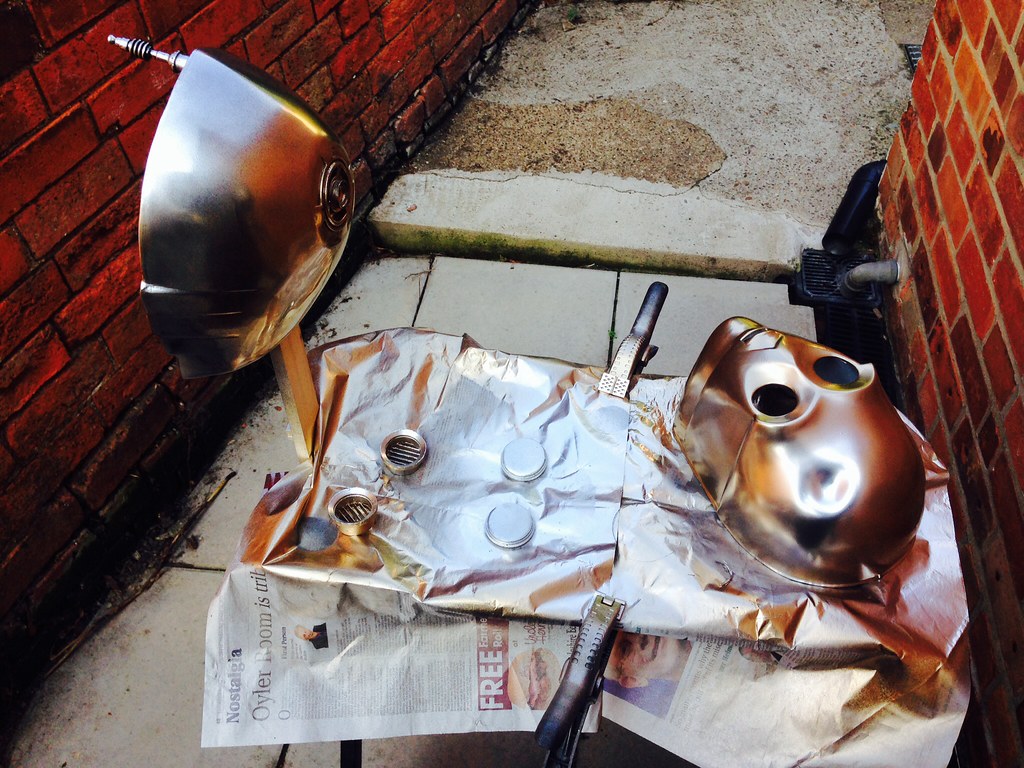
I painted the whole lot (everything that's going to be gold) with a base coat of black and then a layer of chrome silver from plasticoat. i sprayed the sliver on top of the black in phases i did a light coat of silver when the black was still wet, then once all that had dried i gave it a full coat of silver.
I let the all the paint dry full for a good few hours. (the chrome paint takes a long time to dry and it may feel/look dry but if you hold it for to long you will leave fingerprints in it.)
Using silicone i then dabbed it on places that i thought would be where the gold paint would have flaked off, high places, parts of him that would have been hit or scratched.
Then i gave everything a coat of gold plasicoat chromed gold. (which is a lot higher gloss than i thought. much much better. )
The bumpy sections on the eye brows and nose etc. are the sections that have the silicone under the gold. The silicone will be rubbed off when dry and reveal the silver underneath.
Here's what the paint looks like when the silicone is removed
Test fit, the silicone has not been removed from the front face yet.
The silicone on the front shell has been removed (first pic) eyes glued into place.(second pic)
Test video of the sound chip with all the sounds.
I got a sound chip from ebay. Its designed to be used in a greetings card or something like that.
you can connect it to your computer to load up what ever sound you want.
The version i have has five buttons so you can upload five different sounds.
This video was filmed before i did the final weathering of the head.
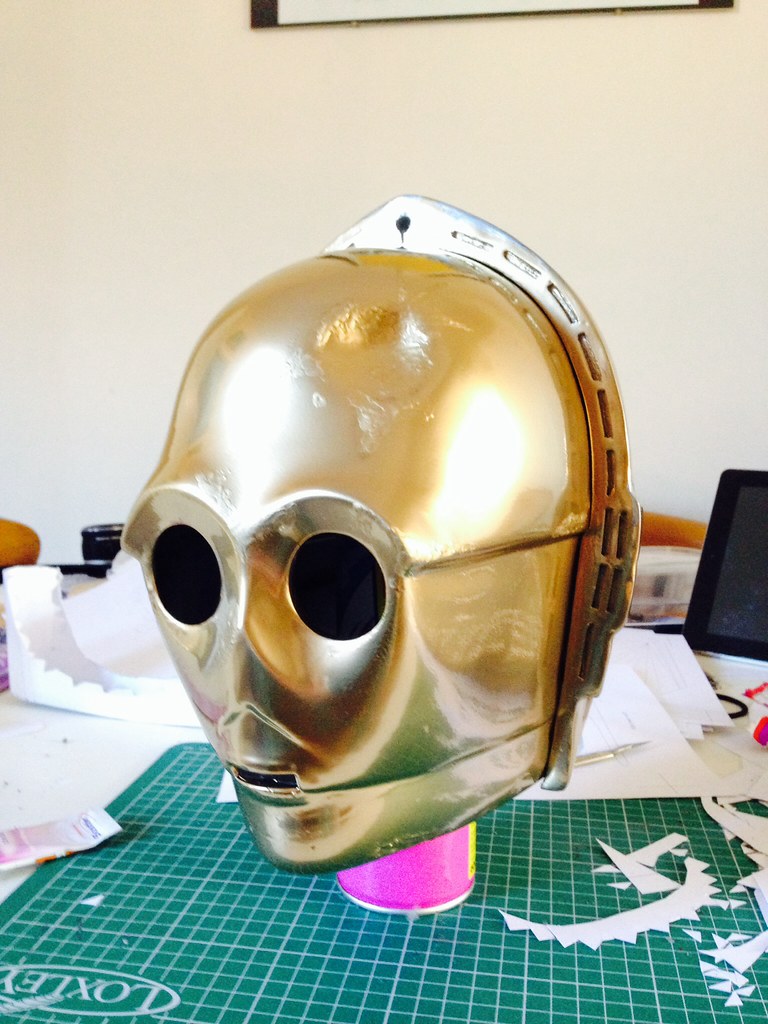
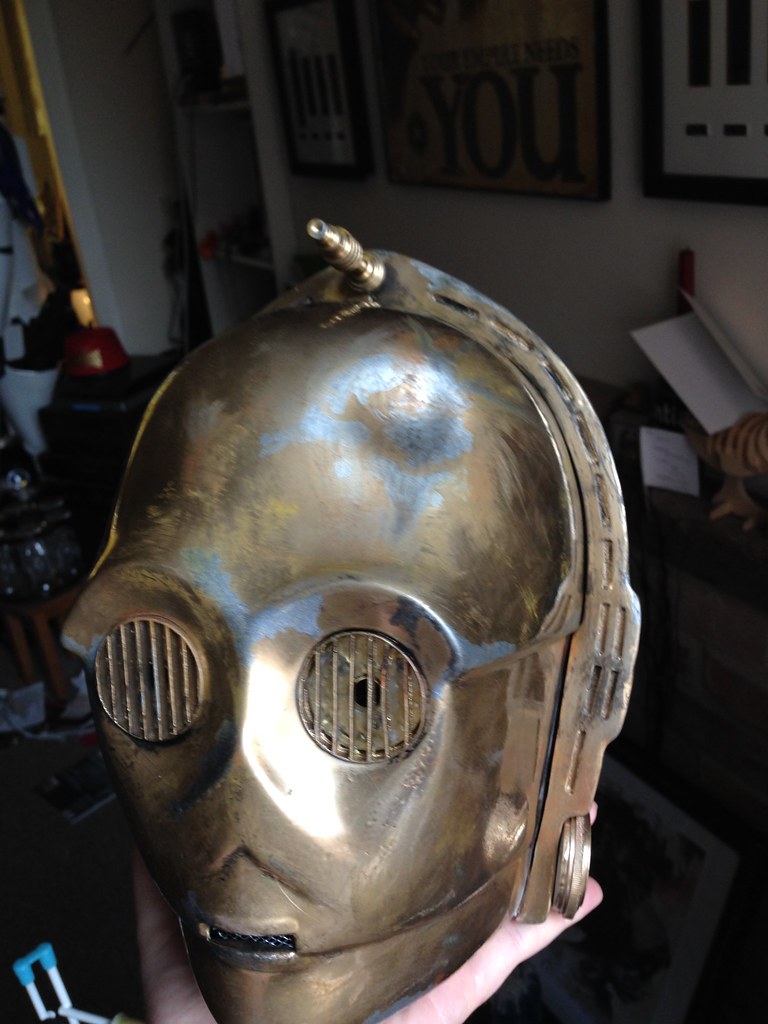
I weathered the whole head, the idea was the make it look like he has been through the wars, scarred up and like hes been blasted in the desert
i did the weathering with different techniques, i started with a very fine sand paper to dull down sections of the gold, mainly round the silver flaked sections and high points.
I also used plain printer paper to rub down sections as this dulls the paint down with out scratching or removing the paint like the sand paper does.
once i was happy with the paint dulling i started with colour washes, doing lots of light dry-brushes of different coloured yellows light browns and dark browns for dust rust and dirt.
once i dry-brushed and wiped off the excess paint over and over to build up loads of layers i did some a bit of black wash, i blacked the joins between the two halves and around the eyes and mouth and in the recesses in the halo to give it some depth and dimension.
I decided to give C3PO a little bit of oil mess on the rear plug on the back of his head.
All the cables coming out the back of the neck hole of C3PO are the buttons and switches for the lights and sounds.
I am going to leave them hanging out the neck as this is a decapitated C3PO so he would have cables and wires out of his neck.
I am planning on capping the neck and making a neck joint where all the wires will come out and then it will sit on a stand so you can access the buttons etc.
I hope you enjoyed my write up, or learned something.
If you have any questions or comments please feel free to leave a comment below.